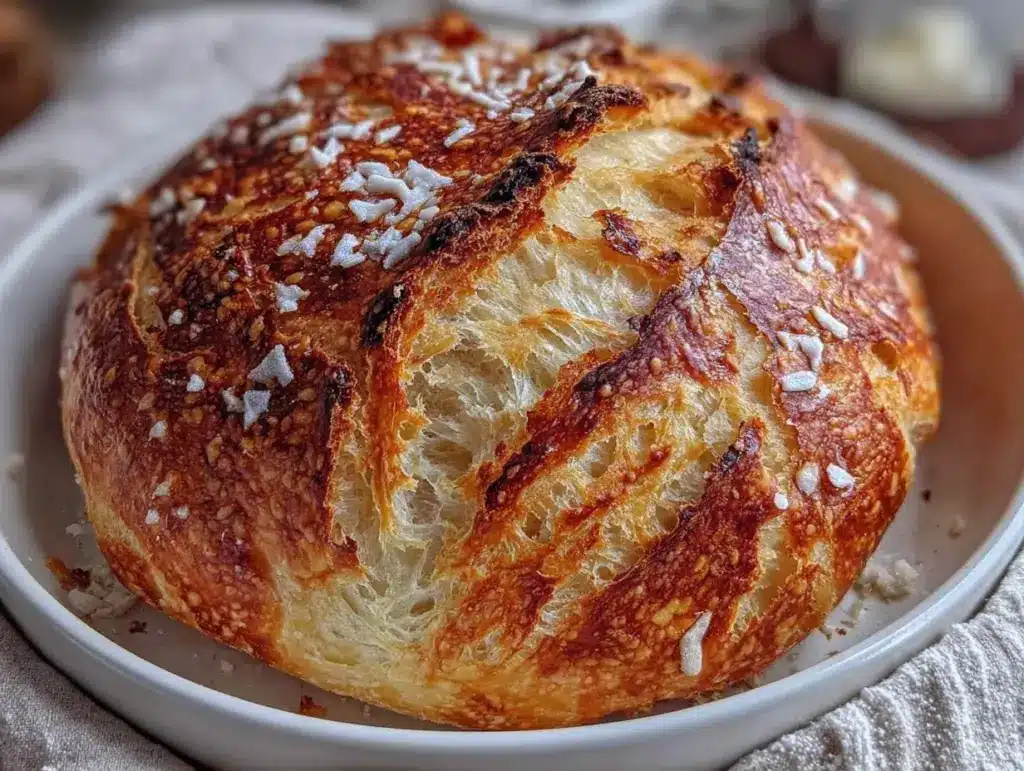
Let me just say—if you’re ever craving that golden, crackling crust and soft, cloud-like crumb you see in bakery windows, this crispy no knead Dutch oven bread is about to become your new obsession. The smell alone when this loaf hits the oven is like a deep, soulful hug; it fills every corner of the kitchen and has my kids poking their heads in, asking, “Is it ready yet?” The first time I made this bread, I was standing in my little galley kitchen, watching the dough bubble and rise overnight, and honestly, I couldn’t believe how easy it was. That moment when I lifted the lid and saw the loaf—craggy, rustic, and beautifully browned—was the kind of moment where you pause, take a deep breath, and just smile because you know you’re onto something truly special.
There’s a family story here, too. Years ago, when I was knee-high to a grasshopper, my grandma would bake bread that had a crust so noisy you could hear it from the next room. She always said, “A good loaf talks to you.” I tried for years to recreate that magic, and then one rainy weekend (really, the perfect bread-baking weather), I stumbled across a method that didn’t even ask for kneading. You know what? I wish I’d found this recipe sooner—it’s dangerously easy and brings pure, nostalgic comfort, just like grandma’s kitchen. My family couldn’t stop sneaking pieces off the cooling rack (honestly, I can’t blame them).
Whether you’re looking for something to brighten up your Pinterest board, a simple loaf for Sunday brunch, or want a centerpiece for holiday dinners, this crispy no knead Dutch oven bread fits the bill. It’s perfect for potlucks, gifting to neighbors, or just treating yourself. I’ve tested it more times than I care to admit—in the name of research, of course—and now it’s a staple for family gatherings and cozy weekends. This bread feels like a warm hug from someone who really knows you, and you’re going to want to bookmark this one. Trust me.
Why You’ll Love This Crispy No Knead Dutch Oven Bread Recipe
If you’re anything like me, you’ve tried your hand at homemade bread, sometimes with more enthusiasm than skill. This recipe changed everything for me—and I guarantee it’ll do the same for you. Here’s why it stands out from the crowd:
- Quick & Easy: You won’t need a stand mixer, hours of kneading, or fancy techniques. The dough comes together in 10 minutes, and the rest is hands-off magic. Perfect for busy weeknights or when you just want fresh bread without the fuss.
- Simple Ingredients: Flour, yeast, salt, and water—nothing complicated, nothing you can’t pronounce. You probably have everything already, which means bread can be on the table at a moment’s notice.
- Perfect for Any Occasion: Whether it’s brunch with friends, a rustic sandwich for lunch, or a cozy addition to soup night, this loaf is always a hit. I’ve even wrapped it up for holiday gifting, and let’s just say it never lasts long.
- Crowd-Pleaser: Kids love it for PB&J, adults rave about the crunchy crust and airy crumb. I’ve had more than one neighbor ask for this recipe after a single bite.
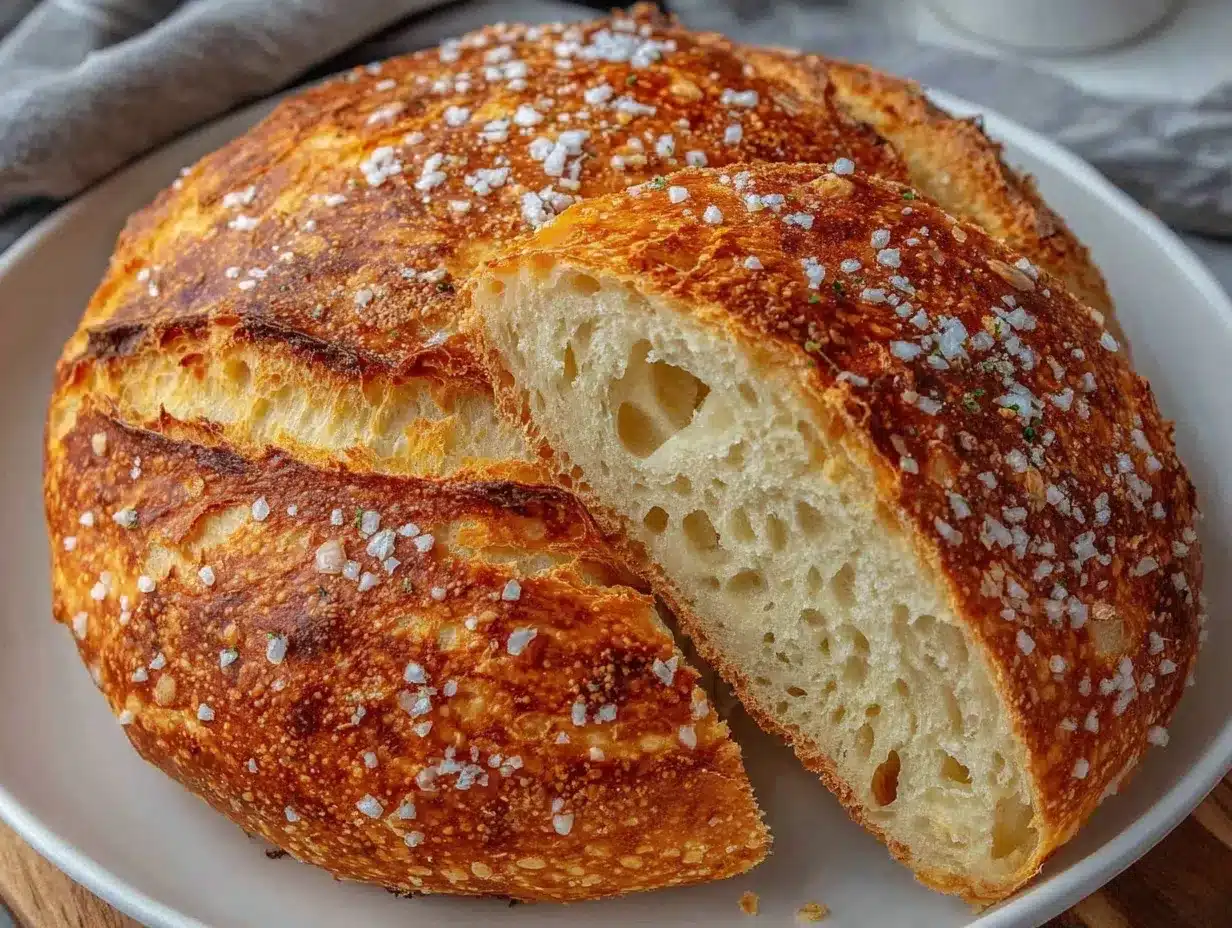
- Unbelievably Delicious: The combo of crispy crust and pillowy interior is pure comfort. Every bite is a little celebration—you know, the kind where you close your eyes and just sigh in happiness.
What makes this crispy no knead Dutch oven bread different? It’s the no knead method—letting time and moisture do the work. The dough develops flavor as it rests, with a rustic, open crumb that’s hard to get any other way. And the Dutch oven traps steam, creating a crust that shatters in your mouth. This isn’t just another homemade loaf—it’s the kind you’ll want to make again and again.
For me, this bread isn’t just good—it’s soul food. It’s simple, forgiving, and always impressive. Whether you’re new to bread baking or a seasoned pro, this recipe brings the bakery home with zero stress. Healthier, quicker, and just as comforting as the classics. If you love the idea of a bread that’s as easy as it is impressive, you’re in the right spot!
What Ingredients You Will Need
This crispy no knead Dutch oven bread relies on just a handful of simple, wholesome ingredients to deliver that bold flavor and rustic texture we all crave. You don’t need anything fancy—just pantry staples and a little patience!
- All-Purpose Flour (3 cups / 375g) – Go for unbleached if you can; King Arthur and Bob’s Red Mill are my go-tos for reliable results. This forms the backbone of your loaf, giving structure and that classic chewy bite.
- Salt (1 1/2 teaspoons / 8g) – It’s not just for flavor; salt strengthens the gluten and helps create that golden, crackly crust. I use fine sea salt, but kosher salt works too (just bump it up a smidge).
- Instant or Active Dry Yeast (1/2 teaspoon / 2g) – Both work, but instant yeast is a little more forgiving for overnight rises. Red Star has never let me down.
- Warm Water (1 1/2 cups / 355ml) – Aim for about 100°F (38°C), just warm to the touch. Too hot and you’ll risk killing the yeast; too cold and the rise will drag on.
If you want a little extra flavor or crunch, here are some add-ins:
- Seeds: Sprinkle in 2 tablespoons (20g) of sunflower or pumpkin seeds for bite.
- Herbs: Try 1 to 2 teaspoons of chopped fresh rosemary or thyme for a fragrant twist.
- Whole Wheat Flour: Substitute up to 1 cup (125g) for a nuttier, denser loaf. You may need a splash more water.
Substitution tips:
- Gluten-Free: Use a 1:1 gluten-free flour blend (Bob’s Red Mill makes a solid option), but expect a slightly less airy crumb.
- Low-Sodium: Reduce the salt to 1 teaspoon if you’re watching sodium, but don’t skip it entirely or the loaf will taste flat.
- Yeast-Free: Sorry, this method really needs yeast for that classic rise and texture—no shortcuts here!
In summer, swap in fresh chopped chives or parsley for brightness. In winter, I love tossing in dried cranberries and walnuts for a festive twist. This recipe is flexible, forgiving, and open to whatever you have on hand. Just don’t skip the salt or yeast—they’re the real heroes here!
Equipment Needed
You don’t need a fancy kitchen to whip up this crispy no knead Dutch oven bread, but a few trusty tools will make the process smooth and stress-free. Here’s what I keep close every time I bake:
- Large Mixing Bowl: For stirring and rising the dough. Glass or ceramic works best (less sticking than metal, in my experience).
- Sturdy Spoon or Dough Scraper: You’ll only need to mix a few times, but a rubber spatula makes cleanup a breeze.
- Kitchen Scale (optional): For precise measurements. If you’re serious about bread, it’s worth the investment—I got mine for under $20.
- Plastic Wrap or Damp Towel: Covers the bowl during the long rise, keeping dough from drying out.
- Parchment Paper: Makes transferring dough to the Dutch oven easy and prevents sticking (I’ve had a few stuck loaves—parchment is a lifesaver).
- Dutch Oven (5–6 quart): The star of the show! Cast iron is classic (Lodge and Le Creuset are my favorites), but any oven-safe pot with a lid works. If you don’t have one, try a heavy oven-safe pot and cover tightly with foil.
- Oven Mitts: Trust me, that Dutch oven gets HOT. I learned the hard way—use thick mitts.
If you’re just starting out, don’t worry. I baked my first loaf in a thrifted Dutch oven and a chipped mixing bowl. As long as your pot can handle high heat (450°F / 230°C), you’re good to go. Keep your tools clean and dry after baking—you’ll be reaching for them again soon!
Preparation Method
Let’s break it down step-by-step so your crispy no knead Dutch oven bread comes out bakery-perfect every time. No kneading, no stress—just honest, good bread.
-
Mix the Dough:
In a large bowl, combine 3 cups (375g) all-purpose flour, 1 1/2 teaspoons (8g) salt, and 1/2 teaspoon (2g) instant yeast. Stir with a sturdy spoon until evenly mixed.
Pour in 1 1/2 cups (355ml) warm water (around 100°F / 38°C). Mix until you get a shaggy, sticky dough—don’t worry if it looks rough!
Tip: If adding seeds or herbs, fold them in now for even distribution. -
First Rise (Overnight):
Cover the bowl tightly with plastic wrap or a damp towel. Let it rest at room temperature (about 68–72°F / 20–22°C) for 12–18 hours. The dough should double in size and be dotted with bubbles.
Troubleshooting: If your kitchen is chilly, give it extra time; if too warm, check at 10 hours. -
Shape the Dough:
Dust a sheet of parchment paper with flour. Scrape the dough onto it, sprinkle a little flour on top, and gently fold the edges toward the center to form a rough ball.
Tip: Don’t overwork—just a few folds for shape.
Cover loosely with a towel and let rest for 30–60 minutes while you preheat the oven. -
Preheat the Dutch Oven:
Place your Dutch oven (with lid) in the oven and set to 450°F (230°C). Heat for at least 30 minutes.
Warning: The pot will be blazing hot—handle with care! -
Transfer & Score:
Carefully remove the hot Dutch oven. Lift the dough (on parchment) and set it inside. If you like, use a sharp knife to score the top—about 1/4-inch deep—to encourage that rustic bloom.
Tip: Scoring isn’t required, but makes for gorgeous, Instagram-worthy bread. -
Bake (Covered):
Cover with the lid and bake for 30 minutes. Steam trapped inside will help develop the crust. -
Bake (Uncovered):
Remove the lid and continue baking for 15–20 minutes, until the crust is deep golden and crackly.
Sensory cue: The loaf should sound hollow when tapped. -
Cool & Slice:
Use oven mitts to lift the bread (with parchment) onto a wire rack. Let it cool for at least 1 hour before slicing—trust me, it’s worth the wait for that perfect crumb!
Troubleshooting: If the loaf seems pale, add 5 minutes to the uncovered bake.
Personal tip: I set a timer, but always peek at the 40-minute mark. Every oven is different, and the best bread is the one that fits your home! The crust should sing when you break it—if it’s quiet, let it bake a few minutes longer. And don’t panic if your loaf looks rustic or imperfect; that’s the charm.
Cooking Tips & Techniques
Baking this crispy no knead Dutch oven bread is part science, part magic—but I’ve learned a few tricks along the way that make all the difference.
- Hydration is Key: Don’t worry if your dough seems sticky or wet. That’s what gives you those big, airy holes in the crumb. Resist adding extra flour—it’ll firm up as it rises.
- Let the Dough Rest: Longer rises build flavor and develop gluten naturally. If you’re short on time, a minimum of 8 hours will do, but overnight is best for that rustic taste.
- Preheating Matters: Getting the Dutch oven blazing hot is crucial for a crispy crust. If you skip this step, the loaf may stick or turn out pale. Learned that the hard way—trust me!
- Scoring Adds Style: A quick slash with a sharp knife or lame helps the bread “spring” in the oven. No fancy patterns required—a simple cross or single line works wonders.
- Don’t Rush Cooling: Slicing too soon can make the crumb gummy. I used to cut right in (couldn’t help myself), but waiting just an hour gives you that light, open texture.
- Multitasking: While the dough rises, prep soup or roast veggies—you’ll have the perfect meal ready when the bread is done.
- Consistency: Use a kitchen scale for flour and water if you want repeatable results. It was a game-changer for me (less guesswork, better loaves).
Common mistakes? Adding too much flour, under-baking, or skipping the preheated Dutch oven. Don’t worry about perfection—every loaf tells a story. I’ve made flat, pale loaves and still devoured them. With practice, you’ll get your signature crusty loaf every time!
Variations & Adaptations
This crispy no knead Dutch oven bread recipe is wonderfully adaptable, so don’t be afraid to make it your own. Here are some of my favorite ways to switch things up:
- Whole Wheat Variation: Swap 1 cup (125g) of all-purpose flour with whole wheat flour for a nuttier flavor and a heartier crumb. Add an extra tablespoon of water to keep the dough soft.
- Cheese & Herb Loaf: Fold in 1/2 cup (60g) shredded sharp cheddar and 2 teaspoons chopped fresh rosemary before the first rise. It’s amazing with soup or as a savory snack.
- Seeded Multigrain: Add 2 tablespoons each of sunflower seeds, sesame seeds, and flaxseed for extra crunch and nutrition. Sprinkle a few on top before baking for a bakery look.
Dietary tweaks:
- Gluten-Free: Use a reputable gluten-free all-purpose blend (like Bob’s Red Mill 1:1). Expect a slightly more dense loaf, but the crust still turns out lovely.
- Low-Sodium: Halve the salt for a lighter touch—just don’t skip it entirely.
- Dairy-Free: All ingredients here are naturally dairy-free. If you add cheese, swap in vegan options.
Cooking methods:
- No Dutch Oven? Bake in a covered oven-safe pot, or create a steam oven by placing a tray of water on a lower rack. It won’t be identical, but you’ll still get a crispy crust.
Personal favorite? Cranberry walnut bread in winter—just add 1/2 cup dried cranberries and 1/4 cup chopped walnuts. Each bite feels festive! Honestly, don’t be afraid to experiment. This recipe is forgiving, and sometimes the “mistakes” are the most delicious surprises.
Serving & Storage Suggestions
There’s nothing quite like the sound of this crispy no knead Dutch oven bread cracking as you slice through the crust. Here’s how I love to serve it and keep it fresh:
- Serving: Slice the loaf while it’s still slightly warm for that perfect, steamy crumb. It’s magic with a pat of salted butter, a drizzle of honey, or dunked in hot soup. For brunch, serve with soft scrambled eggs and ripe tomatoes—it’s a meal fit for royalty.
- Presentation: I love to set out the whole loaf on a wooden board, sprinkle with a touch of flaky sea salt, and let everyone tear off their own piece. It looks gorgeous and feels rustic (very Pinterest-worthy!).
- Storage: Once cooled, wrap the bread in a clean kitchen towel and keep at room temperature for up to 2 days. For longer storage, slice and freeze in a zip-top bag for up to a month. Pull out slices as needed and reheat in the toaster or oven.
- Reheating: To restore that crispy crust, pop a slice in a 375°F (190°C) oven for 5–7 minutes. The flavors actually deepen overnight, so day-old bread is perfect for toast or grilled cheese.
Tip: Avoid plastic wrap for storage—it softens the crust. Trust me, a cloth towel keeps it fresh and crunchy. And honestly, this loaf never lasts long at my house anyway!
Nutritional Information & Benefits
This crispy no knead Dutch oven bread is as wholesome as it gets. Here’s the scoop on what you’re eating (per slice, based on 12 slices):
- Calories: 110
- Carbs: 22g
- Protein: 3g
- Fat: 0g
- Sodium: 220mg
Health benefits? All-purpose flour provides energy, and if you add seeds or whole wheat, you bump up fiber and minerals. This loaf is naturally vegan, dairy-free, and can be adapted for gluten-free diets. The bread is low in fat, making it a lighter option than many store-bought loaves.
Allergens to note: Contains wheat (gluten). For gluten-free, use the suggested flour blend. I love that this bread fits into most diets and honestly, it feels good to know exactly what’s going into your family’s food. Bread can be nourishing and comforting—it’s all about balance!
Conclusion
So, why should you try this crispy no knead Dutch oven bread? It’s easy, reliable, and delivers that perfect bakery-quality loaf right in your own kitchen. You can customize it with your favorite add-ins, serve it for any occasion, and feel like a bread-baking superstar—even if it’s your first time. For me, it’s the pure joy of hearing the crust crackle and sharing slices with people I love.
I encourage you to play with flavors, swap in seeds or herbs, and make this loaf your own. If you try it, let me know in the comments—what did you add, how did it turn out, and what would you do differently next time? Share your photos, pin it for later, or pass it on to a friend who needs a little bread magic.
This recipe is a staple in my kitchen, and I hope it becomes one in yours too. Happy baking—and remember, the best bread is made with patience and love!
Frequently Asked Questions
Can I use whole wheat flour for this crispy no knead Dutch oven bread recipe?
Yes! You can substitute up to 1 cup (125g) of the all-purpose flour with whole wheat flour. Add an extra tablespoon of water to keep the dough soft, and expect a slightly denser crumb.
Do I need a Dutch oven, or can I use something else?
A Dutch oven works best for that crispy crust, but you can use any heavy, oven-safe pot with a lid. If you don’t have one, cover a sturdy pot tightly with foil and bake as directed.
How do I know when the bread is fully baked?
The crust should be deep golden and sound hollow when tapped. If unsure, bake uncovered for an extra 5 minutes. Let the loaf cool for at least one hour before slicing for best texture.
Can I let the dough rise for less than 12 hours?
If you’re short on time, 8 hours will work in a warm kitchen, but overnight gives the best flavor and airy crumb. Don’t rush the rise—it’s worth the wait!
How should I store leftover Dutch oven bread?
Wrap cooled bread in a clean kitchen towel and keep at room temperature for up to 2 days. For longer storage, slice and freeze in a zip-top bag. Reheat in the oven to restore crispiness.
Pin This Recipe!
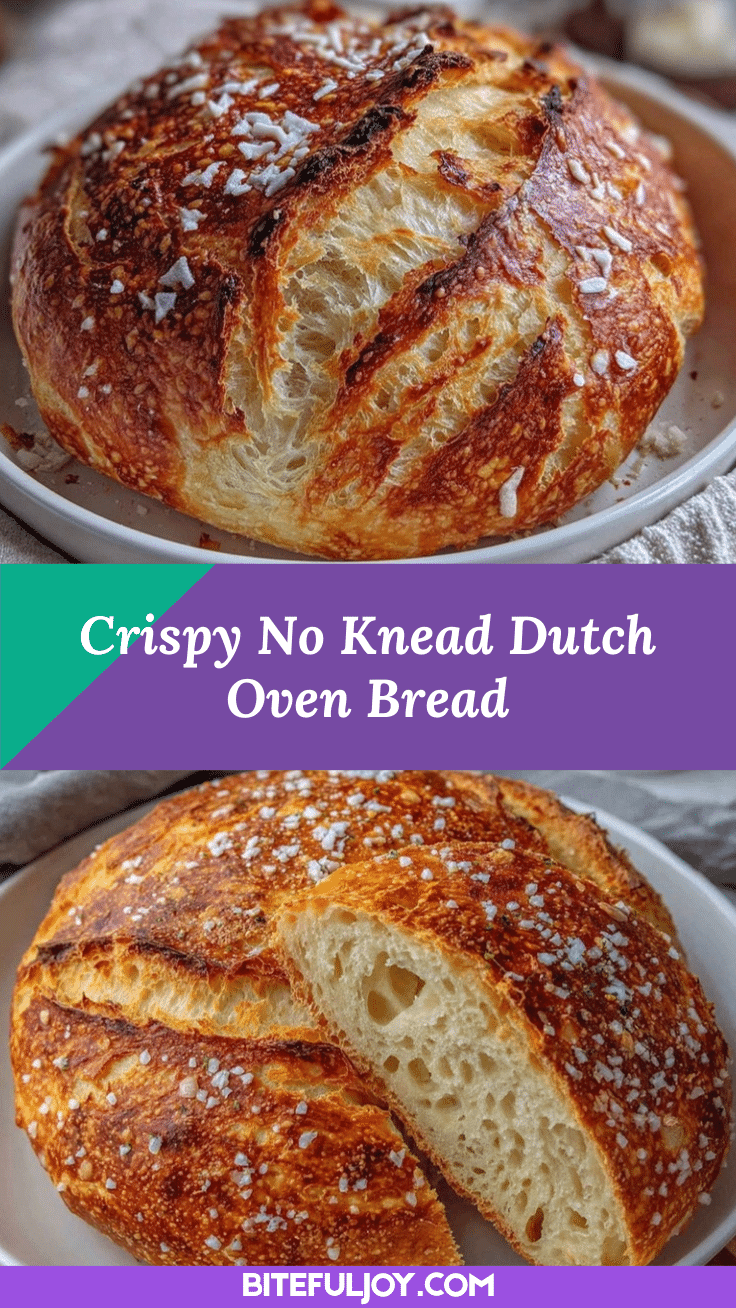
Crispy No Knead Dutch Oven Bread

This easy rustic loaf delivers a golden, crackling crust and soft, airy crumb with minimal effort—no kneading required. Perfect for family gatherings, brunch, or cozy weekends, it brings bakery-quality bread to your home kitchen.
- Prep Time: 15 minutes
- Cook Time: 45 minutes
- Total Time: 13 hours (including overnight rise)
- Yield: 1 loaf (about 12 slices) 1x
- Category: Bread
- Cuisine: American, Rustic
Ingredients
- 3 cups (375g) all-purpose flour (unbleached preferred)
- 1 1/2 teaspoons (8g) fine sea salt or kosher salt
- 1/2 teaspoon (2g) instant or active dry yeast
- 1 1/2 cups (355ml) warm water (about 100°F)
- Optional: 2 tablespoons sunflower or pumpkin seeds
- Optional: 1-2 teaspoons chopped fresh rosemary or thyme
- Optional: Substitute up to 1 cup whole wheat flour for all-purpose flour (add 1 tablespoon extra water if using)
Instructions
- In a large bowl, combine flour, salt, and yeast. Stir until evenly mixed.
- Pour in warm water and mix until a shaggy, sticky dough forms. Fold in seeds or herbs if using.
- Cover bowl tightly with plastic wrap or a damp towel. Let rest at room temperature for 12–18 hours until doubled and bubbly.
- Dust parchment paper with flour. Scrape dough onto it, sprinkle flour on top, and gently fold edges toward center to form a rough ball. Cover loosely and let rest for 30–60 minutes.
- Place Dutch oven (with lid) in oven and preheat to 450°F for at least 30 minutes.
- Carefully remove hot Dutch oven. Lift dough (on parchment) and set inside. Score top with a sharp knife if desired.
- Cover and bake for 30 minutes.
- Remove lid and bake uncovered for 15–20 minutes until crust is deep golden and crackly. Loaf should sound hollow when tapped.
- Lift bread (with parchment) onto wire rack. Cool for at least 1 hour before slicing.
Notes
For best results, use a kitchen scale for precise measurements. Longer rises build flavor and texture; overnight is ideal. Preheating the Dutch oven is crucial for a crispy crust. Add-ins like seeds, herbs, or whole wheat flour are flexible—just adjust water as needed. Let bread cool fully before slicing for best crumb. Store wrapped in a towel at room temperature for up to 2 days, or freeze slices for longer storage.
Nutrition
- Serving Size: 1 slice (1/12 of loa
- Calories: 110
- Sodium: 220
- Carbohydrates: 22
- Fiber: 1
- Protein: 3
Keywords: no knead bread, Dutch oven bread, rustic loaf, easy bread recipe, homemade bread, artisan bread, bakery bread, vegan bread, dairy-free bread, crusty bread


