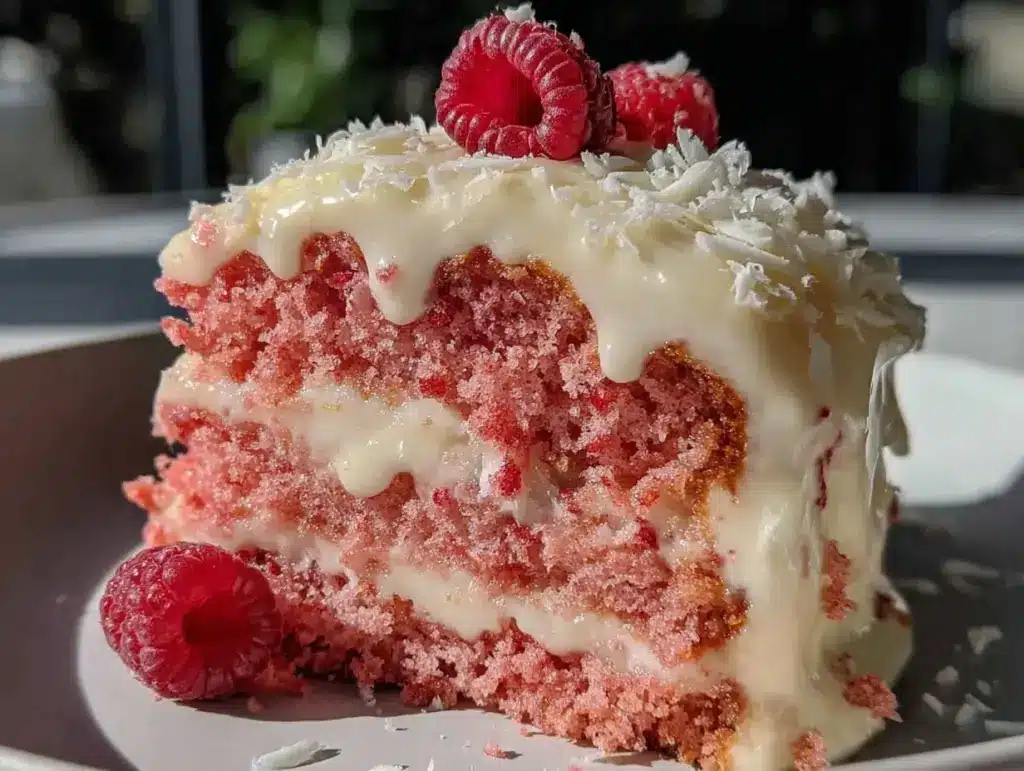
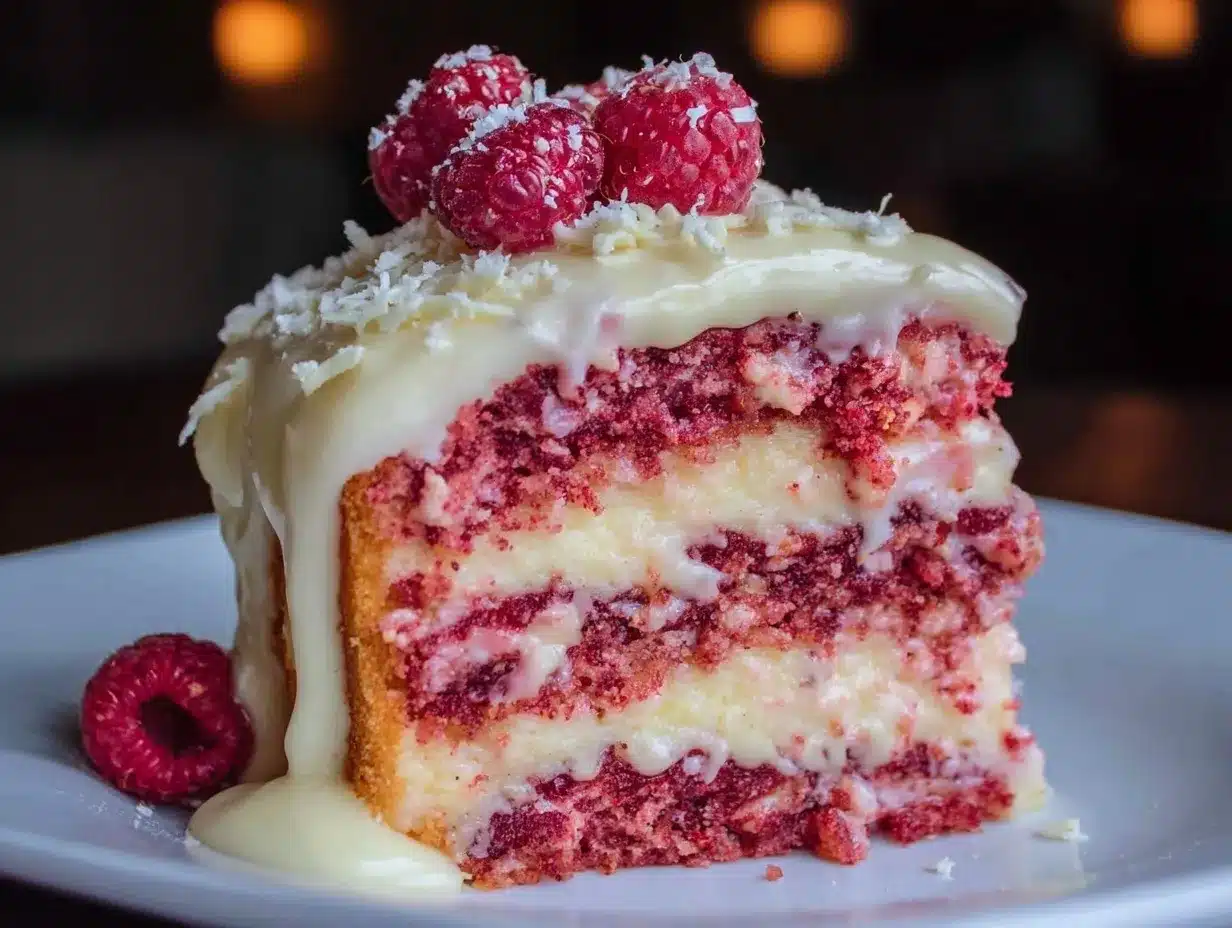
Let me just say, the sight of this pink velvet cake, with its dreamy, pastel layers and luscious white chocolate ganache dripping down the sides, is enough to stop anyone in their tracks. The sweet aroma of vanilla and butter curling through my kitchen, the first time I baked this—honestly, it felt like walking into a fairy tale bakery. The cake itself is soft and tender, with that signature velvet crumb, and the ganache is pure silk—creamy, rich, and just the right amount of sweet.
The first time I sliced into this cake was a bit magical, you know? I’d spent the afternoon mixing, folding, and (okay, let’s be real) sneaking more than a few tastes of batter. When the knife slid through those pink layers and the white chocolate ganache oozed gently, it was one of those moments where you pause, take a deep breath, and just smile because you know you’re onto something truly special. It reminded me of my grandma’s kitchen, when I was knee-high to a grasshopper and everything seemed bigger, brighter, and more delicious.
I stumbled onto this pink velvet cake recipe during a rainy weekend, trying to recreate a bakery treat I had at a friend’s baby shower. I wish I’d known about it years ago—it’s now the star of every birthday and holiday in our house. My family couldn’t stop sneaking slices off the cooling rack (and I can’t really blame them). Even my skeptical brother asked for seconds—now that’s saying something!
Honestly, this cake is dangerously easy. The color alone makes it perfect for Pinterest, and it’s a sweet treat that’ll brighten up any dessert table or kids’ party. Whether you’re celebrating, gifting, or just craving something special, this pink velvet cake with white chocolate ganache layers is pure, nostalgic comfort. I’ve tested it more times than I’d like to admit—in the name of research, of course—and it’s become a staple for family gatherings and gifting. It feels like a warm hug and a celebration in every bite. Trust me, you’re going to want to bookmark this one!
Why You’ll Love This Pink Velvet Cake Recipe
When it comes to cake, I’ve baked my way through countless recipes—some too dry, some too sweet, but this pink velvet cake? It’s the one I keep coming back to. Here’s why you’ll fall head over heels for it (just like I did):
- Quick & Easy: Comes together in under an hour (seriously!). No fancy steps, just straight-forward mixing and baking. Perfect for busy weeknights or last-minute celebrations.
- Simple Ingredients: You probably have most of these in your kitchen already. No wild grocery runs, just everyday staples like flour, sugar, butter, and eggs.
- Perfect for Parties: This cake is a showstopper for birthdays, baby showers, or any gathering where you want a little wow-factor. Pinterest boards are made for cakes like this!
- Crowd-Pleaser: Kids love the playful color, adults swoon over the velvety crumb and rich ganache. I have yet to find someone who doesn’t sneak an extra slice.
- Unbelievably Delicious: The combination of soft, moist cake and silky white chocolate ganache is pure comfort food—next-level texture and flavor.
What sets this pink velvet cake apart? For starters, the cake uses a touch of buttermilk and apple cider vinegar—a little baking secret I picked up from my chef friend—to guarantee that signature velvet texture. And the white chocolate ganache isn’t just an afterthought; it’s made with real cream and high-quality chocolate for extra richness.
This isn’t just another pink cake—it’s my best version. The color is vibrant without being overwhelming, and the flavor is perfectly balanced (not too sweet, not too bland). It’s the kind of cake that makes you close your eyes after the first bite—comfort food, but with a playful twist.
If you want to impress guests without breaking a sweat, or just turn a simple afternoon into something memorable, this pink velvet cake recipe is your ticket. It’s been family-approved, friend-tested, and Pinterest-validated—what’s not to love?
What Ingredients You Will Need for Pink Velvet Cake
This recipe uses simple, wholesome ingredients to deliver bold flavor and that signature velvet crumb—no fuss, no fancy shopping required. Most are pantry staples, and a few can be easily swapped to suit your taste or dietary needs.
- For the Cake:
- 2 1/2 cups (310g) all-purpose flour (I like King Arthur for consistent results)
- 1 1/2 cups (300g) granulated sugar (adds just the right amount of sweetness)
- 1 cup (226g) unsalted butter, softened (room temperature is key for blending)
- 3 large eggs, room temperature (for a richer crumb)
- 1 cup (240ml) buttermilk (don’t skip—this is what makes the cake tender)
- 1 tbsp (15ml) apple cider vinegar (helps the color pop and tenderizes)
- 2 tsp (8g) baking powder
- 1/2 tsp (2g) baking soda
- 1/2 tsp (3g) fine salt (balances sweetness)
- 2 tsp (10ml) pure vanilla extract (for flavor depth)
- 1/2 tsp (2ml) almond extract (optional, but gives a lovely undertone)
- 2-3 drops pink gel food coloring (I use Wilton or Americolor—liquid coloring can dilute the batter)
- For the White Chocolate Ganache:
- 12 oz (340g) high-quality white chocolate, chopped (Ghirardelli or Lindt works great)
- 1 cup (240ml) heavy cream (don’t use half-and-half—it won’t set properly)
- 1/4 tsp (1g) fine salt (makes the chocolate flavor pop)
- Optional Decoration:
- Pink sprinkles or edible glitter
- Fresh raspberries or strawberries (beautiful for topping and adds a little tartness)
- White chocolate shavings
Ingredient selection tip: Always use full-fat buttermilk for the richest flavor. If you don’t have buttermilk, mix 1 cup milk with 1 tbsp lemon juice—let it sit for 5 minutes. For a gluten-free version, swap in Bob’s Red Mill 1-for-1 gluten-free flour. Dairy-free? Use plant-based butter and coconut cream for the ganache.
Seasonal ideas: In summer, top with fresh berries or swap the pink coloring for a peachy hue. For winter, add a bit of peppermint extract to the ganache for a festive twist.
If you’re missing ingredients, don’t worry—this pink velvet cake recipe is forgiving. Substitutions work surprisingly well!
Equipment Needed
- Two 8-inch (20cm) round cake pans (non-stick is best; you can use 9-inch pans for thinner layers)
- Electric mixer or stand mixer (hand mixing works, but an electric mixer gives fluffier results)
- Mixing bowls (at least two—one for wet, one for dry ingredients)
- Measuring cups and spoons
- Rubber spatula (for scraping the bowl clean)
- Cooling rack (prevents soggy bottoms)
- Offset spatula or butter knife (for spreading ganache)
- Small saucepan (for heating cream)
- Whisk (for blending ganache until smooth)
You don’t need fancy bakery tools—a simple hand mixer and sturdy pans are all I’ve ever used. If you only have one pan, bake in batches (just don’t rush the cooling step). For maintenance, always line pans with parchment and lightly grease them; trust me, it saves headaches later.
If you’re on a budget, skip the offset spatula and use a butter knife—it works just fine! My grandma’s cake pans have seen decades of cakes, and a little TLC (no dishwasher!) keeps them in top shape.
Preparation Method
- Preheat & Prep: Preheat your oven to 350°F (175°C). Grease and line two 8-inch (20cm) round cake pans with parchment paper (don’t skip lining—makes for easy removal!).
- Mix Dry Ingredients: In a medium bowl, whisk together 2 1/2 cups (310g) flour, 2 tsp (8g) baking powder, 1/2 tsp (2g) baking soda, and 1/2 tsp (3g) salt. Set aside. (If your flour is lumpy, sift it for a finer crumb.)
- Cream Butter & Sugar: In a large bowl, beat 1 cup (226g) softened butter and 1 1/2 cups (300g) sugar with an electric mixer on medium speed for 3-4 minutes, until light and fluffy. It should look pale and airy.
- Add Eggs & Extracts: Beat in 3 eggs, one at a time, mixing well after each. Stir in 2 tsp (10ml) vanilla extract and 1/2 tsp (2ml) almond extract, if using. Scrape down the bowl, so nothing hides at the bottom.
- Color & Vinegar: Add 2-3 drops pink gel food coloring and 1 tbsp (15ml) apple cider vinegar. Mix until the color is evenly distributed. (Start with less color—you can always add more for vibrancy.)
- Alternate Dry & Wet: With mixer on low, add dry ingredients in three parts, alternating with 1 cup (240ml) buttermilk. Begin and end with dry ingredients. Mix just until combined—overmixing can make the cake dense.
- Bake: Divide batter evenly between pans. Smooth tops with a spatula. Bake for 25-30 minutes, or until a toothpick inserted in the center comes out clean and cakes spring back lightly. (If using 9-inch pans, check at 22 minutes.)
- Cool: Let cakes cool in the pans for 10 minutes, then turn onto a cooling rack. Don’t rush—fully cooled cakes make for neater layering!
- Make Ganache: Place 12 oz (340g) chopped white chocolate in a bowl. In a small saucepan, heat 1 cup (240ml) heavy cream until just simmering—not boiling. Pour cream over chocolate, add 1/4 tsp (1g) salt, and let sit for 2 minutes. Stir until smooth and glossy.
- Layer Cake: Once cakes are cool, place one layer on a serving plate. Spread a generous layer of ganache on top, then add the second cake layer. Pour more ganache over the top, letting it drip down the sides (use an offset spatula for swoopy swirls).
- Decorate & Set: Sprinkle with pink sprinkles, edible glitter, or fresh berries. Let cake set at room temperature for 30 minutes—or chill for 15 minutes if you want the ganache to firm up.
Troubleshooting: If your cakes dome too much, trim the tops for flat layers (I do this every time). If ganache is too runny, let it sit for 5 more minutes. If it’s too thick, warm gently over a double boiler. Sensory cues: The cake is done when it smells buttery and springs back to a gentle touch.
For efficiency, measure ingredients ahead and prep pans before starting—less mess, more fun!
Cooking Tips & Techniques
Let’s face it, baking cakes isn’t always smooth sailing (I’ve had my fair share of flops!). Here are the tips I’ve learned through trial, error, and a little stubbornness:
- Room Temperature Ingredients: Always use room temperature butter and eggs. Cold ingredients won’t blend smoothly and can lead to a dense cake.
- Don’t Overmix: Once the dry ingredients hit the wet, mix just until combined. Overmixing creates tough, chewy layers—trust me, I learned the hard way.
- Gel Food Coloring: Gel or paste food coloring gives vibrant, consistent color. Liquid coloring can water down the batter (and fade after baking).
- Layering: If you want bakery-level layers, trim any domed tops with a serrated knife. Use a little ganache between layers to “glue” them together for stability.
- Ganache Consistency: If your ganache is too thick, add a splash of warm cream and whisk. If it’s too thin, let it cool longer or chill briefly.
- Multitasking: Make the ganache while cakes bake to save time. Clean as you go—less chaos, more calm!
- Consistency: Always measure flour by spooning into the cup and leveling—not scooping. Too much flour = dry cake.
- Personal Lessons: I once tried substituting white chocolate with candy melts—not the same! Stick to real chocolate for best flavor.
If a cake sticks to the pan, run a knife gently around the edge and tap the bottom. For extra moistness, brush layers with a bit of simple syrup before adding ganache. Little touches make a big difference!
Variations & Adaptations
- Gluten-Free: Swap all-purpose flour with a 1-for-1 gluten-free blend (like Bob’s Red Mill). Texture stays soft, and flavor is just as dreamy.
- Dairy-Free: Use plant-based butter and coconut cream for the ganache. The flavor is a bit different—richer and slightly tropical, but honestly, it’s delicious.
- Seasonal Flavors: Add a teaspoon of orange or lemon zest to the cake for a citrusy twist. In winter, mix in a hint of peppermint extract to the ganache for holiday vibes.
- Chocolate Layers: Mix 2 tablespoons (15g) cocoa powder into the dry ingredients for a pink-and-chocolate marble effect. Looks stunning and tastes decadent.
- Allergen Substitutions: For nut allergies, skip almond extract entirely. For egg-free, use a flaxseed “egg” (1 tbsp flaxseed meal + 2.5 tbsp water per egg).
I once swapped in coconut cream for the ganache at a summer party—my dairy-free friend loved it, and now it’s a staple variation in our home. You can get creative with toppings too; fresh berries, candied citrus, or even mini macarons for a fancy finish.
Customize the color for themed parties—soft lavender for spring, bold red for Valentine’s Day, you name it!
Serving & Storage Suggestions
Serve this cake at room temperature for the best texture—cold ganache can be a little firm. Present it on a white cake stand for Pinterest-worthy style, or slice into squares for easy sharing at potlucks or bake sales.
Pair with fresh berries, a dollop of whipped cream, or a glass of cold milk (my kids swear by the milk pairing!). For grown-ups, a cup of coffee or champagne makes it extra celebratory.
To store, cover the cake tightly with plastic wrap or place in an airtight container. It keeps well at room temperature for up to 2 days, or refrigerate for 4-5 days. For longer storage, freeze individual slices wrapped in parchment and foil—thaw at room temp before serving.
Reheat refrigerated cake by letting it sit out for 30 minutes, or microwave slices for 10 seconds (just enough to soften the ganache). Honestly, the flavors develop even more after a day, so leftovers are a treat!
Nutritional Information & Benefits
| Serving Size | Calories | Carbs | Fat | Protein |
|---|---|---|---|---|
| 1 slice (1/12 cake) | 450 | 55g | 22g | 6g |
Key ingredients like buttermilk and eggs provide protein and calcium, while white chocolate adds antioxidants (yes, really!). Using high-quality chocolate means less sugar and more real flavor.
For gluten-free or dairy-free adaptations, you’ll lower lactose and cut gluten entirely—great for sensitive tummies. Note: Contains eggs, dairy, and wheat; always check labels if baking for allergies.
From a wellness perspective, I love that you can make this cake with wholesome ingredients and swap out anything you need. It’s a treat, sure, but it’s made with love—and that counts for something!
Conclusion
Honestly, this perfect pink velvet cake with white chocolate ganache layers is the kind of recipe you’ll want to make again and again. It’s a showstopper for celebrations, comforting on quiet afternoons, and—let’s face it—impossible not to love.
Feel free to tweak the flavor, color, or toppings to suit your style. That’s the beauty of baking at home!
I love this recipe because it brings people together—whether it’s kids giggling over pink slices or friends asking for seconds. If you try it out, let me know in the comments, share your photos, or tell me your favorite adaptation.
Bake it, share it, and spread a little sweetness—your kitchen’s about to get a whole lot happier!
FAQs
How do I get the perfect pink color in my velvet cake?
Use gel food coloring, not liquid, for vibrant and consistent pink. Start with 2 drops and add more if needed. Always mix well to avoid streaks!
Can I make this cake ahead of time?
Absolutely! Bake the cake layers up to two days in advance. Store them tightly wrapped at room temperature, and add ganache just before serving for freshest flavor.
What’s the best way to slice a layer cake neatly?
Use a sharp, serrated knife and wipe it clean after each slice. Chilling the cake for 15 minutes before cutting can help keep the layers tidy.
Can I use white chocolate chips for the ganache?
You can, but chopped white chocolate bars melt smoother and result in silkier ganache. Chips sometimes contain stabilizers that make the ganache grainy.
How do I make this recipe gluten-free?
Swap the all-purpose flour for a 1-for-1 gluten-free baking blend. Everything else stays the same, and the cake will still be soft and delicious!
Pin This Recipe!
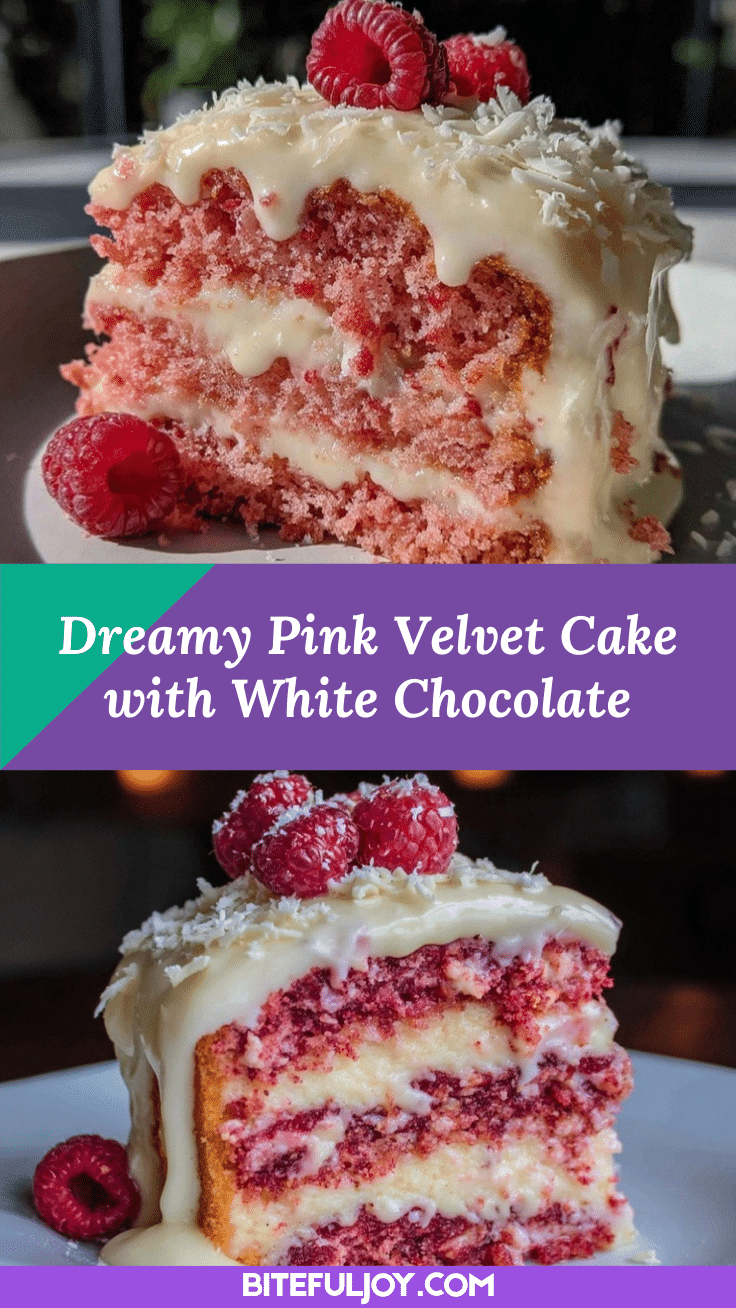
Pink Velvet Cake Recipe Easy Homemade Layers with White Chocolate Ganache

This pink velvet cake features soft, pastel layers with a signature velvet crumb and is topped with a silky, rich white chocolate ganache. It’s a showstopper dessert perfect for celebrations, birthdays, or any occasion that calls for a little extra sweetness.
- Prep Time: 20 minutes
- Cook Time: 30 minutes
- Total Time: 50 minutes
- Yield: 12 servings 1x
- Category: Dessert
- Cuisine: American
Ingredients
- 2 1/2 cups all-purpose flour
- 1 1/2 cups granulated sugar
- 1 cup unsalted butter, softened
- 3 large eggs, room temperature
- 1 cup buttermilk
- 1 tbsp apple cider vinegar
- 2 tsp baking powder
- 1/2 tsp baking soda
- 1/2 tsp fine salt
- 2 tsp pure vanilla extract
- 1/2 tsp almond extract (optional)
- 2–3 drops pink gel food coloring
- 12 oz high-quality white chocolate, chopped
- 1 cup heavy cream
- 1/4 tsp fine salt
- Pink sprinkles or edible glitter (optional)
- Fresh raspberries or strawberries (optional)
- White chocolate shavings (optional)
Instructions
- Preheat oven to 350°F (175°C). Grease and line two 8-inch round cake pans with parchment paper.
- In a medium bowl, whisk together flour, baking powder, baking soda, and salt. Set aside.
- In a large bowl, beat softened butter and sugar with an electric mixer on medium speed for 3-4 minutes until light and fluffy.
- Beat in eggs one at a time, mixing well after each. Stir in vanilla extract and almond extract, if using. Scrape down the bowl.
- Add pink gel food coloring and apple cider vinegar. Mix until color is evenly distributed.
- With mixer on low, add dry ingredients in three parts, alternating with buttermilk. Begin and end with dry ingredients. Mix just until combined.
- Divide batter evenly between pans. Smooth tops with a spatula. Bake for 25-30 minutes, or until a toothpick inserted in the center comes out clean.
- Let cakes cool in the pans for 10 minutes, then turn onto a cooling rack to cool completely.
- For ganache: Place chopped white chocolate in a bowl. In a small saucepan, heat heavy cream until just simmering. Pour cream over chocolate, add salt, and let sit for 2 minutes. Stir until smooth and glossy.
- Place one cake layer on a serving plate. Spread a generous layer of ganache on top, then add the second cake layer. Pour more ganache over the top, letting it drip down the sides.
- Decorate with pink sprinkles, edible glitter, or fresh berries. Let cake set at room temperature for 30 minutes or chill for 15 minutes to firm up ganache.
Notes
Use room temperature butter and eggs for best texture. Do not overmix the batter after adding dry ingredients. Gel food coloring gives the most vibrant color. For gluten-free or dairy-free adaptations, substitute flour and dairy ingredients as needed. Trim domed cake tops for neat layers. Store cake tightly wrapped at room temperature for up to 2 days, or refrigerate for 4-5 days. Freeze individual slices for longer storage.
Nutrition
- Serving Size: 1 slice (1/12 cake)
- Calories: 450
- Sugar: 38
- Sodium: 260
- Fat: 22
- Saturated Fat: 13
- Carbohydrates: 55
- Fiber: 1
- Protein: 6
Keywords: pink velvet cake, white chocolate ganache, birthday cake, party dessert, easy cake recipe, homemade cake, velvet cake, celebration cake, pastel cake, kids party cake


