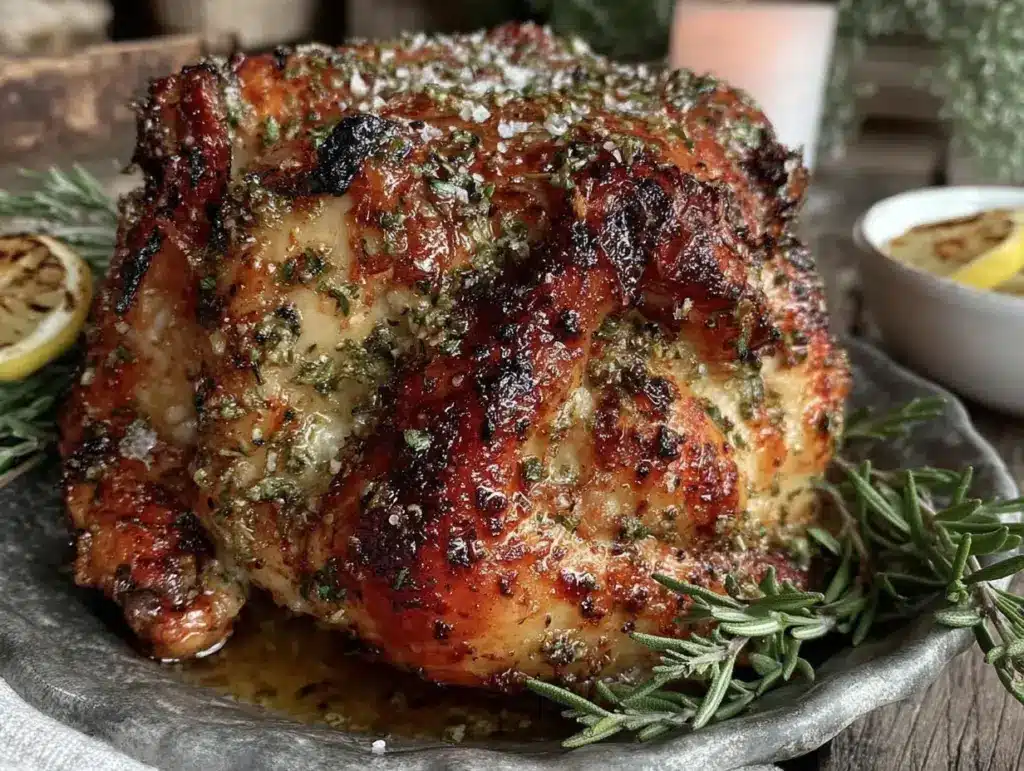
There’s nothing quite like the sizzle and smoky aroma of a Grilled Beer Can Chicken with Herb Rub making its grand entrance at a backyard cookout. The first time I tried this legendary chicken, I was hit with a wave of savory herbs, a hint of hops, and the kind of juicy tenderness that makes you close your eyes and say, “Oh wow.” The skin was crisp and golden, flecked with bits of rosemary and thyme, and the meat practically fell off the bone—so moist it almost needed a warning label.
I remember that afternoon—it was a sticky summer day, the kind where you can taste the humidity. My uncle Jim, king of the grill and tall tales, stood proudly by his kettle grill, balancing a chicken on a half-empty beer can like it was some backyard science experiment. When he sliced into the bird, steam billowed out, carrying that herby, malty scent. I was instantly hooked. It was the kind of moment where you pause, take a deep breath, and just smile because you know you’re onto something truly special.
Honestly, I can’t believe I waited so long to make Grilled Beer Can Chicken myself. I finally gave it a shot one lazy Saturday, determined to recreate that flavor bomb from my childhood. My family couldn’t stop sneaking crispy skin off the platter (and I can’t really blame them). It’s become a staple for summer gatherings, tailgates, and “just because” weekends. The best part? You get ridiculously juicy chicken with dangerously easy prep and a mess of happy faces around the table. If you’re looking for something to brighten up your next cookout, or maybe just want a Pinterest-worthy main that’s secretly simple, this recipe is your golden ticket. Trust me, after a few “in the name of research” test runs, I can say this one feels like a warm hug and deserves a permanent spot in your grilling lineup.
Why You’ll Love This Grilled Beer Can Chicken with Herb Rub
When it comes to grilling, this Grilled Beer Can Chicken recipe sits right at the top of my “can’t-fail” list. After years of fussing over dry chicken and flavorless dinners, I stumbled upon the magic of beer can roasting, and let’s just say, there’s no looking back. Here’s why you’ll be grilling this again and again:
- Quick & Easy: Prep takes just 15 minutes, and the grill does all the heavy lifting. Perfect for those last-minute “what’s for dinner?” moments or impromptu get-togethers.
- Simple Ingredients: The herb rub uses pantry staples—no wild goose chases at the grocery store. Most folks already have everything on hand.
- Perfect for Gatherings: This chicken is a showstopper for backyard barbecues, family reunions, or even a casual Sunday dinner. It’s equal parts impressive and fuss-free.
- Crowd-Pleaser: Kids devour the juicy meat, adults fight over the crispy skin, and even picky eaters ask for seconds. I’ve never had leftovers—seriously.
- Unbelievably Delicious: The combo of steam from the beer and the punchy herb rub makes each bite flavorful and mouthwateringly tender. It’s comfort food—no oven required.
What makes my Grilled Beer Can Chicken recipe stand out? It’s all in the details. The herb rub is perfectly balanced: garlic, rosemary, thyme, and a little smoked paprika for depth. I use a half-can of lager (nothing fancy), which steams the chicken from the inside out for that “how did you get this so moist?” texture. I’ve tried every trick—high heat, low heat, indirect grilling—and this method nails it every single time. Sometimes I even tuck a little lemon or garlic inside the cavity for an extra punch.
This isn’t just chicken—it’s a memory-maker, the kind you serve when you want to wow folks without breaking a sweat. I’ll be honest, it’s the only recipe that makes me a little smug every time I pull it off the grill (in a good way). Whether you need a reliable main for summer or want to switch up your Sunday roast game, this Grilled Beer Can Chicken is comfort food made easy—and you’ll be dreaming about those leftovers (if you have any) for days.
What Ingredients You Will Need
This Grilled Beer Can Chicken recipe uses simple, wholesome ingredients to deliver bold flavor and that signature juicy texture. You probably have most of these in your pantry, and there’s tons of flexibility for swapping if needed. Here’s what you’ll need:
- Whole chicken (about 4-5 lbs / 1.8-2.3 kg): Pat dry for the crispiest skin. I like to grab a local, air-chilled bird if possible.
For the Herb Rub:
- Olive oil (2 tbsp / 30 ml): Helps the rub stick and crisps up the skin. Avocado oil works too.
- Garlic powder (1 tbsp / 9 g): Packs savory punch without burning on the grill.
- Onion powder (2 tsp / 6 g): Adds subtle sweetness and depth.
- Dried rosemary (2 tsp / 2 g): Crush it up for even more aroma. Fresh works, just double the amount.
- Dried thyme (1.5 tsp / 1.5 g): Earthy and classic.
- Smoked paprika (1 tsp / 2 g): For that hint of smoke and gorgeous color. Regular paprika works in a pinch.
- Kosher salt (2 tsp / 10 g): Flakes are best for even seasoning.
- Black pepper (1 tsp / 2 g): Freshly cracked wakes up all the flavors.
For the Beer:
- 1 can (12 oz / 355 ml) lager or pale ale: Go for something light and crisp—no need for the expensive craft stuff. Pabst, Budweiser, or Miller Lite all work great.
Optional Flavor Boosters:
- Lemon wedge or halved garlic bulb: Tuck inside the chicken cavity for a citrusy, aromatic lift.
- Fresh herbs: If you’ve got extra rosemary or thyme sprigs, toss ‘em in the beer for extra fragrance.
Ingredient Tips:
- If you need gluten-free, swap in a gluten-free beer or even a lemon-lime soda (seriously, it works!).
- For a lower sodium version, use half the salt—still delicious, just a little less punchy.
- No beer? You can use a soda can filled halfway with chicken broth for a kid-friendly, alcohol-free version.
I’ve had great results with Kirkland organic chicken, and McCormick or Simply Organic spices for the rub. Try to pat your chicken as dry as possible for a truly crispy skin—the rub sticks better that way, too. In summer, I sometimes swap the dried herbs for fresh garden herbs; just double the amount and chop them fine.
Equipment Needed
You don’t need any fancy gadgets for Grilled Beer Can Chicken, but a few key tools make life easier. Here’s what I recommend (with some budget-friendly swaps):
- Kettle grill or gas grill: Both work, but I love the smoky flavor a charcoal grill imparts. If you’re using gas, you’ll still get great results.
- Sturdy beer can chicken holder (optional): This keeps your chicken steady. Honestly, I’ve balanced the chicken right on the can plenty of times—just be gentle when moving it.
- Instant-read meat thermometer: The secret to juicy chicken, every time. I use a ThermoWorks, but any digital probe does the trick.
- Heavy-duty tongs or heatproof gloves: For wrangling the chicken off the grill without a wrestling match.
- Aluminum foil: To catch drips and make cleanup a breeze (especially if your grill grates are a bit, well, “well-loved”).
- Small bowl and pastry brush or hands: For mixing and applying the herb rub.
- Kitchen shears or sharp knife: For removing the chicken backbone if you want to spatchcock instead (totally optional for this recipe).
Pro tip: If you grill a lot, invest in a simple chicken roaster stand—they’re cheap and last forever. Just scrub with a stiff brush and rinse well after each use. For the budget-minded, a regular beer can and a steady hand are all you really need. I’ve made this on a tailgate grill, a Weber, and even a battered old gas grill at the lake—works every time.
Preparation Method
- Prep the Chicken (10 minutes): Remove giblets from the chicken cavity if present. Pat the chicken completely dry with paper towels—this is key for crispy skin. (Don’t skip this step! Any moisture left makes the skin steam instead of crisp.)
- Mix the Herb Rub (2 minutes): In a small bowl, combine 2 tbsp (30 ml) olive oil, 1 tbsp (9 g) garlic powder, 2 tsp (6 g) onion powder, 2 tsp (2 g) dried rosemary, 1.5 tsp (1.5 g) dried thyme, 1 tsp (2 g) smoked paprika, 2 tsp (10 g) kosher salt, and 1 tsp (2 g) black pepper. Stir until you have a thick, fragrant paste.
- Rub the Chicken (3 minutes): Using your hands or a brush, spread the herb rub all over the chicken—get under the skin on the breasts and thighs if possible. (It’s messy, but that’s where the magic happens. Wash up well!)
- Prepare the Beer Can (2 minutes): Open the beer and pour out (or drink) half. If you like, poke a couple extra holes in the top with a church key can opener for more steam. Drop in a clove of garlic or a sprig of rosemary for extra aroma.
- Mount the Chicken (1 minute): Carefully lower the chicken, cavity side down, over the open beer can so it sits upright. The drumsticks will help balance the bird like a tripod. (If using a stand, set the beer in the holder first, then the chicken.)
- Preheat the Grill (10 minutes): Heat your grill to medium indirect heat (350°F / 175°C). For charcoal grills, bank coals to the sides; for gas, light the outer burners and leave the center off. Place a drip pan under the grate to catch juices (makes cleanup way easier).
- Grill the Chicken (1 to 1.5 hours): Set the chicken, standing upright, on the grill over the drip pan. Close the lid and cook for 60-80 minutes. Rotate the bird every 20 minutes for even browning. Start checking temp at 60 minutes—insert a thermometer into the thickest part of the thigh, not touching bone. You want 165°F / 74°C.
- Troubleshooting: If the skin is getting too dark before the chicken is cooked, tent loosely with foil. If the grill flares up, move the chicken to a cooler spot—don’t panic!
- Rest and Serve (10 minutes): When done, use tongs and a spatula to carefully transfer the chicken (can and all) to a cutting board. Let rest for 10 minutes—this keeps the juices inside where they belong. Carefully remove the can (use oven mitts—it’s hot!) and carve the chicken.
Personal tip: If you want extra crispy skin, brush with a little melted butter during the last 10 minutes of grilling. I sometimes sprinkle a final pinch of salt just before serving—old habits from my restaurant days. Carve at the table for full “wow” effect and watch jaws drop.
Cooking Tips & Techniques
Over the years, I’ve picked up a handful of tricks for making Grilled Beer Can Chicken with Herb Rub turn out perfect every single time. Here’s how to sidestep the most common pitfalls and nail juicy, flavorful chicken with golden, shatteringly crisp skin:
- Pat That Bird Dry: The drier the skin, the crispier the finish. Don’t be shy—really get in there with the paper towels.
- Don’t Overcrowd the Grill: Give your chicken plenty of space for air to circulate. If you’re grilling two at once, make sure they aren’t touching.
- Indirect Heat is Key: Direct flames will burn the skin before the meat’s cooked. Always use indirect heat (coals to the sides, or burners off under the bird).
- Use a Meat Thermometer: Guesswork is for the birds (but not these birds). Check both thigh and breast for 165°F / 74°C. Under-cooked chicken is a no-go, but overcooked is heartbreak.
- Rotate for Even Browning: Every 20 minutes, give the chicken a little turn. This helps avoid hot spots and ensures even color.
- Let It Rest: Don’t carve right away—the juices need a few minutes to redistribute. Ten minutes makes a world of difference in tenderness.
- If Using a Stand: Scrub it well after each use; stuck-on bits can burn and add off flavors. I once ruined a batch following a lazy cleanup. Never again!
- Butter Basting: For extra decadence, quickly brush with melted butter in the last 10 minutes. It’s not required, but oh boy, does it make the skin irresistible.
One mistake I made early on was using a dark, heavy beer. The flavor can get a little bitter or muddy. Stick to a light lager, and you’ll be golden. Multitasking tip: While the chicken’s grilling, you’ve got plenty of time to whip up sides. I usually toss together a quick potato salad or grill some corn. The hardest part is not peeking under the lid every five minutes—trust the process!
Variations & Adaptations
One of my favorite things about Grilled Beer Can Chicken is how flexible it is. Here are a few fun ways to mix things up:
- Low-Carb/Keto: The recipe is naturally low-carb, but for a keto kick, swap the beer for a can of chicken broth and add extra olive oil to the rub. Still juicy, still packed with flavor.
- Spicy Southwest: Add 1 tsp chili powder and a pinch of cayenne to the herb rub. Toss a jalapeño half in the beer can for a subtle kick.
- Herb Garden Fresh: In summer, double up on fresh herbs instead of dried—think basil, thyme, oregano. Chop fine and rub all over for a garden-to-table vibe.
- Oven Method: No grill? No problem! Pop the chicken (beer can and all) on a foil-lined sheet in a 400°F (205°C) oven. Roast 60-75 minutes until done. You’ll miss a bit of smoke, but it’s still delicious.
- Dairy-Free and Gluten-Free: Use olive oil and a gluten-free beer (or soda) for allergy-friendly results. I’ve served this to friends with all kinds of restrictions—everyone’s happy.
- Personal Twist: Sometimes I toss a handful of wood chips on the coals for a smoky punch. Applewood or hickory is awesome if you like a little campfire flavor.
If you need to avoid garlic or onion, simply leave them out and up the herbs. For a lemon-pepper twist, add the zest of one lemon to the rub and use lemon-lime soda in the can. You can really make this chicken your own—just don’t skip that herb rub!
Serving & Storage Suggestions
This Grilled Beer Can Chicken is best served hot and fresh off the grill, when the skin’s crackly and the meat is piping. Here’s how I like to present it:
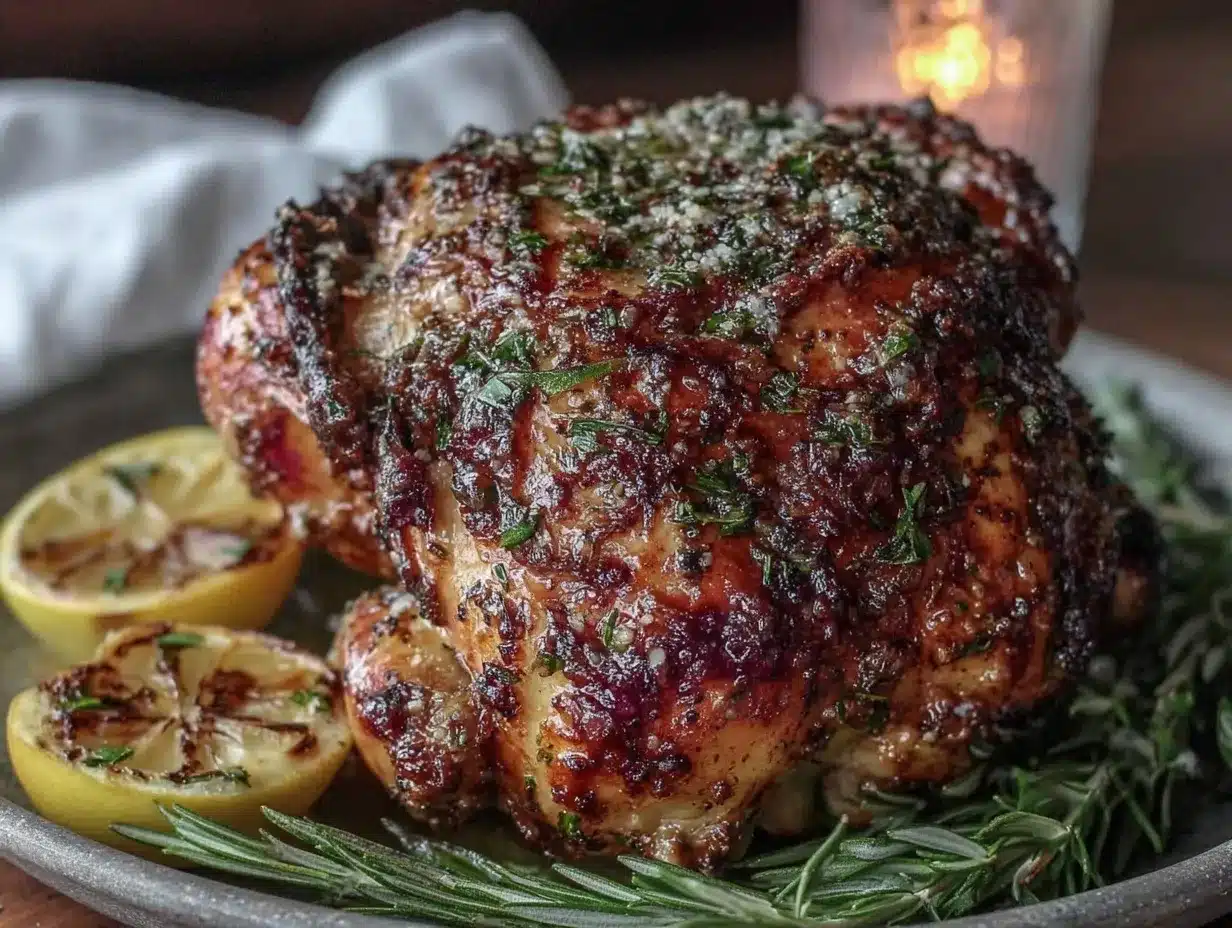
- Serving: Let the chicken rest, then carve at the table for full effect. Arrange slices on a platter with a sprinkle of fresh herbs and a few lemon wedges for color. Serve with sides like grilled corn, potato salad, or a bright green salad.
- Beverage Pairings: I love serving this with a crisp lager or a cold, citrusy iced tea. It pairs well with just about anything—seriously, it’s a crowd-pleaser.
- Storage: Leftovers (if you have any!) keep for 3-4 days in an airtight container in the fridge. The meat stays juicy for sandwiches, salads, or even tacos.
- Freezing: Shred leftover chicken and freeze in zip-top bags for up to 3 months. Thaw overnight in the fridge—great for meal prep.
- Reheating: Warm in a 325°F (165°C) oven, covered loosely with foil to keep things moist. Or, toss shredded meat in a skillet with a splash of broth until just heated through.
- Flavor Note: The herby notes actually deepen after a night in the fridge—perfect for next-day salads or wraps.
Pro tip: Save the bones for homemade stock. The smoky, herby backbone makes for out-of-this-world chicken soup!
Nutritional Information & Benefits
This Grilled Beer Can Chicken with Herb Rub is a lighter main that doesn’t skimp on flavor or satisfaction. Here’s the scoop (per serving, about 4 oz/113 g cooked meat):
- Calories: 250-300
- Protein: 28g
- Fat: 15g (mostly from the skin and olive oil—remove skin for less fat)
- Carbohydrates: 1-2g (almost negligible—great for low-carb eaters)
- Sodium: About 400mg (can reduce by using less salt in the rub)
Chicken is a lean protein source, and grilling keeps things light. The herb rub adds antioxidants and flavor without extra calories. There’s no sugar, no dairy, and you can easily make it gluten-free with the right beer or soda. Allergens to watch: chicken (obviously!), and check the beer label for barley/gluten if needed. I love knowing I can serve this to just about anyone, and it’s always a hit at the table.
Conclusion
If you’re craving a juicy, flavorful main dish that’s as easy as it is impressive, Grilled Beer Can Chicken with Herb Rub is the answer. It’s the recipe I reach for when I want to feed a crowd, impress my in-laws, or just treat myself to a weekend feast. You can keep it classic or riff on the flavors—either way, you’ll get that signature “wow” moment at first bite.
Honestly, there’s something satisfying about making a chicken stand up on a can and watching it transform into pure comfort food. I love this recipe for its simplicity, adaptability, and the happy chaos that comes with carving it up for family and friends. Don’t be afraid to put your own spin on it—add more herbs, spice it up, or go classic. Just promise me you’ll try it at least once.
Have questions, tweaks, or a secret rub of your own? Drop a comment below, pin it for later, and share your pictures! I can’t wait to see your delicious results. Happy grilling—you’re going to love this one.
Frequently Asked Questions About Grilled Beer Can Chicken
How do I keep my beer can chicken from tipping over on the grill?
Use a sturdy chicken holder for extra stability, or make sure the chicken’s legs are positioned like a tripod. Move gently and use tongs to steady it—once it’s on the grill, it’s pretty stable!
Can I make this recipe without beer?
Absolutely! Use a soda can filled halfway with chicken broth or lemon-lime soda for an alcohol-free version. You’ll still get tons of moisture and flavor.
What’s the best beer to use for beer can chicken?
Stick with a light lager or pale ale—nothing too dark or bitter. Brands like Budweiser, Miller Lite, or Pabst work great and don’t overpower the herbs.
How do I know when my chicken is done?
Use a meat thermometer—insert it into the thickest part of the thigh (not touching bone). When it hits 165°F (74°C), you’re good to go. The juices should run clear.
Can I cook this beer can chicken in the oven?
Yes! Place the chicken and beer can on a foil-lined baking sheet and roast at 400°F (205°C) for 60-75 minutes, until cooked through. You won’t get smoke, but it’s still juicy and flavorful.
Pin This Recipe!
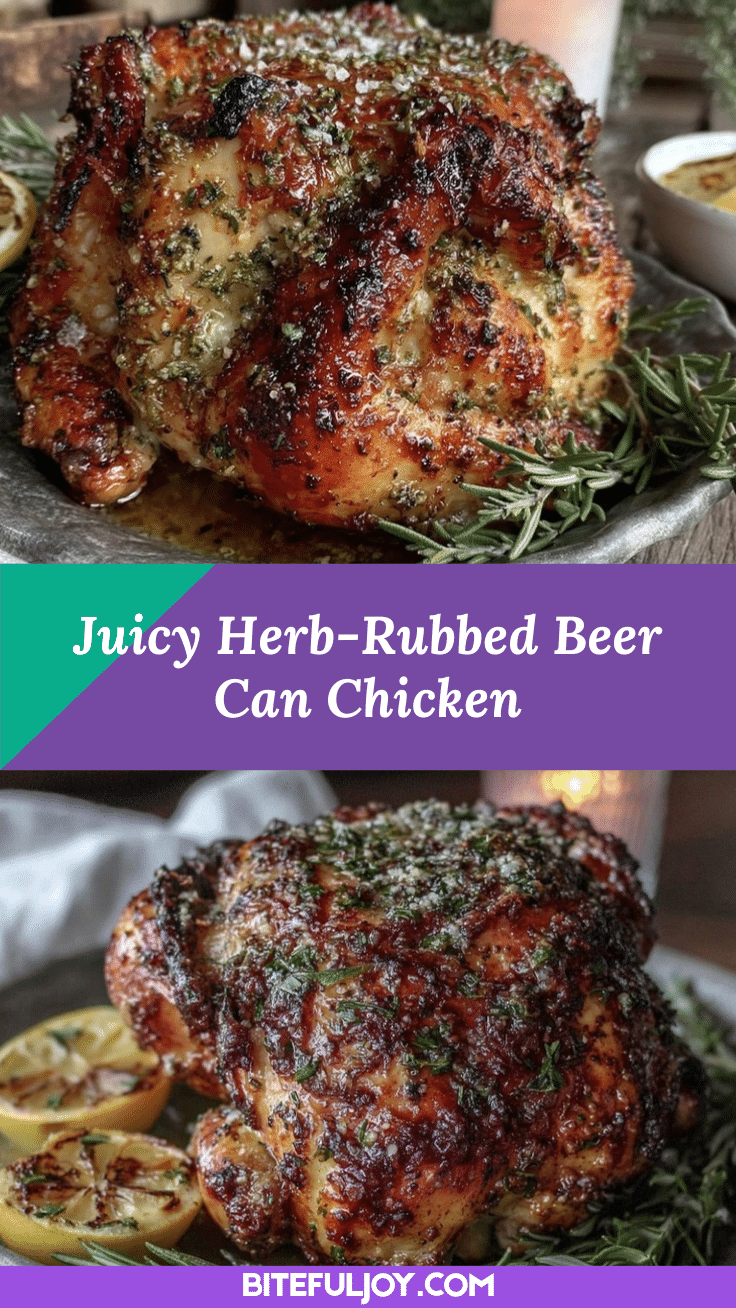
Grilled Beer Can Chicken with Herb Rub
This Grilled Beer Can Chicken recipe features a simple, flavorful herb rub and a classic beer can roasting method for juicy, tender meat and crispy skin. Perfect for backyard cookouts, family gatherings, or an impressive weekend feast.
- Prep Time: 15 minutes
- Cook Time: 60-80 minutes
- Total Time: 1 hour 25 minutes
- Yield: 6 servings 1x
- Category: Main Course
- Cuisine: American
Ingredients
- 1 whole chicken (about 4–5 lbs), patted dry
- 2 tablespoons olive oil
- 1 tablespoon garlic powder
- 2 teaspoons onion powder
- 2 teaspoons dried rosemary (or 4 teaspoons fresh, chopped)
- 1 1/2 teaspoons dried thyme (or 3 teaspoons fresh, chopped)
- 1 teaspoon smoked paprika
- 2 teaspoons kosher salt
- 1 teaspoon black pepper
- 1 can (12 oz) lager or pale ale (or gluten-free beer or lemon-lime soda for substitutions)
- Optional: lemon wedge or halved garlic bulb (for cavity)
- Optional: fresh rosemary or thyme sprigs (for beer can)
Instructions
- Remove giblets from the chicken cavity if present. Pat the chicken completely dry with paper towels.
- In a small bowl, combine olive oil, garlic powder, onion powder, rosemary, thyme, smoked paprika, kosher salt, and black pepper. Stir until a thick paste forms.
- Rub the herb mixture all over the chicken, including under the skin on the breasts and thighs if possible.
- Open the beer and pour out (or drink) half. Optionally, poke a couple extra holes in the top and add a clove of garlic or a sprig of rosemary.
- Carefully lower the chicken, cavity side down, over the open beer can so it sits upright. Use a chicken holder if available.
- Preheat grill to medium indirect heat (about 350°F). For charcoal, bank coals to the sides; for gas, light outer burners and leave center off. Place a drip pan under the grate.
- Set the chicken upright on the grill over the drip pan. Close the lid and cook for 60-80 minutes, rotating every 20 minutes for even browning. Start checking temperature at 60 minutes; chicken is done at 165°F in the thickest part of the thigh.
- If skin is getting too dark before chicken is cooked, tent loosely with foil. Move chicken to a cooler spot if grill flares up.
- When done, use tongs and a spatula to transfer chicken (can and all) to a cutting board. Let rest for 10 minutes. Carefully remove the can and carve the chicken.
- Optional: For extra crispy skin, brush with melted butter during the last 10 minutes of grilling.
Notes
Pat chicken dry for crispy skin. Use indirect heat for best results. Rotate chicken every 20 minutes for even browning. Substitute gluten-free beer or soda for dietary needs. Let chicken rest before carving for juicier meat. Save bones for homemade stock.
Nutrition
- Serving Size: About 4 oz cooked ch
- Calories: 275
- Sodium: 400
- Fat: 15
- Saturated Fat: 4
- Carbohydrates: 2
- Protein: 28
Keywords: grilled chicken, beer can chicken, herb rub, summer grilling, backyard barbecue, juicy chicken, easy chicken recipe, gluten-free option, keto, low-carb, poultry


