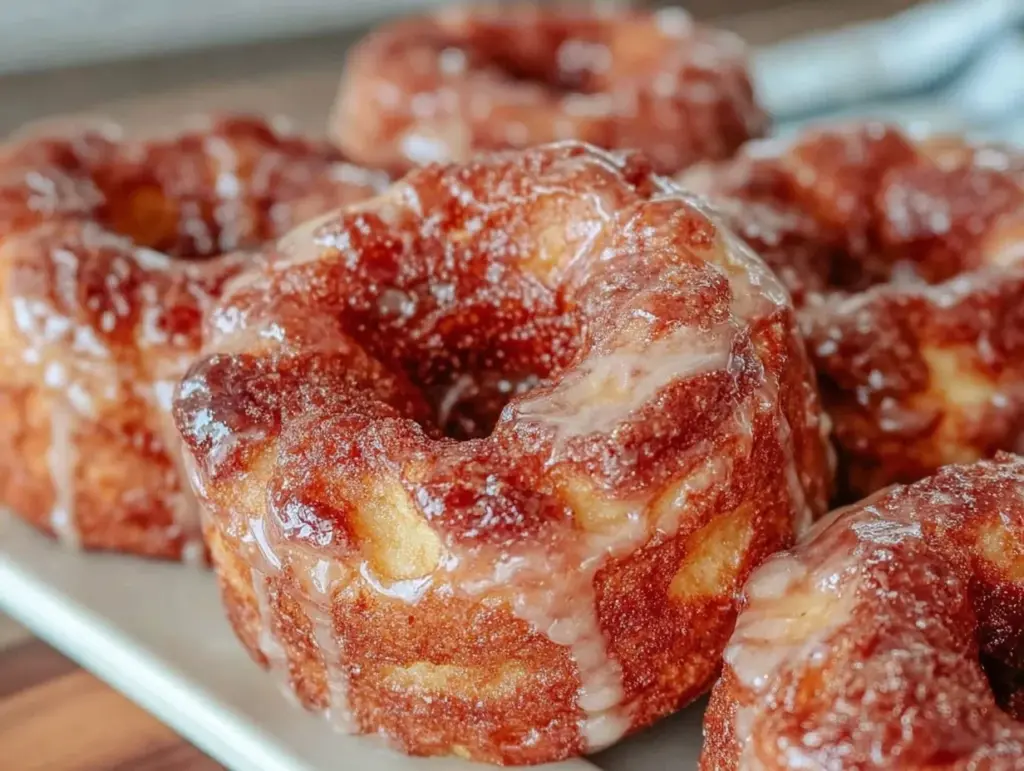
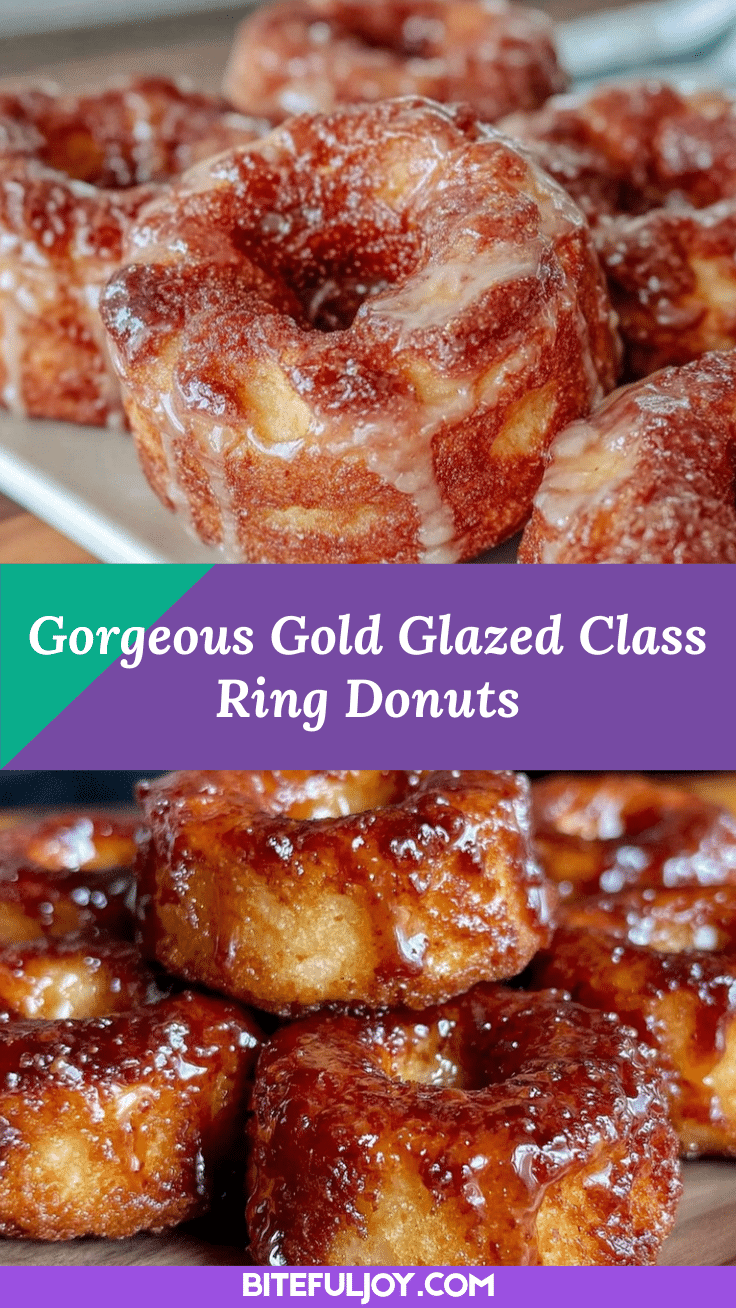
Picture this: the moment you step into the kitchen, the sweet aroma of freshly baked donuts starts swirling through the air, mixing with hints of vanilla and warm sugar. The first time I pulled a batch of class ring donuts from my oven, I couldn’t help but pause—just marveling at their perfectly golden edges and pillowy-soft centers. I mean, these donuts are so gorgeous, it almost feels wrong to eat them (but trust me, you’ll want to). That shimmering gold glaze catches the light and turns every donut into a tiny edible treasure. The kind of moment where you pause, take a deep breath, and just smile because you know you’re onto something truly special.
Years ago, when I was knee-high to a grasshopper, my grandma used to make old-fashioned cake donuts for celebrations. There was always a mad dash to the kitchen as soon as the donuts hit the cooling rack. Fast forward to a rainy Saturday last spring—I stumbled upon the idea of “class ring” donuts while trying to create something memorable for a graduation party. The inspiration? Those iconic high school rings with their sparkling gold. Honestly, I wish I’d discovered this trick years ago, because the look on my family’s faces when they saw those golden donuts… priceless! My kids couldn’t stop sneaking them off the tray, and even my husband (who swears he’s not a donut guy) reached for seconds.
Let’s face it, these class ring donuts aren’t just a dessert—they’re a party centerpiece. Perfect for potlucks, birthday bashes, or to brighten up your Pinterest board. The recipe is dangerously easy, with pure, nostalgic comfort in every bite. And after testing this recipe more times than I’d like to admit (in the name of research, of course), it’s officially a staple for our family gatherings and holiday gifting. If you’re looking for something that feels like a warm hug and instantly impresses, you’re going to want to bookmark this one!
Why You’ll Love These Class Ring Donuts
If you’ve ever wished for a treat that’s as photogenic as it is delicious, honestly, you’re in for a real treat. Over years of baking and dozens of party spreads, I can tell you these class ring donuts with luxurious gold glaze always steal the show.
- Quick & Easy: Ready in under 45 minutes, so you can whip these up for last-minute gatherings or sudden sweet cravings.
- Simple Ingredients: No fancy ingredients here—most are pantry staples, and you probably have everything you need right now.
- Perfect for Stunning Parties: These donuts are a natural fit for graduation celebrations, birthday bashes, or any event where you want to wow your guests.
- Crowd-Pleaser: Kids and adults alike can’t resist the soft texture and eye-catching gold glaze. I’ve never had leftovers (and my picky aunt even asked for seconds).
- Unbelievably Delicious: The contrast between the tender crumb and the sweet, slightly citrusy glaze is pure comfort food. It’s the kind of treat that makes you close your eyes after the first bite.
What sets this class ring donuts recipe apart? It’s not just the look, though that’s a huge part of the charm. The baking method means you get fluffy, not greasy donuts every time. The gold glaze—made with edible luster dust and a hint of lemon—adds a light sparkle and a playful twist. I’ve tried a dozen donut recipes, but this is the one I keep coming back to for its reliability and wow-factor.
These donuts are more than just dessert. They’re a way to make memories, turn a simple celebration into something spectacular, and gift a little bit of homemade happiness. Whether you’re a baking newbie or a seasoned pro, you’ll love the fuss-free method and the chance to put your own spin on things. Let’s make parties a little more golden, shall we?
What Ingredients You Will Need
These class ring donuts use tried-and-true ingredients to deliver a soft, flavorful crumb and a glaze that sparkles like the real deal. You don’t need anything fancy—just a handful of basics and a couple of fun extras for that gold party finish.
- For the Donuts:
- 2 cups (240g) all-purpose flour (I like King Arthur for best texture)
- 2/3 cup (135g) granulated sugar
- 2 tsp baking powder
- 1/2 tsp baking soda
- 1/4 tsp salt
- 1/2 cup (120ml) whole milk (room temperature)
- 1/4 cup (60g) unsalted butter (melted and cooled)
- 2 large eggs (room temperature)
- 1 tsp vanilla extract (for warmth and aroma)
- 1/2 tsp lemon zest (for a hint of brightness)
- For the Luxurious Gold Glaze:
- 2 cups (240g) powdered sugar
- 2–3 tbsp (30–45ml) whole milk (or use dairy-free milk if needed)
- 1 tbsp light corn syrup (for shine)
- 1/2 tsp vanilla extract
- Edible gold luster dust (available online or at cake supply stores)
- 1/2 tsp lemon juice (balances the sweetness)
- Optional Decorative Extras:
- Sprinkles (for added party fun)
- Colored sanding sugar
- Miniature edible pearls
Honestly, most of these will already be in your pantry. If you need a gluten-free option, just swap the flour for your favorite blend (I’ve had good luck with Bob’s Red Mill 1-to-1). For dairy-free donuts, substitute plant-based milk and vegan butter. And if you want to skip the lemon zest, orange zest works great too—especially in spring.
If you’re feeling adventurous, mix in a pinch of cinnamon or nutmeg for a little extra warmth. The glaze is flexible, so you can use almond extract or a splash of coconut milk for flavor twists. I always keep a stash of edible luster dust on hand for special occasions—nothing matches that golden finish!
Equipment Needed
You won’t need a professional bakery setup for these class ring donuts—just a few reliable kitchen tools. Here’s what I use every time:
- Donut Pan: Nonstick 6- or 12-cavity pan works best (Wilton and Nordic Ware are great). If you don’t have one, a muffin tin with rolled foil inserts will do in a pinch.
- Mixing Bowls: Two medium bowls—one for wet, one for dry ingredients.
- Whisk: A balloon whisk makes mixing easy and lump-free.
- Rubber Spatula: For folding together the batter and scraping the bowls clean.
- Piping Bag or Zip-Top Bag: To neatly fill the donut pans (just snip the corner).
- Wire Cooling Rack: Helps donuts cool evenly and keeps the glaze neat.
- Small Sieve: Perfect for dusting gold luster over the glaze.
- Measuring Cups & Spoons: I use stainless steel sets—they last forever and don’t warp.
Honestly, you can make do with basics. If your donut pan’s seen better days, a little spray oil and parchment strips help prevent sticking. For the glaze, a small offset spatula gives you more control (but a butter knife works too). I’ve tried budget-friendly pans and found they work just fine—just wash gently to keep the nonstick coating happy. Don’t sweat the fancy gadgets—these donuts are all about approachable fun!
Preparation Method

Let’s get you from mixing bowl to golden donut bliss in just a few simple steps. I’ll walk you through every part—troubleshooting included!
- Preheat and Prep: Preheat your oven to 350°F (175°C). Lightly grease your donut pan with nonstick spray or a touch of butter. Set a wire rack nearby for cooling.
- Mix Dry Ingredients: In a medium bowl, whisk together 2 cups (240g) all-purpose flour, 2/3 cup (135g) sugar, 2 tsp baking powder, 1/2 tsp baking soda, and 1/4 tsp salt. Make sure no lumps remain—sometimes I sift the flour for extra lightness.
- Combine Wet Ingredients: In another bowl, whisk 1/2 cup (120ml) milk, 1/4 cup (60g) melted butter, 2 eggs, 1 tsp vanilla extract, and 1/2 tsp lemon zest. Whisk until smooth and slightly frothy.
- Combine & Mix: Pour the wet mixture into the dry ingredients. Use a spatula to gently fold everything together until just combined. Don’t overmix—stop as soon as you don’t see dry flour. The batter should be thick but pourable.
- Fill the Pan: Transfer the batter to a piping bag (or a large zip-top bag and snip the corner). Pipe batter into each cavity, filling about 2/3 full. If you overfill, donuts might not have a classic ring shape.
- Bake: Place the pan in the oven and bake for 12–14 minutes (check at 12). Donuts should be lightly golden and spring back when touched. If they look pale, give them another 2 minutes.
- Cool: Remove from oven and let sit in the pan for 3–5 minutes. Gently turn out onto a wire rack. If a donut sticks, use a butter knife to loosen edges—go slow to avoid tearing.
- Make the Gold Glaze: In a bowl, whisk together 2 cups (240g) powdered sugar, 2–3 tbsp (30–45ml) milk, 1 tbsp corn syrup, 1/2 tsp vanilla, and 1/2 tsp lemon juice. Whisk until smooth and glossy. Add more milk, one teaspoon at a time, if glaze is too thick.
- Glaze Donuts: Dip cooled donuts into the glaze, letting excess drip off. Set back on the rack. While glaze is still wet, use a small sieve to dust gold luster dust over each donut. If you want extra sparkle, repeat after a few minutes.
- Decorate (Optional): Add sprinkles, pearls, or colored sugar before the glaze sets. Let donuts dry for at least 15 minutes before serving or stacking.
Troubleshooting tip: If your donuts seem dense, double-check your baking powder and soda are fresh. For glaze that’s too runny, add a little more powdered sugar. For dry donuts, try reducing bake time by 2 minutes next batch. The batter should smell sweet and zesty, and the finished donuts should be lightly golden, with a soft spring when pressed. Don’t rush the cooling—warm donuts will make the glaze slide right off!
Cooking Tips & Techniques
After dozens of batches, I’ve picked up a few tricks to guarantee your class ring donuts always turn out party-perfect.
- Don’t Overmix: It’s tempting to keep stirring, but just combine until the flour disappears. Overmixing leads to tough donuts (learned that the hard way more than once!).
- Use Room Temperature Ingredients: Cold eggs or milk can make the batter lumpy and affect rise. Let them sit out for 30 minutes when you can.
- Pipe, Don’t Spoon: Using a piping bag keeps the rings uniform and avoids batter spills. Trust me, less cleanup = more donut joy.
- Glaze Quickly: Dip donuts while they’re cool but not cold. If they’re warm, the glaze will slide off; if they’re cold, it won’t stick as well.
- Gold Luster Dust: For maximum sparkle, dust while glaze is tacky, not fully set. I accidentally waited too long once—no shine!
- Multi-tasking: Prep your glaze while donuts bake, and lay out decorations ahead of time. It keeps the flow going and prevents rushed decorating.
- Consistency Counts: Always check the batter texture before piping. If it feels stiff, add a splash of milk; if runny, a tablespoon of flour.
Honestly, the best tip I can give is to enjoy the process—even the little mishaps (like accidentally dropping a donut on the floor). It’s all part of the fun. And don’t worry if your glaze isn’t perfectly smooth—the gold dust hides a multitude of sins!
Variations & Adaptations
One of the best parts about class ring donuts is how easily you can customize them to match your event, dietary needs, or taste buds. Here are some tried-and-true ways to switch things up:
- Gluten-Free Donuts: Swap the all-purpose flour for a 1-to-1 gluten-free blend. I’ve used Bob’s Red Mill with great results—just add an extra tablespoon of milk if batter seems thick.
- Dairy-Free Version: Use plant-based milk and vegan butter. The donuts turn out just as fluffy, and the glaze is naturally dairy-free.
- Chocolate Gold Donuts: Replace 1/4 cup (30g) flour with unsweetened cocoa powder for a chocolate base. Dust with gold for a decadent look.
- Seasonal Flavors: For fall, add 1/2 tsp cinnamon and a pinch of nutmeg to the batter. In summer, swap lemon zest for orange, and add blueberry bits before baking.
- Alternative Cooking Methods: Don’t have an oven? You can air fry these at 325°F (160°C) for 8–10 minutes. Texture is a bit different but still delicious.
- Allergen Swaps: For egg-free, use a flax egg (1 tbsp ground flaxseed + 2.5 tbsp water, let sit 5 minutes). Works great, though the crumb is a touch denser.
I once tried a raspberry glaze instead of vanilla—big hit at my niece’s birthday party! You can mix and match glazes, add colored sprinkles, or even make mini donuts for bite-sized fun. The gold theme is flexible—try silver or rose gold for different vibes. Get creative and make them your own!
Serving & Storage Suggestions
These class ring donuts are best served fresh, at room temperature, with their gold glaze gleaming in the afternoon light. I love to pile them up on a pretty cake stand or arrange them in a ring formation for a dramatic centerpiece.
- Serving: Let donuts dry for 15–20 minutes after glazing. Serve on a white platter for maximum gold pop, or on a mirrored tray for extra sparkle. Pair with a glass of cold milk, coffee, or a sparkling lemonade.
- Complementary Dishes: These donuts play well with fresh fruit salads, creamy vanilla puddings, or a simple cheese board for brunch spreads.
- Storage: Store leftovers in an airtight container at room temperature for up to 2 days. For longer storage, refrigerate for up to 5 days—just let them come to room temp before serving for best texture.
- Freezing: Freeze unglazed donuts in a zip-top bag for up to 2 months. Thaw and glaze fresh before your party.
- Reheating: Warm donuts in the microwave for 10–15 seconds. If reheating from frozen, let thaw first, then warm gently.
Honestly, the flavor deepens after a day or two—the glaze soaks in just a bit, making each bite a little more decadent. If you’re prepping for a big event, bake the donuts a day ahead and glaze the morning of. They’re so easy, even kids can help with the decorating!
Nutritional Information & Benefits
I get it—donuts are a treat, but with the right ingredients, you can enjoy them without guilt. Here’s an estimate per donut (assuming 12 servings):
- Calories: ~210
- Fat: 6g
- Carbohydrates: 36g
- Protein: 3g
- Sugar: 19g
The class ring donuts recipe uses whole milk and real eggs, which add protein and a bit of vitamin D. Lemon zest brings a pop of vitamin C, while the gold luster dust is completely edible and safe. Substituting whole-grain flour or almond flour can lower carbs and boost fiber. For those watching allergens, remember there’s wheat, egg, and dairy here—see variations above for swaps. Personally, I love that these donuts offer pure joy and comfort, with easy tweaks for healthier or allergy-friendly options. Treat yourself—because celebrations deserve something golden!
Conclusion
Let’s be real—these class ring donuts with luxurious gold glaze are more than just dessert. They’re a celebration in every bite, perfect for parties, gifting, or just brightening up a regular afternoon. The recipe is easy enough for beginners, yet impressive enough for Pinterest-worthy spreads. I love how versatile and forgiving it is, and the reaction from friends and family never fails to make me smile.
Don’t be afraid to put your own twist on them—try a new glaze, swap out toppings, or make mini versions for a crowd. Baking should be fun, and these donuts deliver every time. I hope you’ll give them a try, snap a few photos, and share your results! Leave a comment if you have questions, or let me know how you made them your own. Here’s to golden celebrations and home-baked happiness!
FAQs
Can I make class ring donuts without a donut pan?
Absolutely! You can use a muffin tin and shape a hole in the center with rolled foil or a small cookie cutter. They won’t be as perfectly round, but they’ll taste just as good.
Where do I find edible gold luster dust?
You can purchase edible gold luster dust at most cake supply stores or online. Make sure you’re buying food-grade dust for safe consumption.
Can I freeze these donuts?
Yes! Freeze unglazed donuts in a zip-top bag for up to 2 months. Thaw at room temperature and glaze fresh for best results.
How do I make these donuts gluten-free?
Just swap the all-purpose flour for a gluten-free 1-to-1 baking blend. Add an extra tablespoon of milk if the batter is thick.
Can I use a different glaze color?
Of course. Try silver, rose gold, or even pastel luster dusts for different party themes. The base glaze works with all colors—just mix and match to your heart’s content.
Pin This Recipe!
Class Ring Donuts Recipe Easy Gold Glaze for Stunning Parties

These baked class ring donuts feature a soft, pillowy crumb and a shimmering gold glaze, making them a show-stopping centerpiece for parties and celebrations. Quick to prepare and endlessly customizable, they’re perfect for graduations, birthdays, or any festive gathering.
- Prep Time: 20 minutes
- Cook Time: 14 minutes
- Total Time: 34 minutes
- Yield: 12 donuts 1x
- Category: Dessert
- Cuisine: American
Ingredients
- 2 cups (240g) all-purpose flour
- 2/3 cup (135g) granulated sugar
- 2 tsp baking powder
- 1/2 tsp baking soda
- 1/4 tsp salt
- 1/2 cup (120ml) whole milk, room temperature
- 1/4 cup (60g) unsalted butter, melted and cooled
- 2 large eggs, room temperature
- 1 tsp vanilla extract
- 1/2 tsp lemon zest
- 2 cups (240g) powdered sugar
- 2–3 tbsp (30–45ml) whole milk (or dairy-free milk)
- 1 tbsp light corn syrup
- 1/2 tsp vanilla extract
- Edible gold luster dust
- 1/2 tsp lemon juice
- Sprinkles (optional)
- Colored sanding sugar (optional)
- Miniature edible pearls (optional)
Instructions
- Preheat oven to 350°F (175°C). Lightly grease your donut pan with nonstick spray or butter. Set a wire rack nearby for cooling.
- In a medium bowl, whisk together flour, granulated sugar, baking powder, baking soda, and salt until no lumps remain.
- In another bowl, whisk together milk, melted butter, eggs, vanilla extract, and lemon zest until smooth and slightly frothy.
- Pour wet mixture into dry ingredients. Use a spatula to gently fold together until just combined. Do not overmix.
- Transfer batter to a piping bag or zip-top bag with the corner snipped. Pipe batter into each donut cavity, filling about 2/3 full.
- Bake for 12–14 minutes, checking at 12 minutes. Donuts should be lightly golden and spring back when touched.
- Remove from oven and let donuts sit in the pan for 3–5 minutes. Gently turn out onto a wire rack to cool.
- For the glaze: In a bowl, whisk together powdered sugar, milk, corn syrup, vanilla extract, and lemon juice until smooth and glossy. Add more milk if glaze is too thick.
- Dip cooled donuts into the glaze, letting excess drip off. Place back on the rack.
- While glaze is wet, use a small sieve to dust gold luster dust over each donut. Repeat for extra sparkle if desired.
- Decorate with sprinkles, pearls, or colored sugar before glaze sets (optional). Let donuts dry for at least 15 minutes before serving or stacking.
Notes
For gluten-free donuts, substitute all-purpose flour with a 1-to-1 gluten-free blend and add an extra tablespoon of milk if needed. For dairy-free, use plant-based milk and vegan butter. Don’t overmix the batter to keep donuts light. Dust gold luster while glaze is tacky for best shine. Store leftovers in an airtight container at room temperature for up to 2 days, or freeze unglazed donuts for up to 2 months.
Nutrition
- Serving Size: 1 donut
- Calories: 210
- Sugar: 19
- Sodium: 140
- Fat: 6
- Saturated Fat: 3
- Carbohydrates: 36
- Fiber: 1
- Protein: 3
Keywords: donuts, baked donuts, gold glaze, party dessert, graduation, birthday, easy donut recipe, class ring donuts, celebration, edible gold


