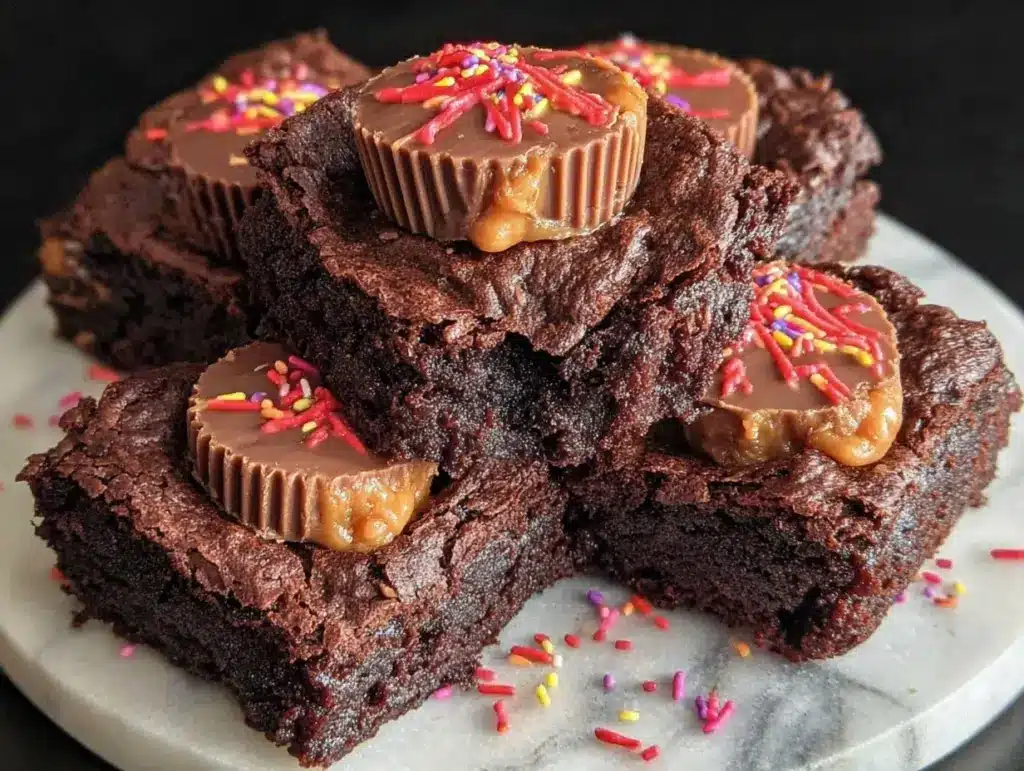
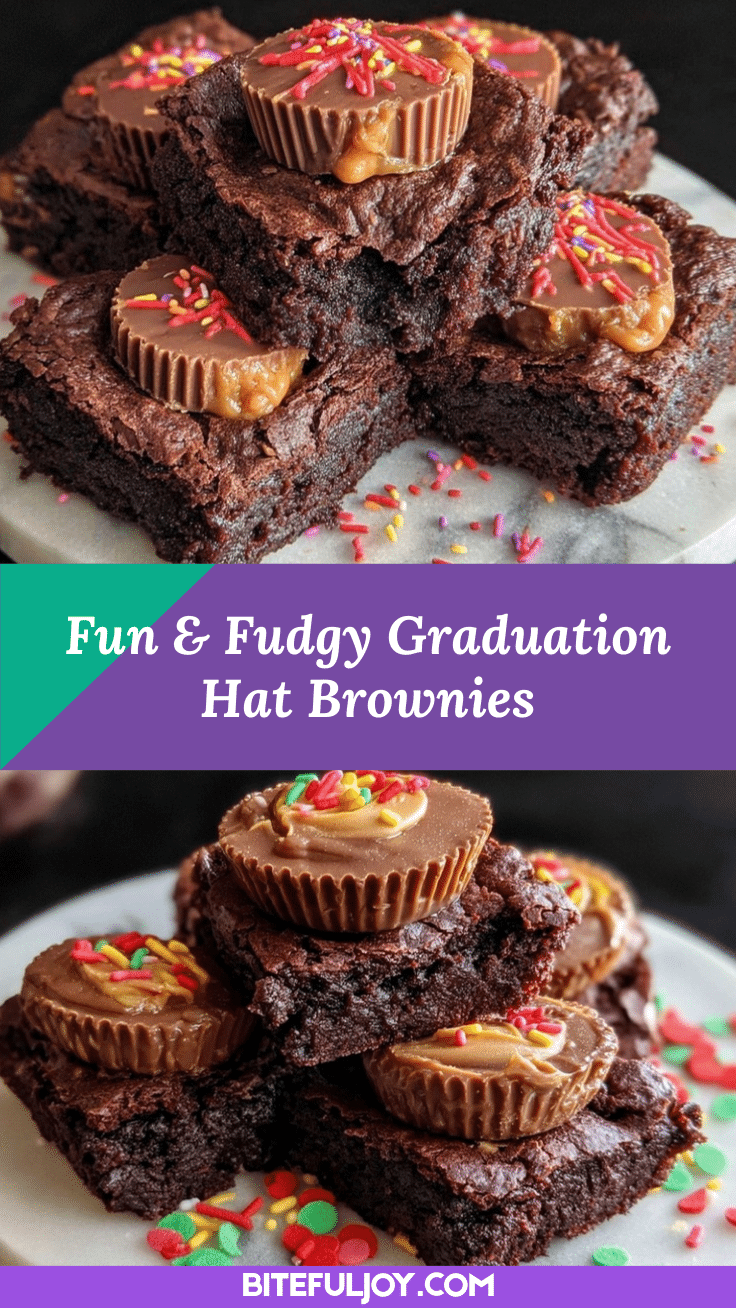
Let me just say, the smell of rich chocolate wafting through my kitchen as these fudgy graduation hat brownies bake is truly something else. It’s the kind of aroma that makes you stop mid-task, close your eyes, and grin—because, honestly, you know a celebration is coming. The first time I made these brownies, it was for my cousin’s graduation party. I had a lightbulb moment staring at a stack of peanut butter cups and thought, “Why not turn them into the cutest edible graduation hats?” The result? A tray full of chocolatey, peanut-buttery treats that had everyone reaching for seconds (and, let’s be honest, thirds).
These brownies are pure, nostalgic comfort, with a fudgy texture that feels like a warm hug after a long day. I remember baking with my grandma when I was knee-high to a grasshopper; she always insisted on using real butter and the darkest cocoa powder. That’s the kind of tradition I carry into these brownies. If you’ve ever tried to make festive treats that end up looking more “Pinterest fail” than “Pinterest win,” trust me—these are dangerously easy to decorate, and the results are adorable every single time.
My family couldn’t stop sneaking them off the cooling rack (and I can’t really blame them). Whether you’re whipping up a batch for a graduation party, gifting them to a proud grad, or just looking to brighten up your social feed, these fudgy graduation hat brownies are the showstopper you didn’t know you needed. I’ve tested this recipe more times than I care to admit (all in the name of research, of course). It’s become a staple at every family gathering and celebration. You’re going to want to bookmark this one—it’s the kind of recipe that feels special but is simple enough to make again and again.
Why You’ll Love This Recipe
When it comes to dessert, I’ve whipped up more brownies than I can count—at bake sales, sleepovers, even for the occasional midnight craving. These fudgy graduation hat brownies with peanut butter cups are the result of trial, error, and lots of happy taste testers. Here’s why you’ll fall head over heels for this recipe:
- Quick & Easy: Ready in under 45 minutes, which means less waiting and more celebrating!
- Simple Ingredients: No need for a fancy grocery run—you probably have everything in your pantry right now.
- Perfect for Parties: These treats are made for graduation parties, school events, or even a fun baking day with the kids.
- Crowd-Pleaser: Chocolate lovers and peanut butter fans unite—these brownies always get rave reviews from everyone, even picky eaters.
- Unbelievably Delicious: Fudgy in the middle, chewy on the edges, with a creamy peanut butter cup surprise in every bite.
What sets these brownies apart? It’s that perfect balance of gooey chocolate and smooth peanut butter, topped with playful decorations that make each piece feel like a mini celebration. I use a simple technique that guarantees a glossy top and a dense, rich center—no cakey brownies here! You know what? Sometimes it’s just about the little things, like using real vanilla or melting the butter just so, to make your brownies irresistible.
This isn’t just another brownie recipe—it’s your best version. The peanut butter cups add a creative twist, and the “graduation hat” assembly is a breeze (even for the less crafty among us). It’s comfort food, reimagined for special occasions, but just as cozy as the brownies you grew up loving. Whether you’re impressing guests or making a quiet night feel a little more festive, these brownies turn an ordinary moment into something memorable. Trust me, after one bite, you’ll understand why this recipe never lasts long in my house.
What Ingredients You Will Need
This recipe uses simple, wholesome ingredients to deliver bold flavor and that irresistible fudgy texture—without any unnecessary fuss. Most of these are pantry staples, and a few clever swaps can make them fit just about anyone’s dietary needs.
For the Brownie Base:
- 1/2 cup (115g) unsalted butter, melted (adds richness and fudginess)
- 1 cup (200g) granulated sugar (for classic sweetness and structure)
- 2 large eggs, room temperature (binds everything together—let them sit out for 20 minutes)
- 1 teaspoon pure vanilla extract (I love Nielsen-Massey for depth of flavor)
- 1/3 cup (40g) unsweetened cocoa powder (use Dutch-process for extra chocolatey punch)
- 1/2 cup (65g) all-purpose flour (King Arthur is my go-to for consistent results)
- 1/4 teaspoon salt (balances the sweetness—don’t skip!)
For the “Graduation Hat” Topping:
- 12 mini peanut butter cups (Reese’s or Trader Joe’s—up to you!)
- 12 chocolate squares (from a baking chocolate bar, or use Ghirardelli squares for a luxe touch)
- 12 mini M&M’s or candy-coated chocolates (for the button on top)
- 12 thin licorice strings or colored icing (for the tassel—get creative!)
Optional (for easier assembly or extra flavor):
- 1 tablespoon smooth peanut butter (to help the chocolate squares stick, if needed)
- Sprinkles or edible glitter (for extra pizzazz—especially if you want Pinterest-worthy photos)
Ingredient Tips & Substitutions:
- Gluten-Free: Swap in a 1:1 gluten-free flour blend—Bob’s Red Mill works well here.
- Dairy-Free: Use vegan butter and dairy-free chocolate squares.
- Nut-Free: Use sunflower butter cups instead of peanut butter cups.
- Seasonal Twist: In summer, swap the peanut butter cups for mini caramel cups or fresh berries.
Honestly, the ingredient list is flexible. If you run out of vanilla, a touch of almond extract can work in a pinch. And for the chocolate squares, you can use any flat chocolate—just aim for something sturdy enough to hold its shape. These brownies don’t require anything fancy, just a bit of love and some pantry magic!
Equipment Needed
- 8×8-inch (20×20 cm) baking pan (metal pans make fudgier brownies; glass pans may require a couple extra minutes baking)
- Parchment paper (makes removing brownies so much easier—trust me, I learned the hard way)
- Mixing bowls (one for wet, one for dry ingredients)
- Whisk and rubber spatula (for mixing and folding—wooden spoons work too)
- Measuring cups and spoons (accuracy matters for fudgy results!)
- Small offset spatula or butter knife (for spreading batter evenly)
- Microwave-safe bowl (to melt butter, if you don’t want to dirty a saucepan)
- Cooling rack (for picture-perfect brownies—and to keep the bottoms from steaming)
- Sharp knife (for clean, square cuts)
- Toothpicks or tweezers (helpful for assembling the hats neatly)
If you don’t have a parchment paper, greasing the pan really well works too, but lining it makes cleanup a breeze. I’ve used both glass and metal pans; just adjust baking times by a couple of minutes as needed. For mixing, a sturdy whisk is best, but even a fork will do in a pinch. If you’re on a budget, dollar store measuring cups work fine—just double-check your measurements for accuracy!
Preparation Method
-
Preheat the Oven:
Set your oven to 350°F (175°C). Line your 8×8-inch (20×20 cm) pan with parchment paper, leaving overhang on the sides for easy lifting. Grease lightly if you’re skipping the parchment.
-
Melt the Butter:
In a microwave-safe bowl, melt 1/2 cup (115g) unsalted butter until just liquefied (about 40 seconds). Let it cool for a minute—too hot and it’ll cook your eggs later!
-
Mix Wet Ingredients:
Add 1 cup (200g) sugar to the melted butter. Whisk until smooth and glossy. Crack in 2 large eggs and whisk for about 30 seconds, until the mixture is lightened in color. Stir in 1 teaspoon vanilla extract.
Note: Whisking well here helps create that shiny, crackly top.
-
Combine Dry Ingredients:
In a separate bowl, sift together 1/3 cup (40g) unsweetened cocoa powder, 1/2 cup (65g) all-purpose flour, and 1/4 teaspoon salt.
-
Make the Batter:
Gently fold the dry ingredients into the wet mixture with a spatula. Mix just until you see no dry streaks. Overmixing leads to dense brownies—so go easy!
Sensory cue: The batter should be thick, glossy, and smell deeply of chocolate.
-
Pour and Smooth:
Scrape the batter into your prepared pan and smooth the top with an offset spatula or butter knife. Tap the pan on the counter to release any air bubbles.
-
Bake:
Slide into the oven and bake for 20-25 minutes. Check at 20 minutes—insert a toothpick in the center; you want moist crumbs, not wet batter.
Warning: Overbaking dries out brownies quickly. Better to slightly underbake for that fudgy texture.
-
Cool Completely:
Let brownies cool in the pan for 10 minutes, then lift out using parchment paper and transfer to a rack. Wait until fully cool—assembly is much easier if they’re set.
-
Cut Into Squares:
Slice the cooled brownies into 12 squares (about 2×2 inches each). Wipe your knife between cuts for neat edges.
-
Prepare the Graduation Hats:
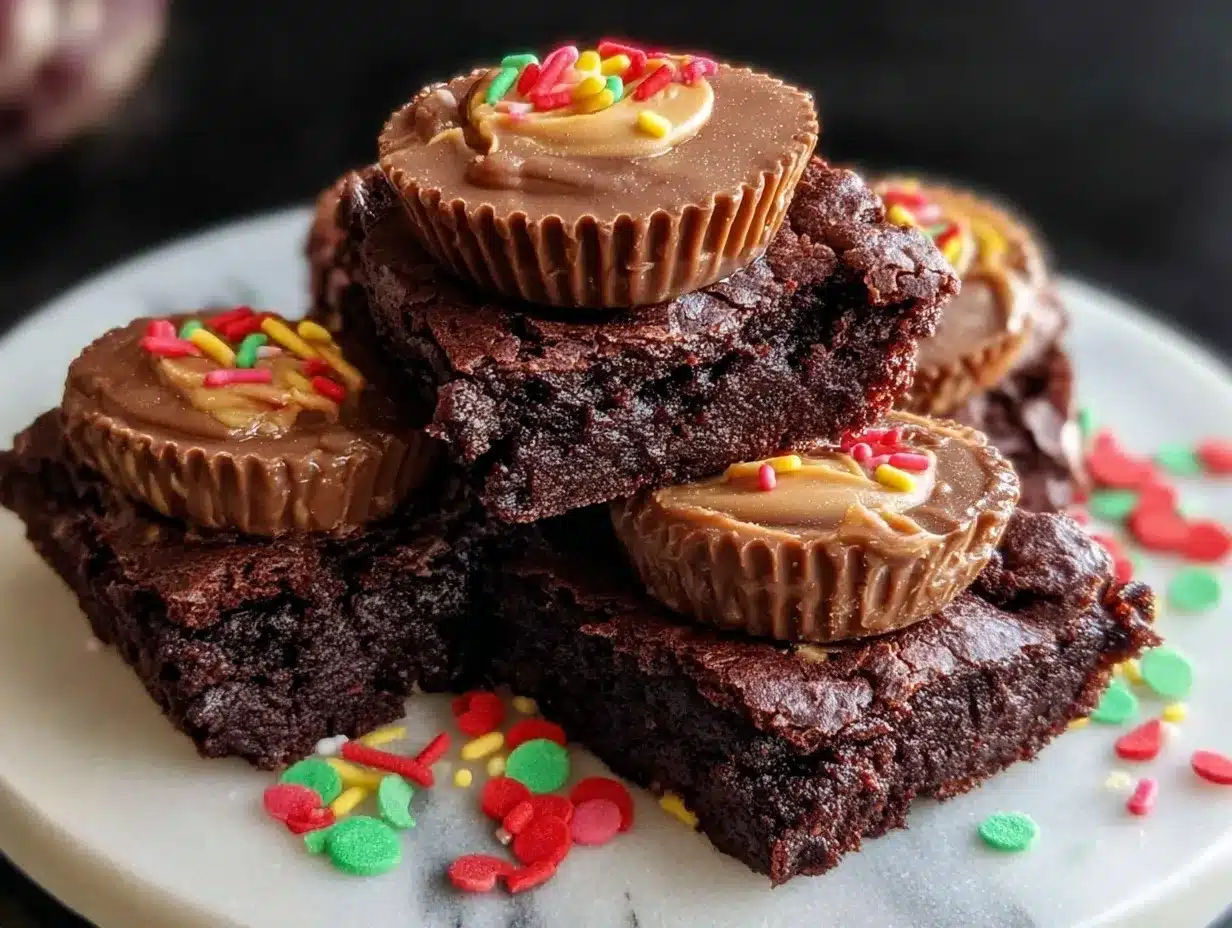
Place a mini peanut butter cup upside down in the center of each brownie square. Dab a tiny bit of melted chocolate or peanut butter on top, then press a chocolate square over the peanut butter cup. Add a mini M&M or candy button on top, and attach a licorice string or icing tassel.
Tip: Use a toothpick to help position the tassel neatly—don’t be afraid to get a little messy!
-
Final Touches:
Optional: Sprinkle with edible glitter or add extra candy for flair. Let everything set before serving (about 10 minutes).
That’s it! These fudgy graduation hat brownies are ready for their close-up. If something looks off, don’t sweat it—imperfections make them charming. And, honestly, they’ll disappear so fast nobody will notice a wonky tassel!
Cooking Tips & Techniques
Over the years, I’ve learned a few tricks to guarantee fudgy brownies and stress-free assembly. Here are my top tips:
- Don’t Overmix: Once you add the dry ingredients, mix gently. Overmixing makes brownies tough—fudgy is the goal here!
- Check Early: Ovens vary. Start checking at 20 minutes—moist crumbs on a toothpick mean perfect brownies. If you wait for a clean toothpick, they’ll be dry.
- Use Room-Temperature Eggs: This helps your batter blend smoothly and bake evenly. Cold eggs can make the butter seize up (I’ve made that mistake more than once).
- Assembly Hack: If your chocolate squares slide off the peanut butter cups, “glue” them with a dab of melted chocolate or peanut butter. Works every time!
- Clean Cuts: Wipe your knife between slices. This keeps your brownies looking sharp—especially important for parties or photos.
- Multitasking: While brownies bake, prep your toppings. That way, you’re ready to assemble as soon as they’re cool.
- Consistency: Stick with the same brands for butter and cocoa. I’ve found that switching brands can subtly change the texture and flavor—sometimes for the better, but not always!
I once thought baking brownies was foolproof—until I ended up with a batch that was more cake than fudge. Lesson learned: watch your bake time and don’t be afraid to trust your senses. If it smells amazing and looks just set, it’s probably ready. These little tips make all the difference between “pretty good” and “wow, you made these?!”
Variations & Adaptations
If you want to put your own spin on these fudgy graduation hat brownies, here are some ideas:
- Gluten-Free: Use a 1:1 gluten-free flour blend. I’ve tried Bob’s Red Mill, and it keeps the brownies just as fudgy.
- Vegan: Swap in vegan butter, flax eggs (1 tablespoon ground flaxseed + 2.5 tablespoons water per egg), and dairy-free chocolate. The texture stays surprisingly close to the original.
- Nut-Free: Replace peanut butter cups with sunflower seed butter cups or caramel-filled chocolates for the hat base.
- Seasonal Twist: For spring, use pastel M&M’s and colored icing tassels. In winter, sprinkle crushed peppermint over the hats for a festive look.
- Flavor Boost: Stir in 1/2 cup (90g) chocolate chips or swirl in a little raspberry jam before baking for a fruity surprise.
- Different Cooking Methods: If you prefer chewier brownies, bake in a muffin tin for individual “hat” brownies—just reduce the bake time to 16-18 minutes.
Last summer, I tried caramel cups instead of peanut butter cups—big hit! My niece, who’s allergic to peanuts, loved them. You can really make these brownies fit just about any theme or dietary need. Don’t be afraid to experiment; sometimes the best treats come from happy accidents.
Serving & Storage Suggestions
These fudgy graduation hat brownies are best served at room temperature. Arrange them on a platter with the “hats” facing up—trust me, they’ll steal the show at any graduation party or potluck.
Pair with a glass of ice-cold milk, coffee, or even a celebratory punch. If you’re making a big spread, these brownies go great alongside fruit platters, cheese boards, or other finger foods.
To store, place brownies in an airtight container and keep at room temperature for up to 3 days. If you need to make them ahead, refrigerate for up to 5 days—just let them come to room temp before serving for best texture. Want to freeze them? Wrap each brownie tightly in plastic wrap and freeze for up to 2 months. Thaw overnight in the fridge.
Reheating is easy: microwave for 10 seconds, or let sit at room temperature for 30 minutes. The flavors actually deepen after a day or two, so leftovers (if you have any) are just as good!
Nutritional Information & Benefits
Each fudgy graduation hat brownie (with peanut butter cup topping) is approximately:
- Calories: 240
- Fat: 14g
- Saturated Fat: 7g
- Carbohydrates: 28g
- Protein: 4g
- Sugar: 21g
Key ingredients like cocoa powder provide antioxidants, while peanut butter cups add a little protein. If you use a gluten-free flour blend or vegan substitutes, they can fit a range of dietary preferences. Watch out for peanut and dairy allergies—easy swaps are listed above.
From a wellness perspective, these brownies are a treat—definitely special occasion food. They’re rich, satisfying, and perfect for sharing, which is how I like to enjoy dessert: surrounded by friends and family!
Conclusion
If you’re searching for a fun, festive treat that’s easy to make and guaranteed to wow your guests, these fudgy graduation hat brownies with peanut butter cups are the answer. They’re rich, chocolatey, and as cute as can be—perfect for celebrating milestones or just making a regular day feel a little more special.
Customize them to suit your taste, dietary needs, or the season. I love this recipe because it’s a little nostalgic, a little creative, and always delicious. Honestly, nothing beats the look on someone’s face when they see (and taste) these for the first time.
Have you tried these brownies? Share your thoughts, tips, or creative twists in the comments below! Save, share, or pin this recipe for your next celebration. Remember, baking is about making memories—so have fun, get messy, and enjoy every bite!
FAQs
Can I use boxed brownie mix for this recipe?
Yep! If you’re short on time, a boxed mix works just fine. Just bake according to package instructions, then follow the assembly steps for the graduation hats.
Do fudgy graduation hat brownies need to be refrigerated?
Nope—room temperature is perfect for up to 3 days. If your kitchen is warm, you can refrigerate them to keep the chocolate toppings firm.
Can I make these brownies gluten-free?
Absolutely! Use a 1:1 gluten-free flour blend in place of regular flour. Check your peanut butter cups and chocolate squares for gluten, too.
What if I don’t have peanut butter cups?
No worries! Use mini caramel cups, marshmallows, or even a dollop of frosting as the “base” for each hat.
How do I keep the chocolate squares from sliding off the peanut butter cups?
Use a dab of melted chocolate or peanut butter as “glue.” Hold for a few seconds until set—it works like a charm!
Pin This Recipe!
Fudgy Graduation Hat Brownies Recipe Easy Peanut Butter Cup Treats
Rich, fudgy brownies topped with adorable peanut butter cup ‘graduation hats’—a festive, crowd-pleasing treat perfect for parties and celebrations. Easy to make, irresistibly chocolatey, and customizable for dietary needs.
- Prep Time: 15 minutes
- Cook Time: 25 minutes
- Total Time: 40 minutes
- Yield: 12 brownies 1x
- Category: Dessert
- Cuisine: American
Ingredients
- 1/2 cup unsalted butter, melted
- 1 cup granulated sugar
- 2 large eggs, room temperature
- 1 teaspoon pure vanilla extract
- 1/3 cup unsweetened cocoa powder (Dutch-process preferred)
- 1/2 cup all-purpose flour
- 1/4 teaspoon salt
- 12 mini peanut butter cups
- 12 chocolate squares (from a baking chocolate bar or Ghirardelli squares)
- 12 mini M&M’s or candy-coated chocolates
- 12 thin licorice strings or colored icing
- 1 tablespoon smooth peanut butter (optional, for assembly)
- Sprinkles or edible glitter (optional, for decoration)
Instructions
- Preheat oven to 350°F (175°C). Line an 8×8-inch baking pan with parchment paper, leaving overhang for easy lifting. Grease lightly if not using parchment.
- In a microwave-safe bowl, melt butter until just liquefied (about 40 seconds). Let cool for 1 minute.
- Add sugar to melted butter and whisk until smooth and glossy. Add eggs and whisk for about 30 seconds until lightened in color. Stir in vanilla extract.
- In a separate bowl, sift together cocoa powder, flour, and salt.
- Gently fold dry ingredients into wet mixture with a spatula until just combined and no dry streaks remain.
- Scrape batter into prepared pan and smooth the top. Tap pan on counter to release air bubbles.
- Bake for 20-25 minutes. Check at 20 minutes—insert a toothpick in the center; you want moist crumbs, not wet batter.
- Let brownies cool in the pan for 10 minutes, then lift out using parchment and transfer to a cooling rack. Wait until fully cool.
- Slice cooled brownies into 12 squares (about 2×2 inches each). Wipe knife between cuts for neat edges.
- Place a mini peanut butter cup upside down in the center of each brownie square. Dab a tiny bit of melted chocolate or peanut butter on top, then press a chocolate square over the peanut butter cup. Add a mini M&M or candy button on top, and attach a licorice string or icing tassel.
- Optional: Sprinkle with edible glitter or add extra candy for flair. Let everything set before serving (about 10 minutes).
Notes
For gluten-free brownies, use a 1:1 gluten-free flour blend. Vegan and nut-free adaptations are possible with swaps listed above. Don’t overmix the batter for maximum fudginess. Use room-temperature eggs for best texture. Wipe your knife between cuts for clean edges. Store brownies in an airtight container at room temperature for up to 3 days, or refrigerate for up to 5 days. Freeze for up to 2 months.
Nutrition
- Serving Size: 1 brownie (1/12 of r
- Calories: 240
- Sugar: 21
- Sodium: 90
- Fat: 14
- Saturated Fat: 7
- Carbohydrates: 28
- Fiber: 2
- Protein: 4
Keywords: brownies, graduation, peanut butter cup, chocolate, party dessert, easy brownies, fudgy brownies, celebration treats, kid-friendly, festive baking


