
The moment you open the freezer and catch a glimpse of these Fluffy Cool Whip Candy Squares, it’s like stepping into a sweet winter wonderland—honestly, the creamy vanilla scent mixed with a hint of chocolate sends my memory straight to grandma’s kitchen, where holiday treats were always front and center. The first time I made these squares, I was standing in my tiny apartment, craving something fun and festive without the fuss of complicated candy-making. Let’s face it, some recipes require a candy thermometer, but this one? Dangerously easy and absolutely irresistible.
Imagine biting into a cloud—soft, sweet, and impossibly light—mixed with the gentle crunch of chocolate and colorful sprinkles. The kind of moment where you pause, take a deep breath, and just smile because you know you’re onto something truly special. Years ago, my mom would whip up batches of candy for every holiday, but these squares? They’re the ones my family can’t help but sneak from the tray before they’re even set. (Seriously, I have to hide a few in the back of the freezer for myself!)
Whether you’re knee-high to a grasshopper or the official dessert person for your family gatherings, these candy squares are pure, nostalgic comfort. I stumbled upon the idea on a rainy weekend, trying to recreate a treat from a bake sale that stuck in my mind for years. What I wish I’d known then: you don’t need fancy ingredients, just Cool Whip, your favorite chocolate, and a few pantry staples. It’s perfect for potlucks, gifting, or brightening up your Pinterest holiday board. My friends rave about them, and honestly, after multiple rounds of “research” (taste-testing, of course), this recipe is now a staple—feels like a warm hug every single time. You’re going to want to bookmark this one.
Why You’ll Love This Recipe
When it comes to easy holiday treats, these Fluffy Cool Whip Candy Squares have earned their place on my festive must-make list. After testing dozens of quick candy recipes (and a few messy mishaps!), I can say with confidence that this is the kind of dessert that brings smiles without stress. Here’s why you’ll keep coming back to this recipe every season:
- Quick & Easy: Comes together in under 20 minutes (plus chilling time)—no stove, no candy thermometer, just simple steps.
- Simple Ingredients: You probably have most of these in your fridge and pantry already. No wild goose chases at the grocery store!
- Perfect for Holiday Celebrations: These squares are a hit at cookie swaps, office parties, and as sweet surprise gifts for neighbors.
- Crowd-Pleaser: Kids love the colorful sprinkles (and the fluffy texture), adults appreciate the nostalgic comfort.
- Unbelievably Delicious: The combo of airy Cool Whip and rich chocolate is next-level. Not too sweet, just perfectly balanced.
What sets this Fluffy Cool Whip Candy Squares recipe apart? Well, for starters, there’s no tricky melting or tempering—just a gentle folding of ingredients. I use a secret step: letting the Cool Whip sit for a minute to soften, which keeps the texture cloud-like and helps everything blend smoothly. Unlike traditional fudge or bark, these squares have a melt-in-your-mouth softness, with just enough chocolate crunch to keep things interesting. You can swap in white chocolate, add crushed peppermint, or toss in some festive sprinkles for a creative twist. It’s my best version because it’s foolproof, flexible, and never fails to impress.
This recipe isn’t just another holiday treat—it’s the kind that makes you close your eyes after the first bite and savor the cozy flavors. It’s comfort food made easier, lighter, and more fun. Whether you want to wow your guests or just treat yourself on a chilly evening, these squares always deliver. If you’re looking for a Pinterest-friendly, stress-free dessert, you’re in the right place!
What Ingredients You Will Need
This recipe uses simple, wholesome ingredients to deliver bold flavor and a satisfying texture without the kitchen chaos. Most are pantry staples, and you’ve probably got them on hand. Plus, there’s plenty of room to customize based on your preferences or what’s in season.
- For the Fluffy Base:
- 1 container (8 oz / 226 g) Cool Whip (thawed in fridge, not melted—adds that signature fluffy texture!)
- 1 cup (120 g) powdered sugar (for structure and subtle sweetness)
- 1 tsp vanilla extract (I love Nielsen-Massey for pure flavor)
- For the Candy Layer:
- 2 cups (340 g) semi-sweet chocolate chips (Ghirardelli or Nestlé work great, but use your favorite)
- 2 tbsp (30 g) unsalted butter (softened, for smooth melting)
- For Topping (Optional but recommended):
- 1/4 cup (40 g) rainbow sprinkles (for color and crunch—Wilton jimmies are my go-to)
- 1/4 cup (30 g) crushed peppermint candies (swap in mini chocolate chips or chopped nuts if you like)
Ingredient Tips: If you want a lighter version, try using sugar-free Cool Whip and chocolate chips. For a dairy-free option, swap regular Cool Whip for non-dairy whipped topping and use vegan chocolate chips. Almond extract is a tasty substitute for vanilla if you want a different flavor profile. You can also change up the sprinkles for seasonal colors—red and green for Christmas, pastel for Easter, or dark chocolate shavings for a grown-up twist.
Substitution Suggestions: No powdered sugar? A blend of granulated sugar (pulse it in a food processor for a finer texture) works in a pinch. Butter can be swapped with coconut oil for a subtle tropical flavor. If you’re gluten-free, rest easy: all ingredients here are naturally gluten-free, but double-check your sprinkles and chocolate for hidden wheat. (Trust me, I’ve learned that lesson the hard way!) Feel free to get creative—these squares are super forgiving.
Equipment Needed
- 8×8-inch (20×20 cm) square baking pan (or similar size; glass or metal both work)
- Parchment paper for easy removal and clean-up
- Medium mixing bowl for the Cool Whip mixture
- Microwave-safe bowl for melting chocolate chips and butter (you could use a double boiler if you’re old-school)
- Silicone spatula for gentle folding and spreading (plastic works, but silicone is easier to clean)
- Offset spatula or butter knife for smoothing the top
- Measuring cups and spoons (accuracy helps keep your squares fluffy and balanced)
If you don’t have parchment paper, a light spritz of non-stick spray will work—just be careful when removing the squares. I’ve used both glass and metal pans and found that glass gives a softer edge, while metal crisps up the chocolate layer a bit more. For melting chocolate, the microwave is your best friend (just keep a close eye to avoid burning). If you’re on a budget, Dollar Store spatulas and bowls do the trick—these squares aren’t fussy about tools. Just keep your mixing bowls dry and clean for best results!
Preparation Method

- Prep Your Pan: Line your 8×8-inch (20×20 cm) baking pan with parchment paper, leaving a little overhang on the sides for easy lifting. If you don’t have parchment, use non-stick spray and cross your fingers.
- Make the Fluffy Base: In a medium bowl, gently fold together 1 container (8 oz / 226 g) Cool Whip, 1 cup (120 g) powdered sugar, and 1 tsp vanilla extract. Use a silicone spatula and go slow—overmixing can deflate the fluffiness. The mixture should look creamy and light, almost like a cloud.
- Spread the Base: Transfer the mixture to your prepared pan. Use an offset spatula or butter knife to gently spread it into an even layer. Don’t press too hard! You want to keep that airy texture.
- Melt the Chocolate: In a microwave-safe bowl, combine 2 cups (340 g) semi-sweet chocolate chips and 2 tbsp (30 g) unsalted butter. Microwave in 30-second bursts, stirring each time, until smooth and glossy (about 90 seconds total). If you prefer, melt over a double boiler—just keep water out of the chocolate.
- Layer the Chocolate: Pour the melted chocolate mixture over the Cool Whip layer. Use a spatula to spread gently. Don’t worry if the layers mix a little; it’ll look pretty when sliced!
- Add Toppings: Sprinkle 1/4 cup (40 g) rainbow sprinkles and/or 1/4 cup (30 g) crushed peppermint candies on top. Press very lightly so they stick. (This is where kids love to help!)
- Chill: Cover the pan with foil or plastic wrap and freeze for at least 2 hours, or until firm. Overnight is even better.
- Slice & Serve: Lift the candy slab out using the parchment edges. Cut into 16 squares (or smaller bites if you prefer). Wipe your knife between cuts for clean edges. Serve straight from the freezer for best texture.
Prep Notes: If your Cool Whip is too soft, pop it back in the fridge for 10 minutes before mixing. Chocolate can seize if overheated—go slow and stir often. If the chocolate layer cracks when slicing, let the pan sit at room temp for 3-5 minutes before cutting. Don’t worry if the squares aren’t perfect—rustic is part of the charm!
Efficiency Tips: I like to prep the pan and toppings while the chocolate melts. If you’re making a double batch, use two pans side by side. For gifting, wrap squares in wax paper and tie with ribbon—so cute for holiday baskets!
Cooking Tips & Techniques
After a few candy-making blunders (like chocolate that seized up and Cool Whip that got melty), I’ve picked up some tricks to make these Fluffy Cool Whip Candy Squares turn out perfect every time.
- Don’t Overmix: Gentle folding keeps the Cool Whip light. If you beat it too much, you’ll lose that fluffy texture (I learned the hard way—ended up with a sticky mess!).
- Chocolate Melting: Always melt chocolate chips with butter in short intervals. Stir every 30 seconds—burnt chocolate is sad and wastes good ingredients.
- Layering Technique: Spread the chocolate quickly before it starts to set. If the chocolate is too thick, add an extra teaspoon of butter to loosen it up.
- Chilling Time: Don’t rush the freezing. Two hours is minimum, but overnight gives the best texture. If you’re in a hurry, pop the pan in the coldest part of your freezer.
- Cutting Clean Squares: Run your knife under hot water, dry it, and slice. Wipe after each cut for those Instagram-worthy edges.
- Consistency Tips: Measure ingredients carefully—too much sugar makes the base gritty, too little makes it sticky. Keep your bowls dry; water and chocolate do not mix.
I’ve had batches that turned out too soft because the Cool Whip wasn’t fully thawed, or chocolate layers that separated because I didn’t chill long enough. Don’t stress—candy is forgiving, and imperfections taste just as good. Multitasking helps: prep toppings while the base sets, and always have extra sprinkles on hand for last-minute flair!
Variations & Adaptations
The best part about Fluffy Cool Whip Candy Squares? You can switch things up for any holiday, dietary need, or flavor craving. Here are some ways to make them your own:
- Dietary Swaps: Use non-dairy whipped topping and vegan chocolate chips for a dairy-free version. Opt for sugar-free chocolate and Cool Whip if you’re watching carbs.
- Seasonal Flavors: Add 1/2 tsp peppermint extract to the base for a wintery twist, or stir in lemon zest for a bright spring treat. Swap sprinkles for chopped dried cranberries or mini marshmallows.
- Flavor Combos: Use white chocolate chips instead of semi-sweet, or swirl peanut butter with the melted chocolate for a nutty layer. Crushed toffee bits or coconut flakes are great toppings, too.
If you prefer softer squares, let them chill for just 1 hour. For firmer bites, freeze overnight. Got allergies? Omit nuts and choose allergen-friendly chocolate. I once made a batch with orange zest and dark chocolate—my husband said it tasted like a creamsicle! Feel free to experiment—these squares are endlessly adaptable.
Serving & Storage Suggestions
Serve Fluffy Cool Whip Candy Squares straight from the freezer for the fluffiest texture—just let them sit for 2-3 minutes before eating. Arrange on a festive platter with extra sprinkles or a dusting of powdered sugar for holiday sparkle.
Pair with hot cocoa, coffee, or a glass of milk (classic, you know!). These squares are perfect as part of a dessert buffet or tucked into holiday treat boxes for gifting. For a fun twist, thread squares onto wooden skewers and serve as candy pops at parties.
To store, keep squares in an airtight container in the freezer for up to 2 weeks. Layer parchment between stacks to prevent sticking. For fridge storage, they’ll last 4-5 days (though the texture will be a bit softer). To reheat, let sit at room temp for 5 minutes—do not microwave, or the chocolate will melt. The flavors deepen after a day in the freezer, so feel free to make ahead. Honestly, they never last long in my house!
Nutritional Information & Benefits
| Per Square | Amount |
|---|---|
| Calories | 120 |
| Fat | 7g |
| Carbs | 15g |
| Protein | 1g |
Cool Whip adds a fluffy, lower-calorie base, making these squares lighter than traditional fudge or bark. Chocolate chips bring antioxidants and a satisfying crunch. If you use sugar-free or non-dairy options, these can fit into low-carb or dairy-free diets. All ingredients are gluten-free, but check your toppings for hidden allergens. (Sprinkles and chocolate sometimes sneak wheat in!) I love that these squares feel indulgent but aren’t heavy—perfect for enjoying a treat without going overboard. They’re easy to portion, so you can share or savor as you like!
Conclusion
If you’re searching for an easy, festive treat that’s sure to become a holiday favorite, Fluffy Cool Whip Candy Squares are calling your name. They’re quick, versatile, and absolutely delicious—what more could you want? Customize the flavors, swap the toppings, and make them your own (I promise, nobody will complain about extra sprinkles!).
I love this recipe because it brings back memories of family celebrations and cheerful bake sales, but with way less effort and mess. Whether you’re making them for a crowd or just for yourself, these squares deliver pure comfort in every bite. If you try them, leave a comment below or share your favorite twist—I’m always looking for new ideas! Wishing you happy holidays and plenty of sweet moments.
Frequently Asked Questions
Can I make Fluffy Cool Whip Candy Squares ahead of time?
Absolutely! They freeze beautifully, so you can prep them days in advance. Just keep them in an airtight container for best texture.
Do I have to use Cool Whip, or can I substitute homemade whipped cream?
You can use homemade whipped cream, but the texture will be softer and may not hold up as well in the freezer. Non-dairy whipped toppings work too!
What’s the best way to cut the squares cleanly?
Let the pan sit at room temp for 2-3 minutes, then use a hot, dry knife. Wipe the blade between cuts for sharp edges.
Can I use different types of chocolate?
Yes! Try white, milk, or dark chocolate chips. Just melt with a bit of butter or coconut oil for a smooth layer.
Are these squares gluten-free?
Yes—just double-check your sprinkles and chocolate chips to make sure they’re gluten-free. Most brands are, but it never hurts to check the label.
Pin This Recipe!
Fluffy Cool Whip Candy Squares

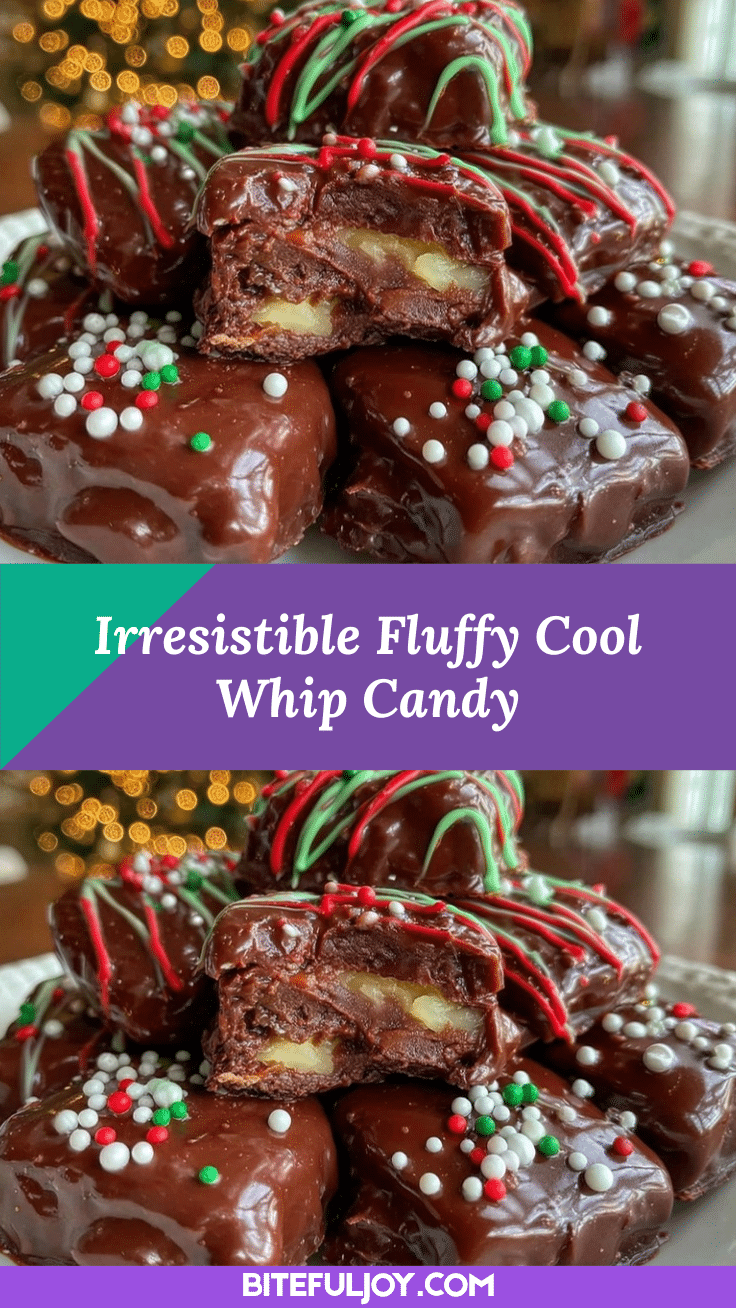
These Fluffy Cool Whip Candy Squares are a quick, festive, and irresistibly light treat featuring a creamy vanilla base, rich chocolate layer, and colorful sprinkles. Perfect for holidays, gifting, or anytime you crave a nostalgic, no-fuss dessert.
- Prep Time: 15 minutes
- Cook Time: 5 minutes
- Total Time: 2 hours 20 minutes
- Yield: 16 squares 1x
- Category: Dessert
- Cuisine: American
Ingredients
- 1 container (8 oz) Cool Whip, thawed
- 1 cup powdered sugar
- 1 teaspoon vanilla extract
- 2 cups semi-sweet chocolate chips
- 2 tablespoons unsalted butter, softened
- 1/4 cup rainbow sprinkles (optional)
- 1/4 cup crushed peppermint candies (optional)
Instructions
- Line an 8×8-inch square baking pan with parchment paper, leaving an overhang for easy lifting.
- In a medium bowl, gently fold together Cool Whip, powdered sugar, and vanilla extract using a silicone spatula until creamy and light. Do not overmix.
- Spread the Cool Whip mixture evenly into the prepared pan using an offset spatula or butter knife.
- In a microwave-safe bowl, combine chocolate chips and butter. Microwave in 30-second intervals, stirring each time, until smooth and glossy (about 90 seconds total). Alternatively, melt over a double boiler.
- Pour the melted chocolate mixture over the Cool Whip layer and gently spread with a spatula.
- Sprinkle rainbow sprinkles and/or crushed peppermint candies on top. Press lightly so they stick.
- Cover the pan with foil or plastic wrap and freeze for at least 2 hours, or overnight for best texture.
- Lift the slab out using the parchment edges. Cut into 16 squares, wiping the knife between cuts for clean edges.
- Serve straight from the freezer for best texture.
Notes
For best results, gently fold the Cool Whip mixture to keep it fluffy. Melt chocolate in short intervals to avoid burning. Let the pan sit at room temperature for a few minutes before slicing for cleaner cuts. Customize with different chocolates, extracts, or toppings. Store in the freezer for up to 2 weeks.
Nutrition
- Serving Size: 1 square
- Calories: 120
- Sugar: 13
- Sodium: 30
- Fat: 7
- Saturated Fat: 4
- Carbohydrates: 15
- Fiber: 1
- Protein: 1
Keywords: Cool Whip candy, holiday treats, easy dessert, no bake, chocolate squares, festive candy, freezer candy, kid friendly, gluten free dessert


