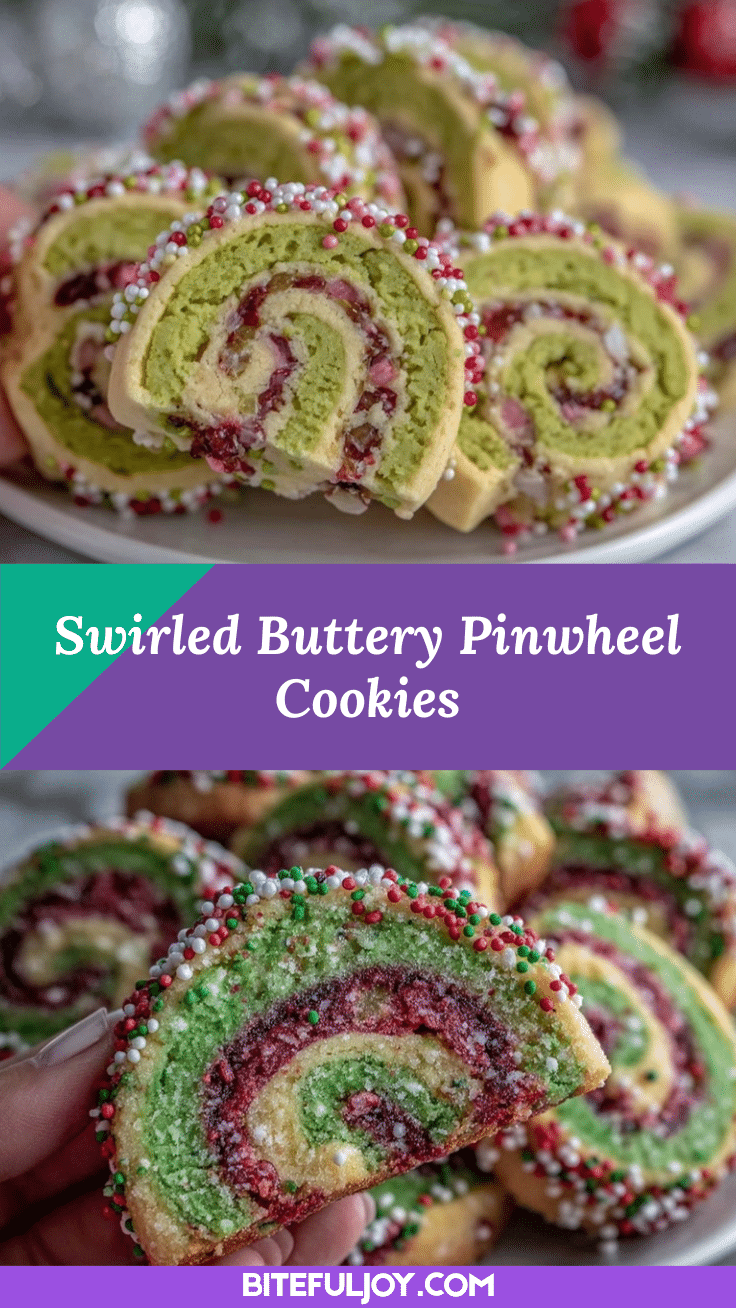
Introduction
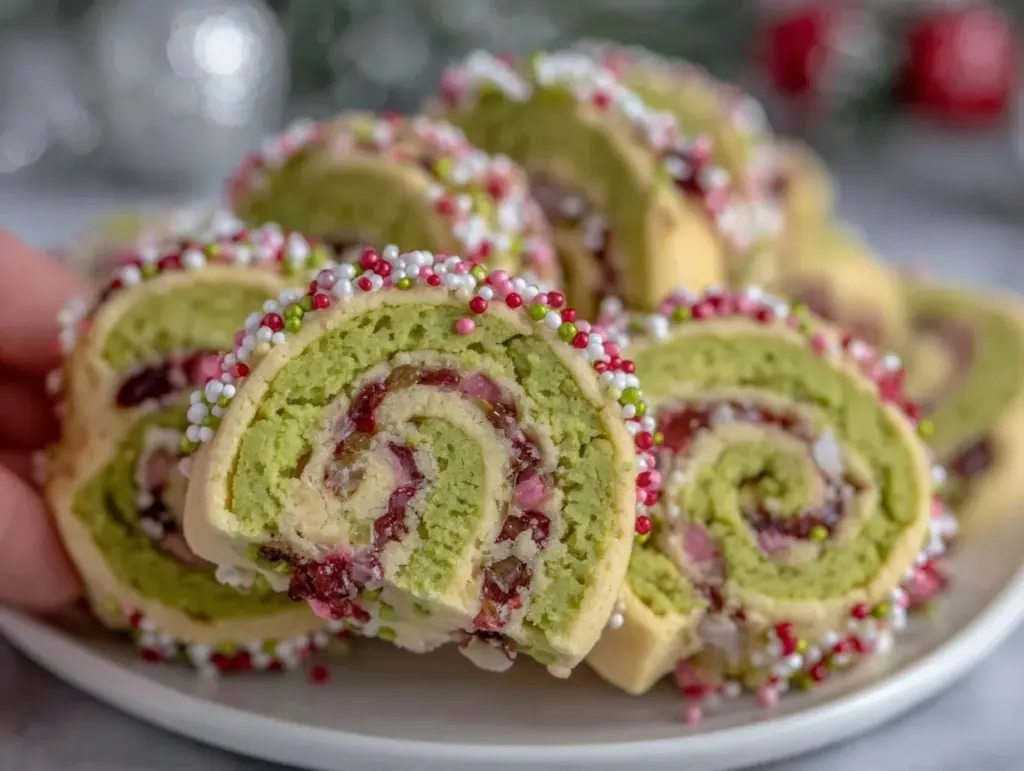
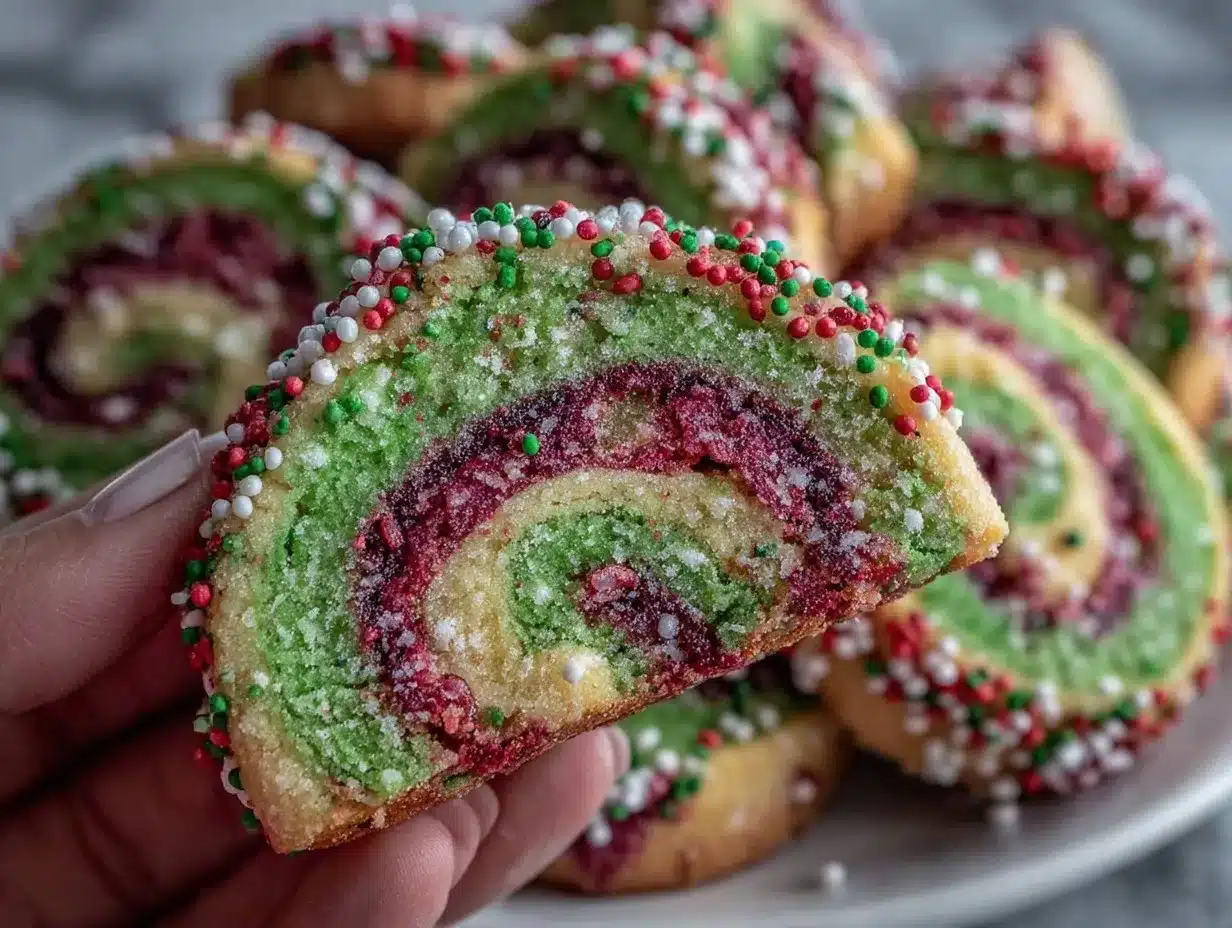
Let me tell you, the scent of buttery dough mingling with sweet vanilla and just a hint of almond wafting through my kitchen as I bake these Festive Pinwheel Cookies is downright irresistible. The swirls of red and green, each perfectly spiraled, look like something straight out of a storybook—honestly, it’s the kind of treat that makes you pause, admire your handiwork, and just smile because you know you’ve created a little holiday magic.
The first time I made these pinwheel cookies was on a snow-dusted December afternoon, years ago when I was knee-high to a grasshopper. I remember helping my grandma roll the dough, giggling as we tried to keep the colors from blending too much. She’d always say, “The more imperfect the swirl, the more love in the cookie!” That moment stuck with me, and now, every Christmas, these cookies are as much a tradition as trimming the tree.
I stumbled onto my own version one rainy weekend, determined to recreate the cheerful cookies I remembered from childhood bake sales. Honestly, I wish I’d figured out this easy method years ago—so much less fuss and still absolutely showstopping. My family couldn’t stop sneaking them off the cooling rack (you know, the usual suspects: my partner, the kids, even my mom when she thinks I’m not looking!). Let’s face it, these cookies aren’t just adorable—they’re dangerously easy and deliver pure, nostalgic comfort in every bite.
Whether you need a sweet treat for your kids’ holiday party, want to brighten up your Pinterest cookie board, or just crave a little Christmas cheer, these Festive Pinwheel Cookies fit the bill. After baking (and taste-testing) them more times than I care to admit (in the name of research, of course), they’ve become a staple for family gatherings and edible gifting. They feel like a warm hug—seriously, you’re going to want to bookmark this one for every holiday season!
Why You’ll Love These Festive Pinwheel Cookies
There’s just something about a cookie that’s as fun to look at as it is to eat. My experience baking Festive Pinwheel Cookies spans dozens of batches, a few kitchen mishaps, and plenty of happy faces around the table. Here’s why you’ll fall head-over-heels for this recipe:
- Quick & Easy: Comes together in under an hour (plus a little chilling), so you can whip up a batch even on busy December days.
- Simple Ingredients: No fancy grocery trips—just pantry staples and everyday baking basics you probably already have on hand.
- Perfect for Christmas Gatherings: These cookies are a hit at school parties, cookie swaps, and cozy family movie nights. They bring instant holiday cheer!
- Crowd-Pleaser: Kids love making them, adults love eating them. I can’t count the times I’ve had requests for the recipe after sharing these at potlucks.
- Unbelievably Delicious: Buttery, tender, with just the right balance of sweetness and a melt-in-your-mouth texture. The almond and vanilla combo is honestly out of this world.
What sets my version apart? First, the dough is super forgiving (trust me, I’ve had my share of “creative” swirls), and the colors stay vibrant without bleeding. I blend in a touch of almond extract for a flavor twist that elevates them above your basic sugar cookie. Plus, it’s flexible—swap in different colors for other holidays or flavors if you like.
These cookies aren’t just another Pinterest pretty—each bite is full of comfort, fun, and a hint of nostalgia. They’re the kind that makes you close your eyes and savor the moment. Perfect for impressing guests (with zero stress), or just making a simple afternoon feel special. Honestly, if you’re looking for an easy Christmas recipe kids love, this is the one.
What Ingredients You Will Need
This Festive Pinwheel Cookies recipe uses simple, wholesome ingredients to deliver bold flavor and a picture-perfect swirl. Most of what you need is probably already in your pantry, and if not, substitutions are easy. Here’s what you’ll grab:
- For the Dough:
- 2 ¾ cups (345g) all-purpose flour (gives the cookies structure)
- 1 cup (227g) unsalted butter, softened (adds richness and tender texture)
- 1 cup (200g) granulated sugar (classic sweetness)
- 1 large egg, room temperature (binds everything together)
- 2 teaspoons vanilla extract (for warmth and depth)
- ½ teaspoon almond extract (optional, but highly recommended—it’s my secret for festive flavor)
- ½ teaspoon baking powder (a little lift, keeps cookies soft)
- ½ teaspoon salt (balances the sweetness)
- For the Swirl:
- Red gel food coloring (for vibrant holiday color)
- Green gel food coloring (doesn’t bleed as much as liquid)
- Optional Add-Ins:
- Colored sprinkles (for rolling, if you want extra festive edges)
- 1 tablespoon milk (optional, if dough feels dry—you know, sometimes the weather messes with baking!)
- Ingredient Tips:
- I usually stick with King Arthur or Bob’s Red Mill flour for consistent results.
- For butter, I prefer Plugrá or Kerrygold when I want extra richness, but store brand works just fine.
- If you need gluten-free, swap the flour for a 1:1 gluten-free blend (like Cup4Cup).
- Dairy-free? Use a plant-based butter like Earth Balance and sub the milk with almond or oat milk.
- Egg-free? Try 3 tablespoons aquafaba or a flax egg (1 tablespoon flaxseed meal mixed with 2 ½ tablespoons water).
- Gel food coloring gives the brightest results—liquid coloring works, but the colors aren’t as bold.
- If almond extract isn’t your thing, just bump up the vanilla or try lemon extract for a citrus twist.
Everything comes together in a way that’s festive and fun, especially when kids help with the swirling. In summer, swap in pastel colors for a birthday party, or use cocoa powder to make chocolate pinwheels for a twist. Honestly, these ingredients make holiday baking a breeze.
Equipment Needed
You don’t need a fancy kitchen to make these Festive Pinwheel Cookies—just a few basics and a little holiday spirit.
- Electric mixer (stand or handheld—stand mixers make dough mixing easier, but a good old hand mixer works fine)
- Mixing bowls (medium and large)
- Measuring cups and spoons (accuracy matters for cookies!)
- Rolling pin (a must for even dough—if you don’t have one, use a sturdy water bottle in a pinch)
- Parchment paper (for rolling and baking—keeps things tidy and prevents sticking)
- Plastic wrap (chilling the dough helps with clean slicing)
- Sharp knife or dough scraper (for slicing the cookies cleanly)
- Baking sheets (heavy-duty ones bake more evenly; I use cheap ones lined with parchment and they work fine)
- Wire cooling rack (for keeping cookies crisp after baking)
If you don’t have a stand mixer, don’t stress—a hand mixer and some elbow grease do the trick. For rolling, I’ve used everything from vintage wooden pins to silicone ones (the silicone is easier to clean, by the way). A dough scraper is handy for getting neat slices, but a sharp chef’s knife works too. Parchment paper is my best friend for sticky dough—makes cleanup a breeze. Budget-friendly tip: Dollar store mixing bowls and measuring cups work just as well as fancy brands!
Keep your rolling pin dusted with flour to prevent sticking, and always wash and dry equipment right after baking to keep things in tip-top shape for next time.
Preparation Method
This step-by-step guide makes baking Festive Pinwheel Cookies easy, even for little helpers. You’ll want to chill the dough for best results, so plan ahead!
- Cream Butter & Sugar: In a large bowl, beat 1 cup (227g) softened unsalted butter with 1 cup (200g) granulated sugar until light and fluffy—about 2-3 minutes. The mixture should look pale and creamy. If it’s grainy, keep beating!
- Add Egg & Extracts: Beat in 1 large egg, 2 teaspoons vanilla extract, and ½ teaspoon almond extract (if using). Mix until fully combined—scrape the sides of the bowl once or twice.
- Sift Dry Ingredients: In a separate bowl, whisk together 2 ¾ cups (345g) flour, ½ teaspoon baking powder, and ½ teaspoon salt.
- Combine Wet & Dry: Gradually add dry ingredients to the butter mixture, mixing on low until a smooth dough forms. If the dough feels dry (sometimes winter air does this!), add up to 1 tablespoon milk. The dough should be soft but not sticky.
- Divide & Color: Split dough evenly into two bowls. Tint one half with red gel food coloring, one with green. Start with 2-3 drops and mix—add more until you hit your favorite holiday shade. If the color looks uneven, knead gently by hand (wear gloves if you want to avoid stained fingers).
- Roll Out Dough: Place each colored dough between two sheets of parchment paper. Roll each into a rectangle about ¼-inch thick (roughly 10×12 inches or 25×30 cm). Chill both sheets in the fridge for 20-30 minutes—this keeps the colors crisp and makes handling easier.
- Stack & Roll: Remove dough from fridge and peel off top parchment. Place the green dough on a clean surface, then carefully lay the red dough on top. Gently press together. Trim edges if needed for a neat rectangle.
- Form the Swirl: Starting from the long edge, roll up the dough tightly into a log—like a jelly roll. Use the parchment to help guide the roll, keeping the swirl tight. If cracks form, gently pinch dough to seal.
- Chill & Slice: Wrap the log in plastic wrap and chill for at least 1 hour (overnight is even better for perfect slices!). Preheat oven to 350°F (180°C) while dough chills.
- Slice Cookies: Using a sharp knife, slice log into ¼-inch (0.6cm) rounds. Wipe blade between cuts for clean swirls. If you want, roll edges in colored sprinkles for extra sparkle.
- Bake: Place cookies on parchment-lined baking sheets, spacing about 1 inch (2.5cm) apart. Bake for 8-10 minutes, until edges are set but centers are still soft. Cookies shouldn’t brown—watch closely!
- Cool: Remove from oven and let cookies cool on baking sheet for 5 minutes, then transfer to wire racks.
Troubleshooting Tips: If cookies spread too much, chill dough longer. If dough cracks while rolling, let it warm slightly. For vibrant colors, always use gel food coloring. If slicing is tough, pop the log in the freezer for 10 minutes—makes for cleaner cuts.
Personal Tip: Let kids help with coloring and rolling—they love seeing the swirl appear! And if you’re short on time, freeze dough logs for up to 2 weeks, then slice and bake when you need fresh cookies fast.
Cooking Tips & Techniques
Baking Festive Pinwheel Cookies can feel like magic—but a few pro tips make all the difference. Here’s what I’ve learned after years of holiday cookie-making:
- Chill Is Key: Always chill the dough before rolling and again before slicing. This keeps the colors from getting muddy and the swirls crisp. Honestly, I’ve skipped this step before and regretted it every time—sticky, misshapen cookies aren’t festive!
- Use Gel Food Coloring: Liquid colors can make dough too wet and pale. Gel gives bold color with less mess (trust me, I ruined a batch with liquid coloring once—it looked more like tie-dye than Christmas!).
- Roll Evenly: Uneven dough leads to lopsided cookies. I use guides (like chopsticks or rolling pin rings) for even thickness. If you don’t have those, just eyeball it and press gently.
- Slice With Confidence: A sharp knife or dough scraper will give you clean slices. If the dough is sticky, freeze the log for 10 minutes—makes for perfect rounds.
- Don’t Overbake: The cookies should be pale, with just set edges. Overbaking dries them out (been there, done that). Start checking at 8 minutes—every oven is different!
- Multitasking: While dough chills, clean up and prep toppings. Kids can help squeeze food coloring or lay out sprinkles. Baking is way more fun when everyone gets involved.
- Consistency Trick: If you want absolutely uniform cookies, roll dough between parchment and use a ruler to measure rectangles. But honestly, a little variation just adds homemade charm!
Even with a few mistakes, these cookies always turn out festive and delicious. And if you mess up a swirl, just call it “abstract Christmas art.” That’s baking with love!
Variations & Adaptations
One of the best things about Festive Pinwheel Cookies is how easily you can adapt them. Here are a few fun twists to suit every taste and need:
- Gluten-Free Version: Swap all-purpose flour for a 1:1 gluten-free baking blend. I’ve tried Cup4Cup and Bob’s Red Mill—both work great. The texture is a tad more delicate, but just as tasty.
- Dairy-Free Adaptation: Use plant-based butter and dairy-free milk. Earth Balance is my go-to for baking. The flavor is a smidge different but still buttery and delicious.
- Flavor Swaps: Change up the extracts—try peppermint for a cool, wintry twist or lemon for zesty spring pinwheels. You can even swirl in a thin layer of jam between dough layers for fruity cookies.
- Seasonal Colors: Instead of red and green, use blue and white for Hanukkah, pink and yellow for Easter, or black and orange for Halloween. The method is the same, just switch up the shades.
- Different Cooking Methods: If you’re short on oven space, slice and bake smaller batches in a toaster oven. Just keep a close eye—these bake quickly!
- Allergen-Friendly: For egg allergies, use a flax egg (1 tablespoon flaxseed meal + 2 ½ tablespoons water) or aquafaba. Works surprisingly well!
Last Christmas, I tried a chocolate-vanilla pinwheel version with cocoa powder replacing some flour in one half—big hit with the kids. You can also add orange zest for a citrusy punch. Customizing these cookies is half the fun—make them your own, and don’t be afraid to experiment!
Serving & Storage Suggestions
These Festive Pinwheel Cookies are best enjoyed fresh, but they’re also perfect for gifting and make-ahead holiday treats.
- Serving: Serve the cookies at room temperature, arranged on a pretty holiday platter. I love pairing them with hot cocoa or a festive punch. They look adorable in cookie tins or jars—great for teacher gifts!
- Presentation: Stack cookies in cellophane bags tied with ribbon for gifting. Layer with parchment in cookie boxes to keep swirls looking sharp.
- Storage: Store cookies in an airtight container at room temperature for up to 1 week. They stay soft and buttery—just as good on day five as day one.
- Freezing: Freeze dough logs (before slicing) for up to 2 months. Thaw slightly, slice, and bake fresh when needed. Baked cookies can also be frozen, layered with parchment, for up to 1 month—just let them come to room temp before serving.
- Reheating: If you want to warm up cookies, pop them in a low oven (300°F/150°C) for 3-4 minutes. The aroma is heavenly!
- Flavor Note: The almond and vanilla deepen over time—so cookies taste even richer a day or two after baking.
Honestly, these cookies are a lifesaver during the busy holiday rush. Make ahead, gift, or just snack on them as you wrap presents. They’re the kind that disappears fast, so stash a few for yourself!
Nutritional Information & Benefits
Here’s the scoop on the nutrition behind Festive Pinwheel Cookies (because, let’s face it, knowing what’s in our treats matters):
- Estimated per cookie (based on 36 cookies): 100 calories, 5g fat, 12g carbs, 1g protein, 6g sugar
- Key Ingredients: Butter provides healthy fats, while eggs add protein. Flour gives structure. Almond extract brings antioxidants and a lovely aroma.
- Dietary Considerations: You can make these gluten-free or dairy-free with simple swaps. Just be mindful of allergens—contains wheat, dairy, and eggs unless adapted.
- Allergen Info: Common allergens include wheat, dairy, eggs, and nuts (if using almond extract). Always check extract labels—some brands use synthetic flavors.
From a wellness perspective, these cookies are more about joy and tradition than nutrition—but I like to think a little homemade goodness is good for the soul. And with easy adaptations, everyone can join in (even those with food sensitivities).
Conclusion
If you’re searching for a Christmas recipe kids love, Festive Pinwheel Cookies truly hit the mark. They’re colorful, delicious, and fun to make—plus, they hold up beautifully on a holiday cookie tray or as edible gifts. The swirls are always a conversation starter, and the flavor never disappoints.
Don’t be afraid to mix up the colors, swap the flavors, or let your kids take the lead in rolling and slicing. There’s no “perfect” swirl—just the joy of baking together and making holiday memories. I love this recipe because it brings everyone into the kitchen, laughter and all, and reminds me of my own childhood Christmases.
If you try these Festive Pinwheel Cookies, let me know in the comments below! Share your own twists, photos, or holiday stories—honestly, nothing makes me happier than seeing your creations. Wishing you warmth, sweetness, and plenty of swirly cookies this season. Happy baking!
Frequently Asked Questions
Can I make Festive Pinwheel Cookies ahead of time?
Absolutely! You can prepare and chill the dough up to 2 days in advance, or freeze logs for several weeks. Just slice and bake when you’re ready for fresh cookies.
How do I prevent the colors from blending together?
Chill the dough well before stacking and rolling. Use gel food coloring for vibrant, distinct colors. If the dough feels sticky, add a bit more flour or chill longer.
What’s the best way to slice the cookie dough log?
Use a sharp knife or dough scraper and wipe between cuts for clean slices. If the log is too soft, pop it in the freezer for 10 minutes before slicing.
Can I make these cookies gluten-free or dairy-free?
Yes! Use a gluten-free baking blend in place of all-purpose flour, and substitute plant-based butter and milk for dairy-free cookies. The texture is slightly different, but the flavor still shines.
How long do Festive Pinwheel Cookies stay fresh?
Stored in an airtight container, they’ll stay soft and flavorful for up to a week. You can also freeze baked cookies for up to a month—just thaw and enjoy!
Pin This Recipe!
Festive Pinwheel Cookies: Easy Christmas Recipe Kids Love

Festive Pinwheel Cookies are buttery, tender sugar cookies swirled with vibrant red and green colors, perfect for holiday gatherings and edible gifting. This easy, kid-friendly recipe delivers nostalgic comfort and showstopping results every Christmas season.
- Prep Time: 30 minutes
- Cook Time: 10 minutes
- Total Time: 1 hour 40 minutes
- Yield: 36 cookies 1x
- Category: Dessert
- Cuisine: American
Ingredients
- 2 ¾ cups all-purpose flour
- 1 cup unsalted butter, softened
- 1 cup granulated sugar
- 1 large egg, room temperature
- 2 teaspoons vanilla extract
- ½ teaspoon almond extract (optional)
- ½ teaspoon baking powder
- ½ teaspoon salt
- Red gel food coloring
- Green gel food coloring
- Colored sprinkles (optional, for rolling)
- 1 tablespoon milk (optional, if dough feels dry)
Instructions
- In a large bowl, beat softened butter with granulated sugar until light and fluffy, about 2-3 minutes.
- Beat in egg, vanilla extract, and almond extract (if using) until fully combined.
- In a separate bowl, whisk together flour, baking powder, and salt.
- Gradually add dry ingredients to the butter mixture, mixing on low until a smooth dough forms. If dough feels dry, add up to 1 tablespoon milk.
- Divide dough evenly into two bowls. Tint one half with red gel food coloring, one with green. Mix until colors are vibrant.
- Place each colored dough between two sheets of parchment paper. Roll each into a rectangle about ¼-inch thick (roughly 10×12 inches). Chill both sheets in the fridge for 20-30 minutes.
- Remove dough from fridge and peel off top parchment. Place green dough on a clean surface, then carefully lay red dough on top. Press together and trim edges if needed.
- Starting from the long edge, roll up the dough tightly into a log, using parchment to help guide the roll.
- Wrap the log in plastic wrap and chill for at least 1 hour (or overnight). Preheat oven to 350°F (180°C) while dough chills.
- Using a sharp knife, slice log into ¼-inch rounds. Wipe blade between cuts for clean swirls. Roll edges in colored sprinkles if desired.
- Place cookies on parchment-lined baking sheets, spacing about 1 inch apart. Bake for 8-10 minutes, until edges are set but centers are still soft.
- Remove from oven and let cookies cool on baking sheet for 5 minutes, then transfer to wire racks.
Notes
Chilling the dough before rolling and slicing is key for crisp swirls and vibrant colors. Use gel food coloring for best results. Dough logs can be frozen for up to 2 months; slice and bake as needed. For gluten-free or dairy-free adaptations, use a 1:1 gluten-free flour blend and plant-based butter/milk. Let kids help with coloring and rolling for a fun holiday activity.
Nutrition
- Serving Size: 1 cookie
- Calories: 100
- Sugar: 6
- Sodium: 40
- Fat: 5
- Saturated Fat: 3
- Carbohydrates: 12
- Protein: 1
Keywords: Christmas cookies, pinwheel cookies, holiday baking, kid-friendly, sugar cookies, festive dessert, edible gifts, easy cookies


