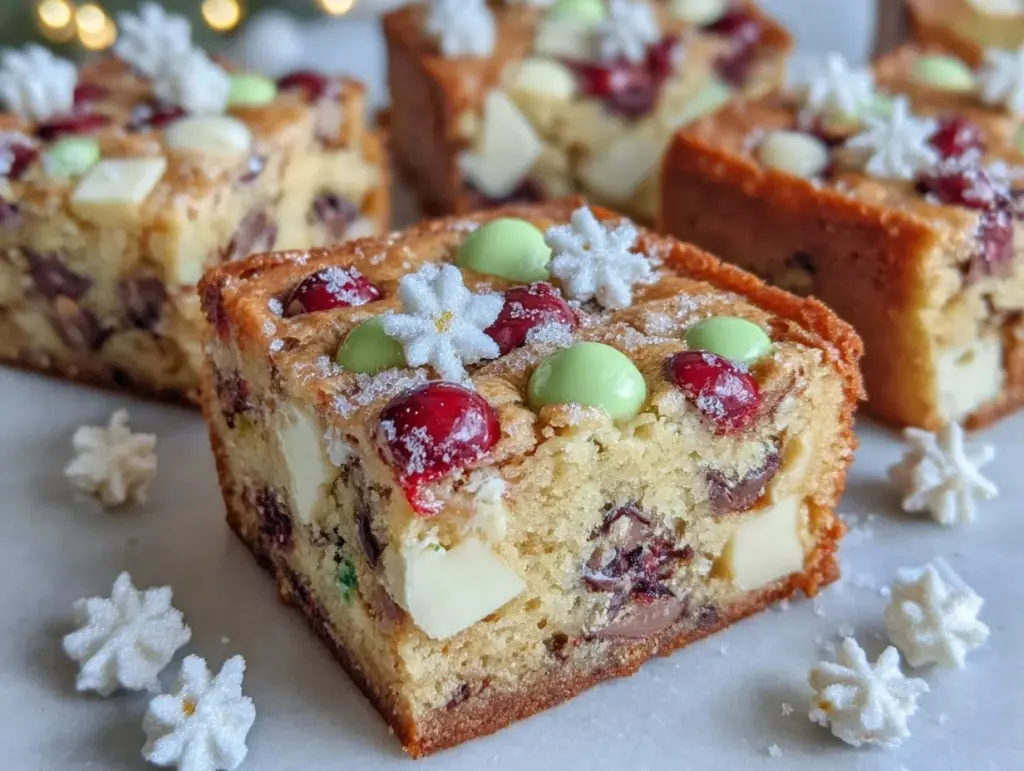
Let me set the scene: the aroma of melting chocolate, buttery dough, and sweet candies swirling together in my kitchen, instantly making my whole house feel like Santa’s workshop! The first time I whipped up these Christmas Cookie Bars with chocolate and candies, it was one of those moments where I just had to stop, take a deep breath, and smile—because, honestly, I knew I’d stumbled onto something magical. You know those recipes that spark joy the second you pull them from the oven? This is one of them.
Years ago, when I was knee-high to a grasshopper, my grandma would make cookie bars at the holidays—always sneaking extra chocolate chips into the mix. I remember those festive afternoons, the kind where everyone’s fingers were sticky with fudge and sprinkles. Fast forward to a snowy Saturday last December, and I found myself trying to recreate that same nostalgic comfort, but with a little twist (extra candies and lots more chocolate, let’s face it). What I didn’t expect was how addictive these bars would become. My family couldn’t stop sneaking them off the cooling rack (I caught my husband mid-swipe, and he just grinned sheepishly—no shame!).
These festive Christmas Cookie Bars are perfect for potlucks, gifting, or just brightening up your Pinterest cookie board. They’re dangerously easy to throw together, and every bite tastes like pure holiday magic. I’ve tested this recipe so many times “in the name of research,” and every batch disappears within hours. It’s become a staple for family gatherings, teacher gifts, and, honestly, whenever I need a little pick-me-up that feels like a warm hug. If you’re craving something that’ll make the season just a little sweeter, you’re going to want to bookmark this Christmas Cookie Bars recipe. Trust me!
Why You’ll Love This Recipe
If you’re anything like me, you want a Christmas treat that’s festive, foolproof, and guaranteed to get oohs and ahhs from everyone at the party. These Christmas Cookie Bars with chocolate and candies aren’t just tasty—they’re a little slice of holiday magic, perfected through trial and, yes, a few delicious errors. After years of baking for crowds, school events, and my own picky kids, I can say with confidence: this is the recipe you’ll come back to again and again.
- Quick & Easy: Comes together in under 40 minutes (hello, last-minute cravings and busy holiday schedules!).
- Simple Ingredients: No need for a fancy grocery run—just grab everyday pantry staples and your favorite festive candies.
- Perfect for Every Occasion: Ideal for Christmas brunches, potlucks, classroom parties, or cozy nights by the fire.
- Crowd-Pleaser: Kids and adults both go wild for the gooey chocolate and crunchy candies.
- Unbelievably Delicious: The blend of soft cookie base, melty chocolate, and pops of candy is next-level comfort food.
What sets these Christmas Cookie Bars apart? For starters, the dough is perfectly balanced—not too sweet, with a hint of vanilla and a pinch of salt to make the chocolate pop. I use a mix of chocolate chips and colorful candy-coated chocolates for that festive sparkle. Plus, the bars stay chewy for days (if they last that long), thanks to a carefully tested ratio of butter and brown sugar. This isn’t just another cookie bar—it’s the one that makes you close your eyes after the first bite and smile. It’s the kind of recipe that turns a simple treat into a memory, and honestly, isn’t that what the holidays are all about?
Whether you want to impress your friends without breaking a sweat or just treat yourself to a cozy snack, these Christmas Cookie Bars have you covered. They’re the holiday comfort food you didn’t know you needed—until now!
What Ingredients You Will Need
This recipe uses simple, wholesome ingredients to deliver bold flavor and satisfying texture without any fuss. Most of these are pantry staples, but you can always swap in your favorite festive candies for a personal touch. Here’s what you’ll need to make the best Christmas Cookie Bars with chocolate and candies:
- For the Cookie Bar Base:
- 2 1/4 cups (280g) all-purpose flour
- 1/2 teaspoon baking soda
- 1/2 teaspoon salt
- 1 cup (226g) unsalted butter, softened (adds richness)
- 3/4 cup (150g) packed brown sugar (keeps bars chewy)
- 1/4 cup (50g) granulated sugar
- 2 large eggs, room temperature
- 2 teaspoons vanilla extract (I love Nielsen-Massey for a deep flavor)
- For the Festive Mix-Ins:
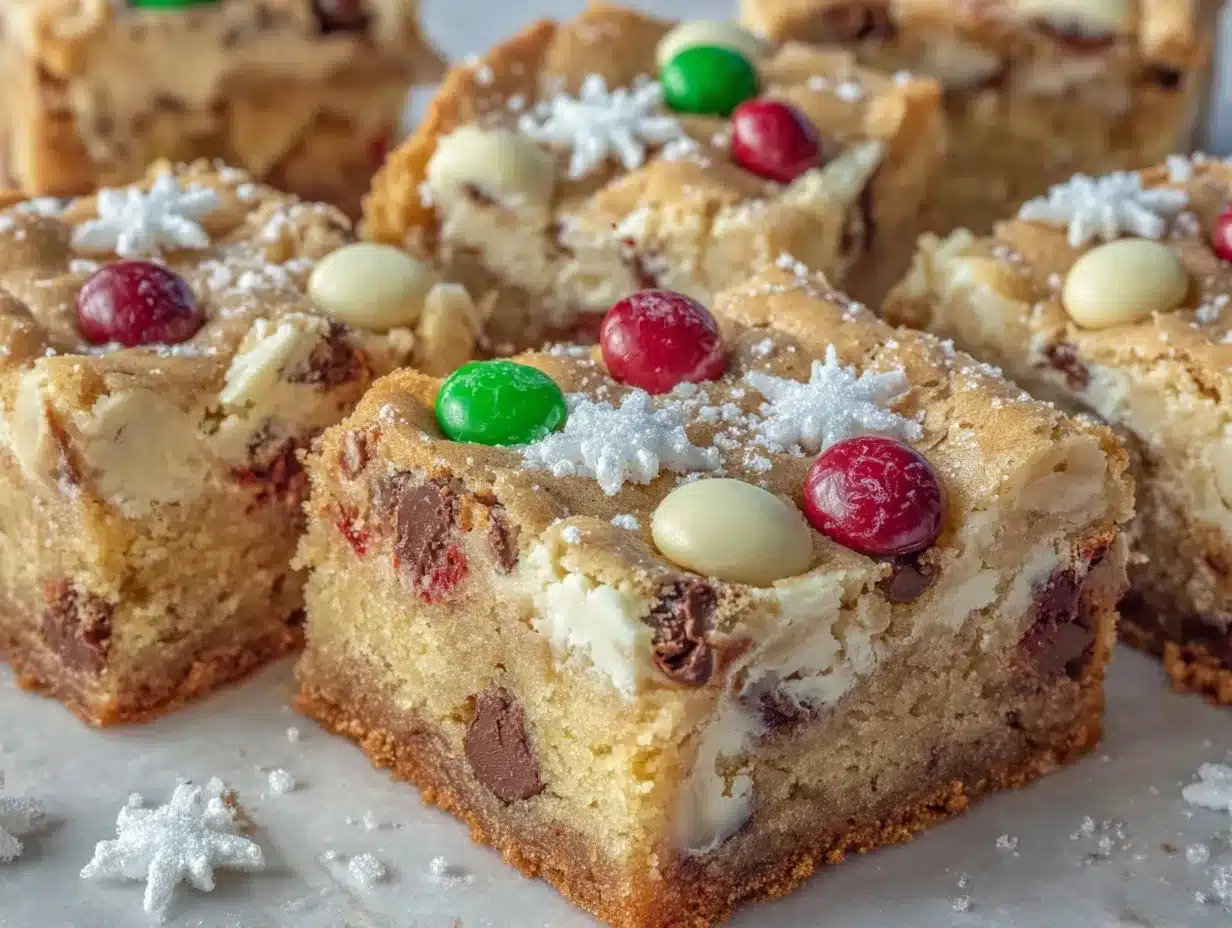
- 1 cup (170g) semi-sweet chocolate chips (can use milk or dark chocolate, depending on your mood)
- 1 cup (170g) holiday candy-coated chocolates (like M&Ms or similar—red, green, and white add a festive touch)
- 1/2 cup (60g) chopped white chocolate or white chocolate chips (optional, but adds a creamy twist)
- 1/2 cup (50g) crushed peppermint candies (optional, for minty flair)
- For Finishing:
- Extra candies or sprinkles for topping (I like Wilton Christmas sprinkles)
- Flaky sea salt (optional, for a little grown-up sparkle)
Substitution Tips:
- Swap all-purpose flour with gluten-free blend for a gluten-free version (Bob’s Red Mill is reliable).
- Use dairy-free butter for a lactose-free treat.
- If you’re not into peppermint, skip it or try crushed pretzels for a salty crunch.
- For egg allergies, use flax eggs (1 tablespoon flaxseed meal + 2.5 tablespoons water = 1 egg).
Honestly, you can toss in whatever candies make you happy—this recipe is pretty forgiving and always festive!
Equipment Needed
- 9×13-inch baking pan (metal gives crispier edges, but glass works fine too)
- Parchment paper (for easy removal and less mess)
- Mixing bowls—one large, one medium
- Electric mixer or sturdy whisk (I’ve used both—mixer is faster but whisk builds arm strength!)
- Measuring cups and spoons (I love the OXO brand for accuracy)
- Rubber spatula (helps scrape every last bit of dough)
- Cooling rack (optional, but helps bars set evenly)
If you don’t have parchment, just grease your pan well—though bars come out cleaner with the paper. For mixing, you can use a stand mixer, hand mixer, or just some elbow grease and a wooden spoon (been there, done that). If you’re on a budget, skip fancy equipment and use what you have. Just make sure your pan is sturdy enough to hold up under all those candies!
Maintenance tip: wash your mixer blades right away—sticky dough is a pain once it dries. And if you have a festive spatula, now’s the time to show it off!
Preparation Method
Here’s how to make these irresistible Christmas Cookie Bars with chocolate and candies, step by step. Trust me, it’s easier than it looks!
- Prep Your Pan: Line a 9×13-inch pan with parchment paper, letting the edges overhang. (This makes it easy to lift the bars out later.) Preheat your oven to 350°F (175°C).
- Mix Dry Ingredients: In a medium bowl, whisk together 2 1/4 cups (280g) flour, 1/2 teaspoon baking soda, and 1/2 teaspoon salt. Set aside.
- Cream Butter & Sugars: In a large bowl, beat 1 cup (226g) softened butter, 3/4 cup (150g) brown sugar, and 1/4 cup (50g) granulated sugar together until light and fluffy (about 2-3 minutes). A stand mixer makes this easy, but a hand mixer or whisk works too.
- Add Eggs & Vanilla: Beat in 2 large eggs, one at a time, mixing well after each addition. Stir in 2 teaspoons vanilla extract. The dough should look smooth and a little glossy.
- Combine Wet & Dry: Gradually add the dry ingredients to the wet, mixing just until combined. Don’t overmix—stop when no streaks of flour remain. If the dough feels stiff, that’s normal.
- Fold in Mix-Ins: Stir in 1 cup (170g) chocolate chips, 1 cup (170g) candy-coated chocolates, 1/2 cup (60g) white chocolate, and 1/2 cup (50g) crushed peppermint (if using). Reserve a handful of candies for topping.
- Spread Dough: Press the dough evenly into the prepared pan. It’ll be thick—use a spatula or your hands (clean, of course!) to smooth the top.
- Add Toppings: Sprinkle reserved candies and extra sprinkles on top. Press lightly so they stick.
- Bake: Bake at 350°F (175°C) for 22-28 minutes, until edges are set and the center is golden but slightly gooey. (Don’t overbake—bars firm up as they cool.)
- Cool: Let bars cool in the pan for at least 30 minutes before lifting out with parchment. (If you’re impatient, bars will be extra gooey but still delicious.)
- Slice & Serve: Cut into squares or rectangles. Wipe your knife between cuts for cleaner slices.
Troubleshooting Tips:
- If bars seem underdone, let them cool—center sets as they rest.
- For crisp edges, use a metal pan and don’t skip preheating.
- If candies sink, sprinkle some on top just before baking.
Sensory cues: the bars should smell buttery and chocolatey, with a hint of peppermint (if you used it). The edges will be golden, and the middle soft—don’t worry if it jiggles a little, that’s perfect!
Efficiency tip: measure all ingredients beforehand and get kids involved for the candy sprinkle step—it’s their favorite part!
Cooking Tips & Techniques
Getting Christmas Cookie Bars just right is all about balance and a little bit of know-how. Here’s what I’ve learned after more batches than I can count:
- Use Room Temperature Ingredients: Butter and eggs should be at room temp for a smooth, even dough. Cold butter leads to lumps, and cold eggs can make the mixture seize up.
- Don’t Overmix: Once the flour goes in, mix until just combined. Overmixing makes bars tough instead of chewy.
- Watch the Baking Time: Ovens vary, so check at 22 minutes. Bars should be set at the edges and a bit soft in the middle—carryover cooking will finish the job.
- Multitasking Strategy: While bars bake, clean up your kitchen or set out festive plates. The bars need to cool, so no rushing!
- Consistency Wins: Always measure flour by spooning it into your cup, then leveling off. Too much flour = dry bars, I learned that the hard way.
- Personal Failures: I’ve baked these bars too long before—resulting in rock-hard edges (not ideal for dental work). Now I trust my nose—when the kitchen smells amazing, they’re almost done.
- Topping Trick: Press extra candies gently onto the hot bars; they’ll stick without melting too much.
Honestly, the biggest mistake is walking away and forgetting the timer (guilty!). Keep an eye on things, and you’ll get perfect, festive Christmas Cookie Bars every time.
Variations & Adaptations
The beauty of Christmas Cookie Bars with chocolate and candies is how flexible they are! Here are some of my favorite twists:
- Gluten-Free Version: Use a 1:1 gluten-free flour blend in place of regular flour. Bars stay chewy, and no one misses the gluten.
- Seasonal Swap: Try Valentine’s candy for February, or pastel candies for Easter. This base recipe works year-round!
- Flavor Bomb: Mix in butterscotch chips, coconut flakes, or dried cranberries for extra holiday flair.
- Different Cooking Methods: Bake in mini muffin tins for bite-sized cookie bar “cups”—great for parties.
- Allergen-Free Adaptation: Use dairy-free butter and allergy-friendly chocolate chips. Substitute flax eggs for egg allergies.
- Personal Favorite: I once added chopped pretzels and caramel bits—those bars were sweet, salty, and totally addictive!
Don’t be afraid to make these Christmas Cookie Bars your own. Tweak the candies, play with the chocolate, or add your favorite nuts. The holiday spirit is all about creativity!
Serving & Storage Suggestions
Christmas Cookie Bars with chocolate and candies are best served at room temperature, cut into generous squares and piled high on a festive plate. I love to dust a little powdered sugar on top or add extra sprinkles for sparkle—perfect for a Pinterest-worthy display!
Pair with hot cocoa, mulled cider, or even a cold glass of milk. These bars make an awesome addition to a cookie swap, dessert table, or holiday brunch spread.
For storage, keep bars in an airtight container at room temperature for up to 5 days. They’ll stay soft and chewy! If you want to freeze them, wrap tightly in plastic and store in a freezer bag for up to 2 months. Defrost at room temp or microwave for a few seconds for that fresh-baked taste.
Reheating tip: a few seconds in the microwave makes the chocolate melty and the bars extra gooey. Honestly, flavors get even better after a day or two—if you can wait that long!
Nutritional Information & Benefits
Each Christmas Cookie Bar (based on 24 bars per batch) has about 210 calories, 11g fat, 26g carbs, and 2g protein. The butter and eggs provide richness, while the candies pack in a little extra joy.
Key ingredients like chocolate and eggs offer a touch of antioxidants and protein. If you use gluten-free flour or dairy-free butter, these bars adapt to most dietary needs. Just watch for potential allergens—eggs, dairy, wheat, and nuts (if you add them).
From a wellness perspective, these festive treats are all about balance. A little indulgence is good for the soul, especially when shared with loved ones!
Conclusion
If you’re looking for a Christmas Cookie Bars recipe that’s fast, festive, and loaded with chocolate and candies, this is the one to try. It’s a holiday favorite in my house and always brings smiles—whether you’re baking for family, friends, or just yourself.
Don’t be afraid to tweak the mix-ins or swap ingredients to suit your taste. That’s the fun of holiday baking! Personally, I love these bars because they remind me of childhood, family, and all those sweet, simple moments that make the season special. (And, let’s be real, they’re ridiculously easy to make.)
Give them a try, share your own twist, and let me know how they turn out! Drop a comment below, share with your friends, or pin this recipe for later. Wishing you lots of joy and seriously delicious cookie bars this Christmas!
Frequently Asked Questions
Can I make Christmas Cookie Bars ahead of time?
Absolutely! They stay chewy for up to five days in an airtight container, and the flavors even improve after a day or two.
What candies work best for these cookie bars?
I love classic M&Ms, but you can use any festive candy-coated chocolates or even chopped candy bars for extra variety.
Can I freeze these bars?
Yes, just wrap tightly and freeze for up to two months. Thaw at room temperature or microwave for a gooey treat.
How do I keep the bars from getting dry?
Don’t overbake! Remove bars when the edges are set and the center is just a bit soft. Measuring flour carefully also helps.
Can I make these bars gluten-free?
Definitely! Use a 1:1 gluten-free flour blend and dairy-free butter if needed. They come out just as tasty and festive.
Pin This Recipe!
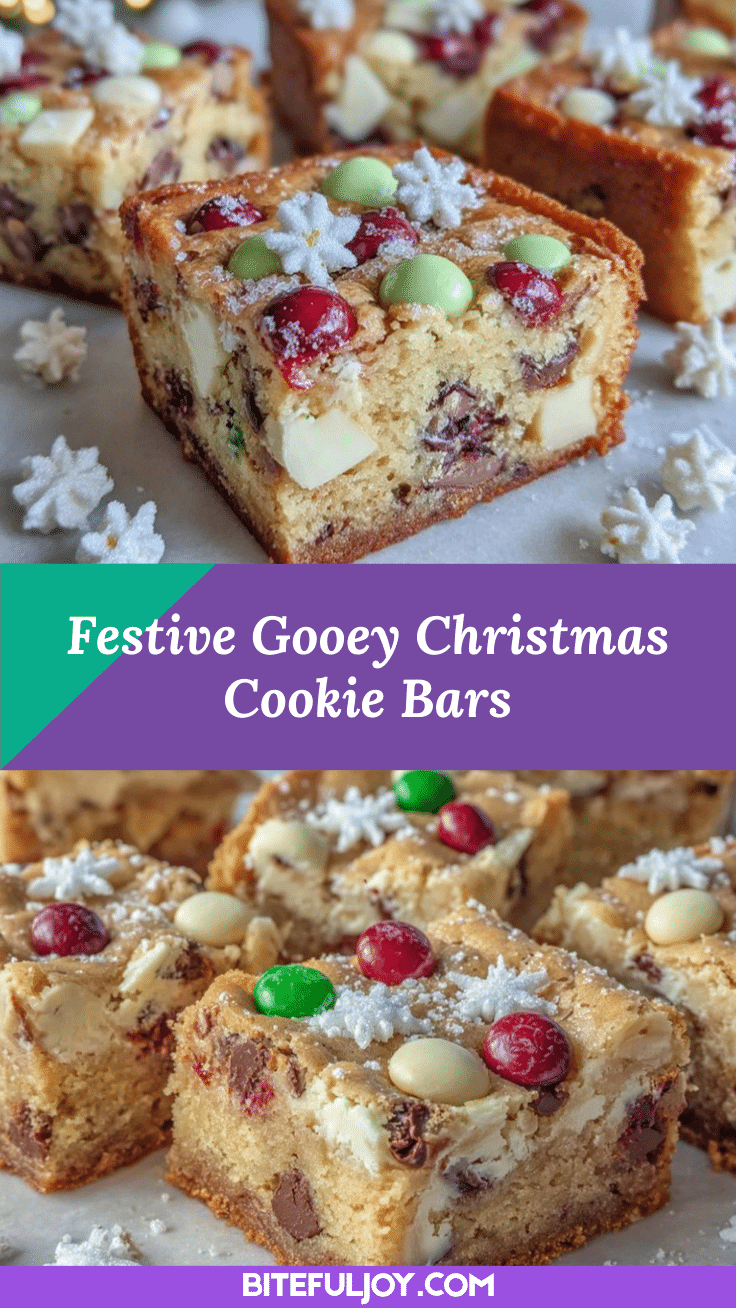
Christmas Cookie Bars Recipe – Easy Festive Treat with Chocolate and Candy

These Christmas Cookie Bars are a quick, festive treat loaded with chocolate chips and colorful candies. Perfect for holiday gatherings, gifting, or cozy nights in, they come together easily and deliver chewy, gooey comfort in every bite.
- Prep Time: 15 minutes
- Cook Time: 22-28 minutes
- Total Time: 40-45 minutes
- Yield: 24 bars 1x
- Category: Dessert
- Cuisine: American
Ingredients
- 2 1/4 cups all-purpose flour
- 1/2 teaspoon baking soda
- 1/2 teaspoon salt
- 1 cup unsalted butter, softened
- 3/4 cup packed brown sugar
- 1/4 cup granulated sugar
- 2 large eggs, room temperature
- 2 teaspoons vanilla extract
- 1 cup semi-sweet chocolate chips
- 1 cup holiday candy-coated chocolates (such as M&Ms)
- 1/2 cup chopped white chocolate or white chocolate chips (optional)
- 1/2 cup crushed peppermint candies (optional)
- Extra candies or sprinkles for topping
- Flaky sea salt (optional, for finishing)
Instructions
- Line a 9×13-inch pan with parchment paper, letting the edges overhang. Preheat oven to 350°F (175°C).
- In a medium bowl, whisk together flour, baking soda, and salt. Set aside.
- In a large bowl, beat softened butter, brown sugar, and granulated sugar together until light and fluffy (about 2-3 minutes).
- Beat in eggs, one at a time, mixing well after each addition. Stir in vanilla extract.
- Gradually add the dry ingredients to the wet, mixing just until combined. Do not overmix.
- Fold in chocolate chips, candy-coated chocolates, white chocolate, and crushed peppermint (if using). Reserve a handful of candies for topping.
- Press the dough evenly into the prepared pan. Smooth the top with a spatula or clean hands.
- Sprinkle reserved candies and extra sprinkles on top. Press lightly so they stick.
- Bake for 22-28 minutes, until edges are set and the center is golden but slightly gooey. Do not overbake.
- Let bars cool in the pan for at least 30 minutes before lifting out with parchment.
- Cut into squares or rectangles. Wipe your knife between cuts for cleaner slices.
Notes
For gluten-free bars, substitute a 1:1 gluten-free flour blend. Use dairy-free butter for lactose-free bars, and flax eggs for egg allergies. Do not overbake—bars firm up as they cool. Store in an airtight container for up to 5 days or freeze for up to 2 months. Press extra candies on top after baking for a festive look.
Nutrition
- Serving Size: 1 bar (1/24th of rec
- Calories: 210
- Sugar: 18
- Sodium: 90
- Fat: 11
- Saturated Fat: 7
- Carbohydrates: 26
- Fiber: 1
- Protein: 2
Keywords: Christmas cookie bars, holiday dessert, chocolate bars, festive treats, easy cookie bars, M&M cookie bars, Christmas baking, potluck dessert, chewy cookie bars, kid-friendly cookies


