There’s something about the gooey pull of melted marshmallows, the snap of chocolate, and the crunch of graham that just sets off instant nostalgia—especially when you mash it all together in a new way. I’ll never forget the first time I made these S’mores Rice Krispie Chocolate Peanut Butter Cups. It was a sticky, summer afternoon, and honestly, I was craving a campfire treat but didn’t want to deal with the whole bonfire hassle. So, I raided my pantry, got creative with some cereal, and what came out of it was pure magic!
These S’mores Rice Krispie Chocolate Peanut Butter Cups take everything you love about old-school s’mores and classic Rice Krispie treats and crank it up a notch with the addition of peanut butter and a chocolate shell. They’re indulgent, sweet, a little salty, and ridiculously easy to whip up—no baking (or open flames) required. Perfect for those days when you want a taste of summer, but don’t want to sweat over the oven.
As someone who’s made these for everything from birthday parties to late-night cravings, I can promise you they’re a crowd-pleaser. The recipe’s been tested (and devoured) by my family more times than I can count. Whether you’re a busy parent, a college student, or just a dessert lover with a soft spot for s’mores, these cups are about to become your new favorite treat. Plus, with just a handful of pantry staples, you’ll be in dessert heaven in no time. Let’s get into the gooey, chocolatey, peanut buttery details of these S’mores Rice Krispie Chocolate Peanut Butter Cups!
Why You’ll Love This Recipe
Over the years, I’ve baked (and not baked) my way through countless s’mores-inspired treats, but these S’mores Rice Krispie Chocolate Peanut Butter Cups are honestly one of the top requested desserts in my house. Here’s why people keep coming back for more—myself included!
- Quick & Easy: You only need about 25 minutes of hands-on time, and there’s zero oven involved. Perfect for those moments when you want dessert, like, now.
- Simple Ingredients: No need for a special trip to the store. Most of these goodies are probably in your kitchen right now—think marshmallows, chocolate chips, peanut butter, and Rice Krispies.
- Perfect for Any Occasion: Whether you’re packing lunchboxes, prepping for a picnic, or just need something sweet for movie night, these cups fit right in. They also look adorable on a party platter (trust me, Pinterest-worthy!).
- Crowd-Pleaser: Kids, adults, picky eaters—everyone goes wild for these. The combination of creamy peanut butter, crispy cereal, and gooey marshmallows is totally irresistible.
- Unbelievably Delicious: The layers of chocolate, peanut butter, and marshmallow are a flavor explosion. The texture is everything—crunchy, smooth, and chewy all at once.
What sets this recipe apart is the balance—just the right amount of sweetness, a hint of salt from the peanut butter, and that satisfying snap from the chocolate. Blending the Rice Krispies with melted marshmallow and then sandwiching it all between chocolate and peanut butter? Total genius (if I do say so myself). It’s the kind of snack you make once and then find yourself craving again and again.
This recipe isn’t just a treat—it’s a fun, no-stress dessert that delivers the full s’mores experience in a bite-sized, portable package. No sticky fingers from melted marshmallows over the fire, no hunting for sticks. Just pure, simple comfort food goodness with a modern, practical twist. Make a batch, and I promise you they’ll disappear faster than you can say “more s’mores, please!”
What Ingredients You Will Need
This recipe for S’mores Rice Krispie Chocolate Peanut Butter Cups is all about using simple, trusted ingredients to create a dessert that packs a punch in both flavor and texture. Here’s everything you’ll need—no fancy stuff, just pantry classics that work beautifully together.
- For the Rice Krispie Layer:
- 3 cups (75g) Rice Krispies cereal (classic or any crispy rice cereal works)
- 1 1/2 cups (75g) mini marshmallows (plus extra for topping, if you like)
- 2 tablespoons (28g) unsalted butter (for that rich, buttery flavor)
- 1/4 teaspoon fine sea salt (balances the sweetness—don’t skip!)
- 1/2 teaspoon vanilla extract (adds depth)
- For the Chocolate Peanut Butter Shell:
- 1 1/4 cups (210g) semi-sweet chocolate chips (milk or dark chocolate chips work too; I love Ghirardelli for a smooth melt)
- 1/2 cup (120g) creamy peanut butter (natural peanut butter is a bit runnier, but works—just stir before using)
- 1 tablespoon (14g) coconut oil (makes the chocolate extra glossy and helps it set—vegetable oil works in a pinch)
- For the Graham Cracker Crunch:
- 4 graham crackers, crushed (about 1/2 cup/60g—honey or cinnamon graham crackers both taste great)
- Optional Add-Ins & Toppings:
- Pinch of flaky sea salt (for sprinkling on top—highly recommended!)
- Extra mini marshmallows or a drizzle of white chocolate for a pretty finish
- Chopped peanuts or mini chocolate chips for garnish
A couple ingredient notes: If you need to make these gluten-free, just grab certified gluten-free crispy rice cereal and graham crackers. For a nut-free version, sunflower seed butter or soy nut butter swaps in nicely for peanut butter. You can even use vegan marshmallows and dairy-free chocolate chips if you want to keep these vegan-friendly.
These ingredients are flexible—if you’re missing something, there’s almost always a swap that’ll work! That’s what I love about this recipe: it’s deliciously forgiving.
Equipment Needed
You don’t need any fancy gadgets to whip up these S’mores Rice Krispie Chocolate Peanut Butter Cups—just some basic kitchen tools. Here’s what I use every time:
- 12-cup standard muffin tin (nonstick is best, but you can use silicone molds for easy removal—it’s what I use when I want super clean edges)
- Paper cupcake liners (makes cleanup a breeze and helps with unmolding; reusable silicone liners work great too)
- Medium saucepan (for melting butter and marshmallows)
- Microwave-safe bowl (for melting the chocolate and peanut butter together—if you don’t have a microwave, a double boiler works just as well)
- Rubber spatula or wooden spoon (for stirring the sticky marshmallow mixture—trust me, a sturdy spatula is a must!)
- Measuring cups and spoons (for accuracy—eyeballing is tempting, but these treats are best when you get the ratios right)
- Small offset spatula or the back of a spoon (to spread layers evenly)
If you don’t have cupcake liners, you can grease the muffin tin well, but removal might get a little messy (been there, done that—still tasty, though). For budget-friendly options, dollar store spatulas and bowls work just fine, just don’t use metal on nonstick pans to keep them in good shape. I always rinse my spatula in warm water between steps—it keeps the marshmallow from sticking everywhere. Simple tools, big payoff!
Preparation Method
-
Prep Your Muffin Tin:
Line a 12-cup standard muffin tin with cupcake liners. If you’re using silicone molds, just set them on a baking sheet for easy transfer. This step keeps everything from sticking later—trust me, it’s worth it! -
Make the Rice Krispie Mixture:
In a medium saucepan, melt 2 tablespoons (28g) unsalted butter over low heat. Add 1 1/2 cups (75g) mini marshmallows and stir constantly until the marshmallows are completely melted and smooth, about 2-3 minutes. Remove from heat and quickly stir in 1/4 teaspoon salt and 1/2 teaspoon vanilla extract. Immediately add 3 cups (75g) Rice Krispies cereal and mix until every bit is coated in sticky marshmallow. It’ll get thick—just keep folding! -
Press Into Muffin Cups:
Working quickly (before the mixture cools), divide the cereal mixture evenly among the lined muffin cups—about 2 packed tablespoons per cup. Press down gently with greased fingers or the back of a spoon to form a compact base. Don’t press too hard or they’ll be tough to bite! -
Add the Graham Cracker Crunch:
Sprinkle a generous teaspoon of crushed graham crackers over each Rice Krispie layer, gently pressing so the crumbs stick. This gives you that classic s’mores flavor and a lovely texture contrast. -
Make the Chocolate Peanut Butter Topping:
In a microwave-safe bowl, combine 1 1/4 cups (210g) chocolate chips, 1/2 cup (120g) creamy peanut butter, and 1 tablespoon (14g) coconut oil. Microwave in 30-second intervals, stirring after each, until completely melted and smooth (usually about 1-1.5 minutes total). If you don’t have a microwave, melt everything together in a double boiler over simmering water. -
Assemble the Cups:
Spoon about 2 tablespoons of the chocolate-peanut butter mixture over each cup, covering the cereal and graham layer. Use a small offset spatula or the back of a spoon to smooth the tops. -
Add Toppings (Optional):
While the chocolate is still soft, sprinkle on a pinch of flaky sea salt, extra mini marshmallows, chopped peanuts, or a handful of mini chocolate chips if you want to get fancy. Sometimes I add a drizzle of melted white chocolate for a bakery-style look. -
Chill Until Set:
Place the muffin tin in the refrigerator for at least 1 hour, or until the chocolate has hardened and the cups hold together. You can speed this up in the freezer if you’re impatient like me (about 25 minutes does the trick). -
Unmold and Serve:
Once set, lift each cup out of the tin using the liners. Peel back the paper and enjoy! If you skipped liners, run a warm butter knife around the edges to help pop them out.
Troubleshooting Tips: If the marshmallow mixture gets too stiff to work with, zap it in the microwave for 10 seconds to loosen it back up. If your chocolate topping looks dull or streaky, make sure you added enough coconut oil for that shiny finish. Sensory cue: the Rice Krispie layer should feel soft but hold its shape, and the chocolate should snap when you bite into it. If you run into sticky fingers, a little water on your hands helps more than you’d think!
Efficiency hack: Measure everything out before you start—this recipe moves fast, and prepped ingredients make assembly a breeze.
Cooking Tips & Techniques
I’ve made these S’mores Rice Krispie Chocolate Peanut Butter Cups more times than I can count, and I’ve picked up a few tricks (and learned from some sticky mistakes!) along the way. Here’s what you need to know for perfect results:
- Work Quickly With Marshmallows: Once melted, marshmallows start to set up fast. Have your Rice Krispies and vanilla ready to go so you can mix and press before things get too firm.
- Grease Your Tools: Sticky cereal mix can be a pain. Lightly spray your spatula or fingers with nonstick spray or rub with a little butter—it makes pressing into the muffin cups way easier.
- Even Layers Matter: Take a moment to gently press and level each layer. If you rush, you’ll get uneven cups, which still taste great but don’t stack as neatly (ask me how I know!).
- Microwaving Chocolate: Heat in short bursts and stir often. Chocolate burns fast in the microwave—if it smells burnt, you’ll want to start over for best flavor.
- Room Temperature Peanut Butter: If your peanut butter is cold, it won’t mix smoothly with the chocolate. Let it sit out for 10 minutes or microwave just until soft (not hot).
- Chill Time: Don’t rush the chill! The layers set best if you give them enough time in the fridge or freezer. If you unmold too soon, the chocolate may smear or the layers might slide apart.
- Batch Prep: Making a double batch? Prep two muffin tins and alternate pressing the layers so your marshmallow mixture doesn’t harden before you’re done.
My first few attempts, I didn’t chill the cups long enough and ended up with a gooey mess—delicious, but not exactly portable. Now, I always wait until the chocolate is firm to the touch. Trust me, patience pays off! If you’re multitasking, set a timer so you don’t forget them in the fridge (been there). Practice makes perfect, and honestly, mistakes here are still pretty tasty.
Variations & Adaptations
One of the best things about these S’mores Rice Krispie Chocolate Peanut Butter Cups is how easily you can tweak them to fit your cravings or dietary needs. Here are some fun ways to switch things up:
- Nut-Free Version: Swap the peanut butter for sunflower seed butter or soy nut butter. I’ve tried this for my nephew’s school snacks—totally delicious and allergy-friendly.
- Gluten-Free & Vegan: Use gluten-free crispy rice cereal and graham crackers, plus vegan marshmallows and dairy-free chocolate chips/peanut butter. I like Dandies marshmallows and Enjoy Life chocolate chips for a true vegan version.
- Double Chocolate: Add 2 tablespoons cocoa powder to the marshmallow mixture for extra chocolatey Rice Krispie bases, or use dark chocolate chips for a richer flavor.
- Seasonal Flavors: Sub cinnamon graham crackers in fall, or add a pinch of pumpkin pie spice to the cereal mix. For summer, toss in freeze-dried strawberries or raspberries for a fruity twist.
- Marshmallow Overload: Stir in extra mini marshmallows (not melted) for gooey pockets throughout, or torch the tops lightly with a kitchen torch for that campfire vibe.
If you’re in a rush, you can spread everything in a parchment-lined 8×8-inch (20x20cm) pan and cut into bars instead of cups. I’ve done it both ways, and honestly, both disappear fast. Don’t be afraid to experiment—some of my favorite versions came from swapping ingredients based on what I had on hand!
Serving & Storage Suggestions
These S’mores Rice Krispie Chocolate Peanut Butter Cups are best served chilled or at cool room temperature—right when the chocolate is set but not rock-hard. They look adorable arranged on a platter for parties, and they’re easy to pack for picnics, potlucks, or even lunchboxes.
Pair these cups with a glass of cold milk, hot cocoa, or even a strong cup of coffee to balance the sweetness. They’re also amazing with fresh berries on the side for a bit of tart contrast.
For storage, keep them in an airtight container in the fridge for up to 5 days. If stacking, separate layers with parchment to prevent sticking. You can freeze them for up to 2 months—just thaw in the fridge for a few hours before serving. To reheat (if you want them gooier), microwave for 8-10 seconds, but be careful not to melt the chocolate layer completely. Honestly, I think the flavors get even better after a day or two, as the chocolate and marshmallow mingle with the cereal and graham. Good luck making them last that long!
Nutritional Information & Benefits
Each S’mores Rice Krispie Chocolate Peanut Butter Cup contains approximately 220 calories, 12g fat, 26g carbohydrates, and 4g protein (values will vary based on exact brands and sizes). They’re a treat, not a meal—but hey, everyone deserves dessert!
On the plus side, peanut butter adds a dose of healthy fats and protein, while whole grain cereal and graham crackers offer a little fiber. If you use dark chocolate, you’ll also get antioxidants. These cups are naturally egg-free, and can be gluten-free or vegan with simple substitutions. Peanut allergy? Swap in sunflower seed butter!
As someone who tries to balance sweet cravings with nutrition, I love that you can tweak this recipe for your needs. Just keep an eye on portion size—these are rich, so a little goes a long way for that satisfying s’mores flavor fix.
Conclusion
There you have it—S’mores Rice Krispie Chocolate Peanut Butter Cups that are easy, no-bake, and seriously addictive. This is the kind of recipe you make once for fun and then find yourself coming back to every time you need a quick treat or want to impress a crowd without breaking a sweat.
I love that you can personalize these with your favorite mix-ins or toppings, and that they’re as fun to make as they are to eat. Whether you’re sharing them with friends, packing them for a road trip, or sneaking one for a late-night snack (guilty as charged), they always hit the spot.
Give these a try and let me know how you make them your own. Did you add a special topping? Swap out the nut butter? I’d love to hear about your twists in the comments or see your creations on social media. Happy snacking—and don’t forget to save some for yourself!
FAQs
Can I make these S’mores Rice Krispie Chocolate Peanut Butter Cups ahead of time?
Absolutely! They keep well in the fridge for up to 5 days or in the freezer for up to 2 months. Just let them thaw slightly before serving for the best texture.
What can I use instead of peanut butter?
Sunflower seed butter, almond butter, or soy nut butter all work well. Choose your favorite or whatever fits your dietary needs.
Are these gluten-free?
They can be! Just use gluten-free crispy rice cereal and graham crackers. Double check your chocolate chips and marshmallows for hidden gluten, just to be safe.
How do I keep the marshmallow mixture from sticking to my hands?
Lightly grease your hands with butter or nonstick spray before pressing the mixture into the muffin cups. It makes a big difference!
Can I make these in a pan instead of muffin cups?
Yes! Press the layers into a lined 8×8-inch pan and cut into bars once set. It’s just as delicious and even easier for a crowd.
Pin This Recipe!

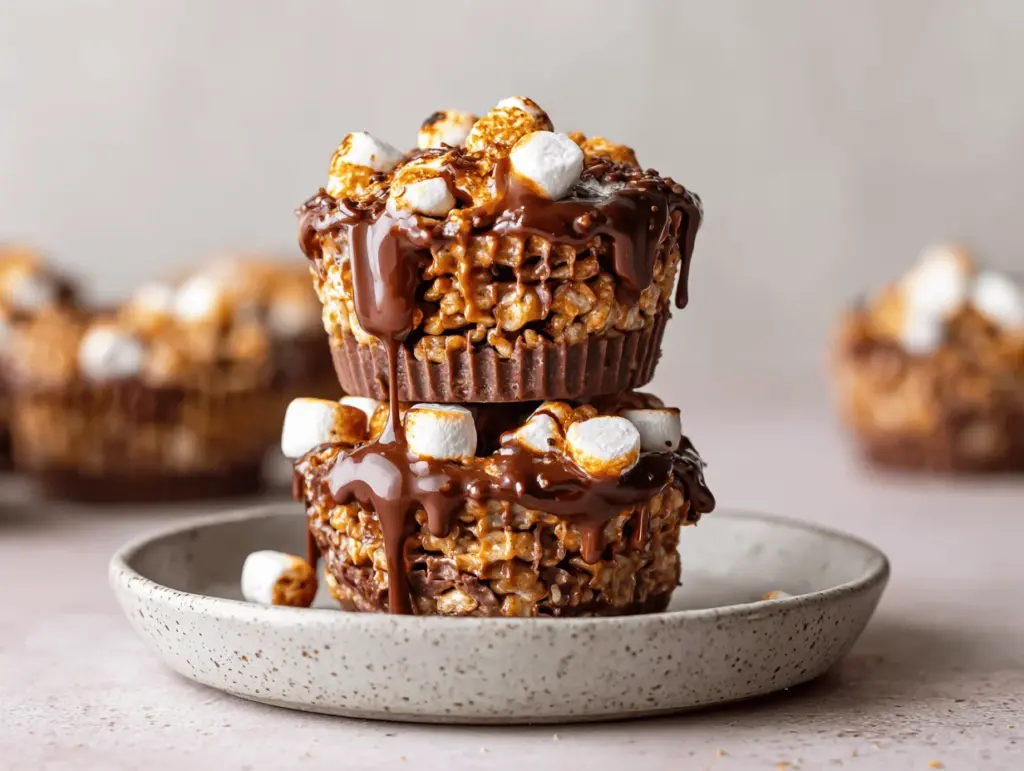
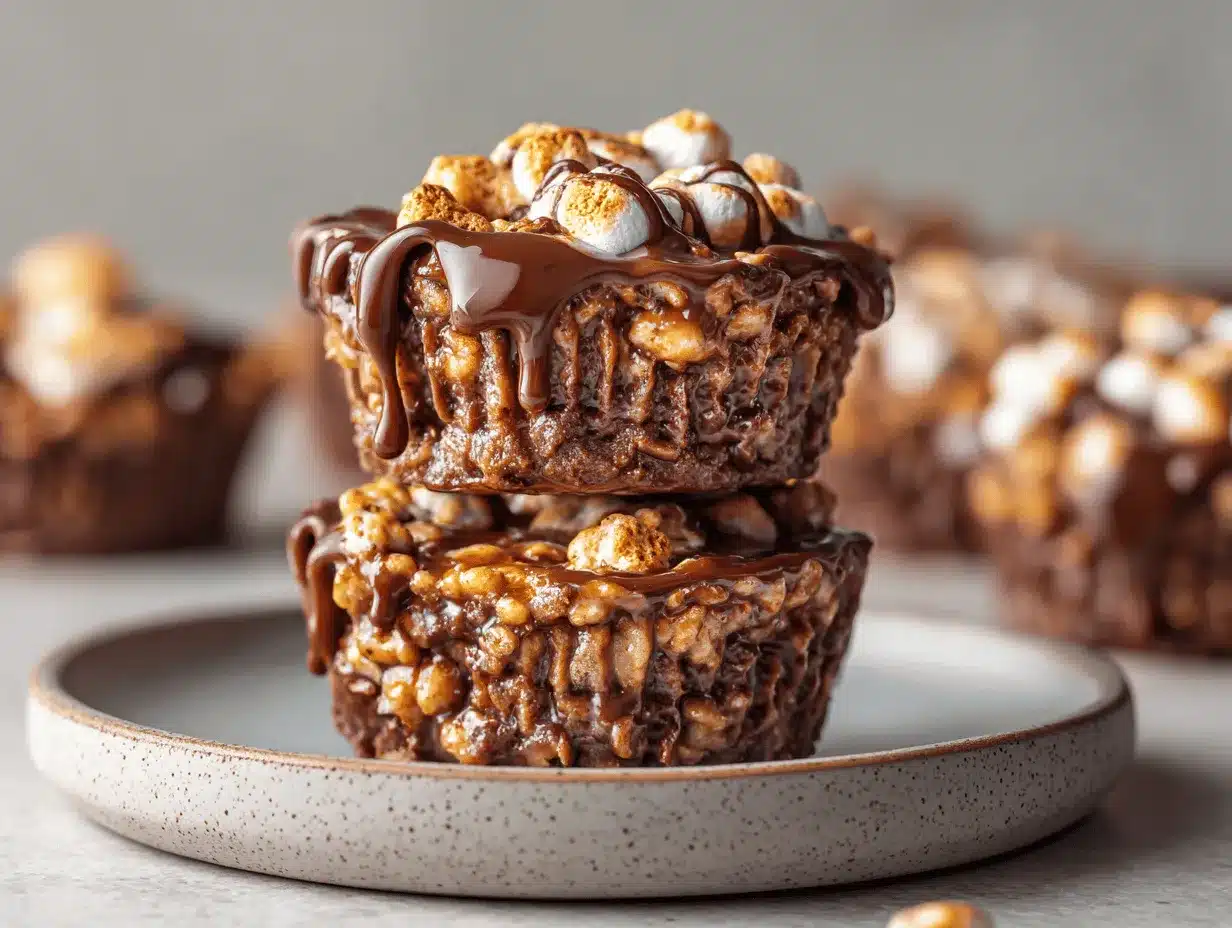
S’mores Rice Krispie Chocolate Peanut Butter Cups

These no-bake treats combine the nostalgic flavors of s’mores and Rice Krispie treats with a creamy peanut butter chocolate shell. Perfect for parties, lunchboxes, or whenever you crave a gooey, crunchy, chocolatey dessert—no oven required!
- Prep Time: 15 minutes
- Cook Time: 10 minutes
- Total Time: 1 hour 25 minutes
- Yield: 12 cups 1x
- Category: Dessert
- Cuisine: American
Ingredients
- 3 cups Rice Krispies cereal (or any crispy rice cereal)
- 1 1/2 cups mini marshmallows (plus extra for topping, if desired)
- 2 tablespoons unsalted butter
- 1/4 teaspoon fine sea salt
- 1/2 teaspoon vanilla extract
- 1 1/4 cups semi-sweet chocolate chips (milk or dark chocolate chips work too)
- 1/2 cup creamy peanut butter
- 1 tablespoon coconut oil (or vegetable oil)
- 4 graham crackers, crushed (about 1/2 cup)
- Pinch of flaky sea salt (optional, for topping)
- Extra mini marshmallows, white chocolate drizzle, chopped peanuts, or mini chocolate chips for garnish (optional)
Instructions
- Line a 12-cup standard muffin tin with cupcake liners or use silicone molds on a baking sheet.
- In a medium saucepan, melt butter over low heat. Add mini marshmallows and stir constantly until melted and smooth, about 2-3 minutes.
- Remove from heat and stir in salt and vanilla extract. Immediately add Rice Krispies cereal and mix until fully coated.
- Divide the cereal mixture evenly among the muffin cups (about 2 packed tablespoons per cup). Press down gently with greased fingers or the back of a spoon.
- Sprinkle a generous teaspoon of crushed graham crackers over each Rice Krispie layer, pressing gently so the crumbs stick.
- In a microwave-safe bowl, combine chocolate chips, peanut butter, and coconut oil. Microwave in 30-second intervals, stirring after each, until melted and smooth (about 1-1.5 minutes total). Alternatively, melt together in a double boiler.
- Spoon about 2 tablespoons of the chocolate-peanut butter mixture over each cup, covering the cereal and graham layer. Smooth the tops with a spatula or spoon.
- While the chocolate is still soft, add desired toppings: flaky sea salt, extra mini marshmallows, chopped peanuts, mini chocolate chips, or a drizzle of white chocolate.
- Chill the muffin tin in the refrigerator for at least 1 hour, or until the chocolate is set. (Speed up in the freezer for about 25 minutes if desired.)
- Once set, lift each cup out of the tin using the liners. Peel back the paper and enjoy! If not using liners, run a warm butter knife around the edges to help release.
Notes
Work quickly with the marshmallow mixture as it sets fast. Grease your hands or spatula to prevent sticking. For gluten-free or vegan versions, use appropriate substitutions for cereal, graham crackers, marshmallows, and chocolate. Chill thoroughly for clean layers. Store in an airtight container in the fridge for up to 5 days or freeze for up to 2 months.
Nutrition
- Serving Size: 1 cup
- Calories: 220
- Sugar: 15
- Sodium: 120
- Fat: 12
- Saturated Fat: 5
- Carbohydrates: 26
- Fiber: 1
- Protein: 4
Keywords: s'mores, rice krispie, chocolate, peanut butter, no bake, dessert, easy, party, summer, treat, marshmallow, graham cracker