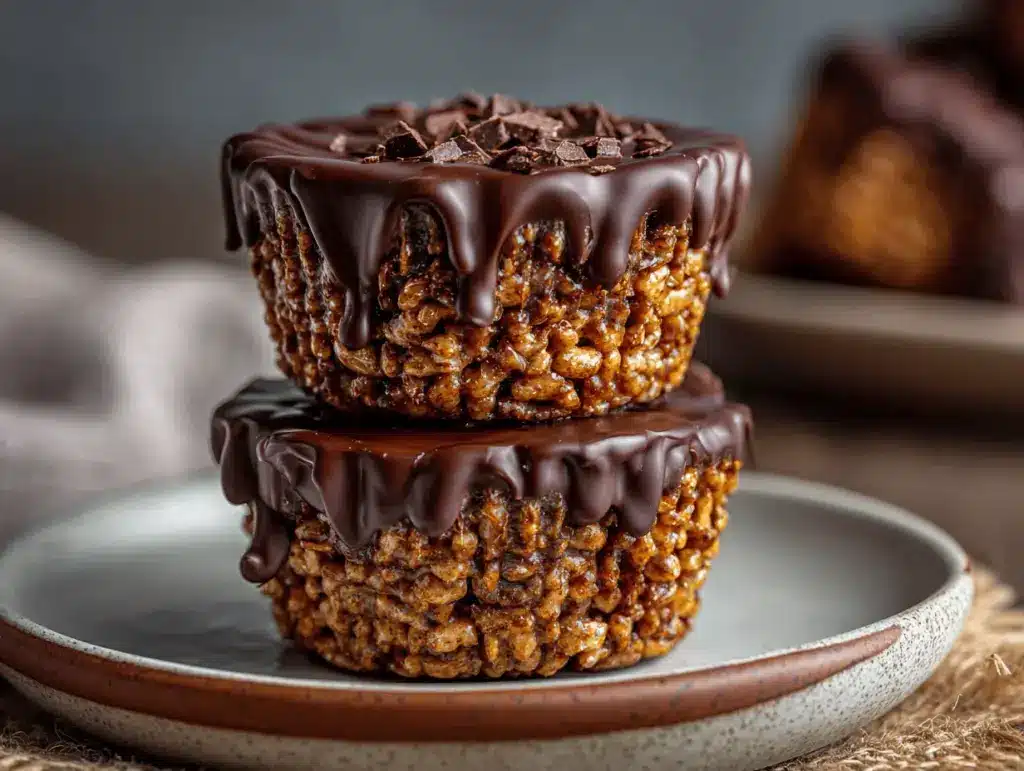
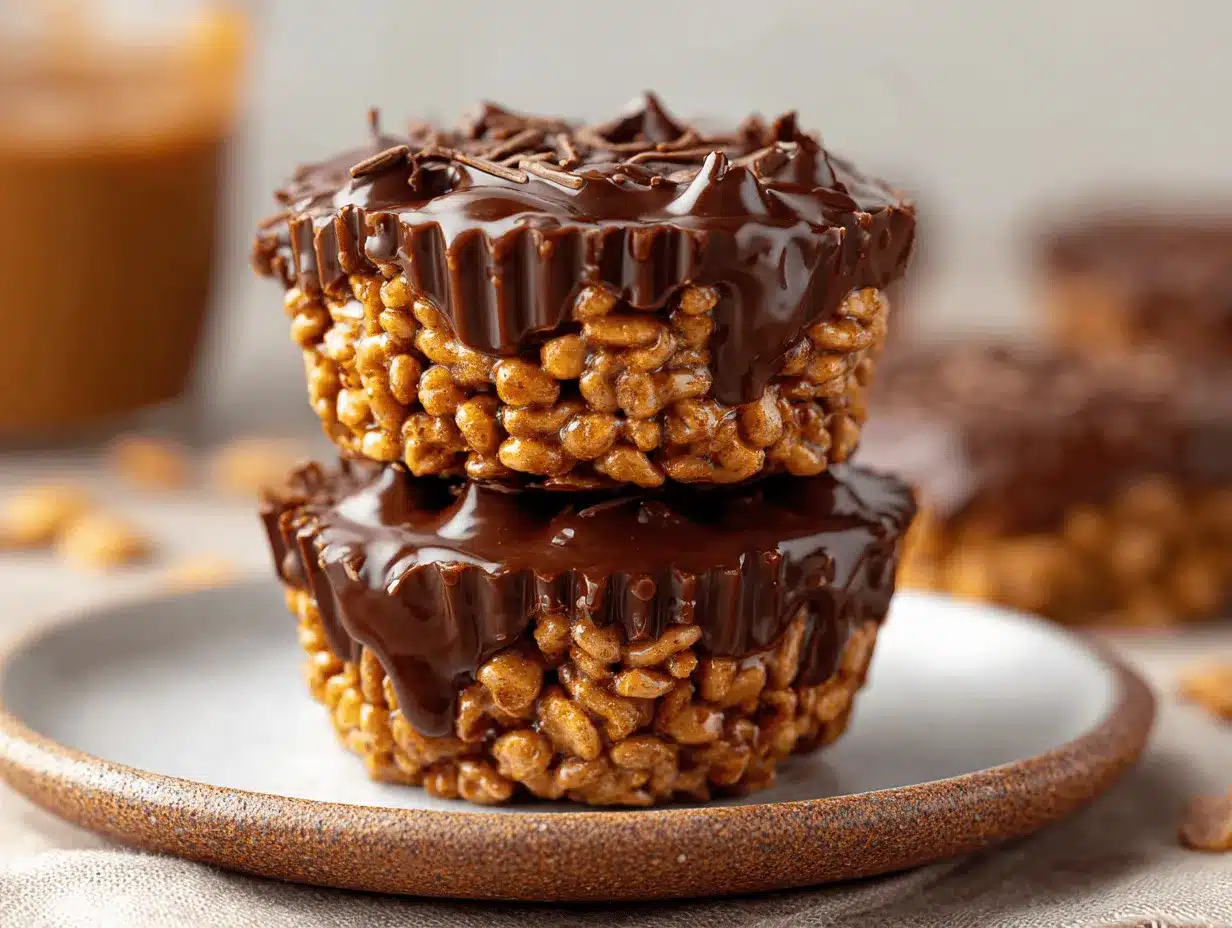
The snap of chocolate, the creamy swirl of peanut butter, and the crunch of puffed rice cereal—yeah, I know, my mouth is watering too! The very first time I whipped up these Chocolate Peanut Butter Rice Krispie Cups, my kitchen smelled like a candy shop, and honestly, I couldn’t wait for them to set. These aren’t your average cereal bars; they’re like little bites of nostalgia and pure joy, only with a grown-up twist. You can picture that glossy chocolate top, right? Or that moment you peel back the cupcake liner and see the peanut butter layer just waiting for you…
I’ve been making these for family parties, bake sales, and—let’s be real—those “just because” days when you need a sweet pick-me-up. My kids can’t get enough of them, and I’ve even had friends ask if I bought them at a fancy candy shop. The secret? Simple ingredients, just a handful of steps, and all the classic flavors you crave—no oven, no candy thermometer, no fuss. Over the years, I’ve tweaked the ratios (more peanut butter, sometimes extra chocolate) and tested every shortcut (freezer hack, anyone?) to get these just right.
The best part is how these Chocolate Peanut Butter Rice Krispie Cups fit into any occasion. They’re perfect for after-school snacks, party platters, or as a homemade gift (wrap them up in a cute box and watch the smiles). They’re also naturally gluten-free, and you only need six ingredients—most of which you probably have in your pantry right now. Trust me, they’re the kind of treat you’ll reach for again and again, and you won’t believe how easy they are to whip up. So, whether you’re a seasoned candy maker or just looking for a fun weekend kitchen project, you’re going to love these irresistible little cups.
Why You’ll Love This Recipe
- Quick & Easy: You’ll have a batch ready in under 30 minutes (plus a little chill time). No baking, no fancy gadgets—just mix, melt, and layer.
- Only 6 Ingredients: Peanut butter, chocolate chips, Rice Krispies, butter, powdered sugar, and a pinch of salt. That’s it! No need for a big shopping trip.
- Versatile & Crowd-Pleasing: These Chocolate Peanut Butter Rice Krispie Cups are perfect for birthday parties, classroom treats, or even holiday dessert trays. I’ve brought them to potlucks and they disappear in minutes. Kids and adults both rave about them.
- Texture Heaven: The crispy layer, creamy peanut butter, and silky chocolate on top—each bite is a little party in your mouth. They’re sweet but not cloying, with just enough crunch to keep things interesting.
- Make-Ahead Friendly: These store beautifully in the fridge or freezer, so you can always have a batch on hand for unexpected guests or sweet cravings.
What really sets this recipe apart is the attention to balance—the peanut butter isn’t overshadowed by the chocolate, and the Rice Krispies provide the perfect crunch without going soggy. I’ve tried a bunch of versions, but this one nails that classic “candy cup” vibe while still being homemade and approachable. If you’ve ever found yourself disappointed by store-bought peanut butter cups (too sweet, not enough texture), these will set things right.
When you make these, you’re not just getting a treat—you’re getting a little bit of joy, a little nostalgia, and a lot of chocolate-peanut butter goodness. Whether you’re making them for a special occasion or just because, these Chocolate Peanut Butter Rice Krispie Cups are guaranteed to put a smile on your face (and maybe even make you do a happy dance in your kitchen, like I do every time).
What Ingredients You Will Need
This recipe is all about keeping things simple but delicious. Each ingredient brings its own magic, and together, they make these Chocolate Peanut Butter Rice Krispie Cups truly irresistible. You probably already have most of this in your kitchen, but here’s everything you’ll need:
- Rice Krispies cereal (or any puffed rice cereal, about 2 cups / 60g): The star of the show for that iconic crunch. I usually go for the classic Kellogg’s brand, but store brands work fine too.
- Creamy peanut butter (1 cup / 240g): I prefer a no-stir, mainstream brand for smooth results (Jif or Skippy are my go-tos). Natural peanut butter works, but the cups may be a bit softer.
- Unsalted butter (1/4 cup / 56g, melted): Adds richness and helps bind the peanut butter layer. You can use salted butter if that’s what you have—just skip the extra pinch of salt later.
- Powdered sugar (3/4 cup / 90g): Sweetens and thickens the peanut butter mixture. Sift it if it seems lumpy.
- Semi-sweet chocolate chips (1 cup / 170g): The perfect chocolatey topping. You can also use milk chocolate chips if you prefer a sweeter finish, or dark chocolate for a more intense flavor.
- Fine sea salt (a pinch): It’s optional, but it really brings out the flavors and balances the sweetness. If you like a salty-sweet vibe, sprinkle a tiny bit on top too.
Ingredient Tips & Swaps:
- For a gluten-free version, double-check your rice cereal—most are, but it never hurts to confirm.
- If you’re nut-free, sunflower seed butter is a solid swap for peanut butter (I’ve made it for school events this way).
- Don’t have powdered sugar? You can blitz regular granulated sugar in a blender until fine in a pinch.
- Want more texture? Stir in a handful of chopped roasted peanuts with the rice cereal.
- For a vegan version, use vegan butter and dairy-free chocolate chips. I’ve tried Earth Balance and Enjoy Life chips with great results.
These ingredients come together so quickly, and honestly, the hardest part is waiting for them to set! Most of them are pantry staples, and you can tweak things based on what you have—just don’t skimp on the peanut butter or chocolate, because that’s where the magic happens.
Equipment Needed
- Muffin tin (12-cup standard size): Essential for shaping the cups. I use a nonstick metal pan, but silicone works too.
- Paper or silicone cupcake liners: These make removal a breeze. Trust me, you don’t want to skip them—the cups will stick otherwise. If you’re out, just grease the pan really well, but be prepared to work them out gently.
- Microwave-safe mixing bowls: One for the peanut butter mixture, one for the chocolate. Glass or sturdy plastic is fine here.
- Rubber spatula or wooden spoon: For mixing and smoothing layers. If you don’t have one, a regular spoon works, but a spatula gets every last bit.
- Measuring cups and spoons: For getting those ratios just right.
- Small offset spatula or the back of a spoon: Optional, but handy for smoothing the chocolate layer.
Budget-Friendly Tip: You don’t need fancy tools—honestly, I’ve made these at a friend’s house with just a muffin tin, a basic bowl, and a wooden spoon.
Maintenance Note: If you’re using a silicone pan, make sure it’s fully dry before adding the mixture or you’ll get weird textures. If your metal pan is looking a little rough, line with two cupcake liners for easy cleanup.
Preparation Method
-
Line your muffin tin (5 minutes):
Place paper or silicone liners into each cup of your 12-cup muffin tin. (This makes cleanup so much easier and the cups pop right out.) -
Make the peanut butter base (5 minutes):
In a medium microwave-safe bowl, combine 1 cup (240g) creamy peanut butter and 1/4 cup (56g) unsalted butter. Microwave in 30-second bursts, stirring after each, until melted and smooth—usually about 1 minute total. Stir in 3/4 cup (90g) powdered sugar and a pinch of salt. Mix until fully combined and glossy.
Note: If using natural peanut butter, the mixture may be softer—just chill a bit longer before adding the chocolate layer. -
Add the Rice Krispies (2 minutes):
Gently fold in 2 cups (60g) Rice Krispies cereal, making sure everything is evenly coated. The mixture will be sticky but should hold together when pressed.
Troubleshooting: If your mixture seems too loose, add a tablespoon more powdered sugar. Too dry? Add a splash of melted butter. -
Shape the cups (5 minutes):
Divide the peanut butter-cereal mixture evenly among the 12 muffin cups (about 2 tablespoons per cup). Press down firmly with a spoon or your fingers to create a compact base. I like to make a little indentation in the center for the chocolate to sit nicely.
Tip: Lightly grease your hands or the back of a spoon to prevent sticking. -
Make the chocolate topping (3 minutes):
In another microwave-safe bowl, melt 1 cup (170g) semi-sweet chocolate chips in 20-30 second bursts, stirring each time until smooth. (Usually takes about 1-1.5 minutes total.) Don’t overheat or the chocolate will seize.
If you want a shinier top, stir in 1/2 teaspoon coconut oil or butter at this stage. -
Assemble the cups (5 minutes):
Spoon the melted chocolate over each peanut butter-cereal base (about 1 tablespoon per cup). Use a small offset spatula, butter knife, or the back of a spoon to smooth the tops.
Optional: Sprinkle with flaky sea salt or chopped peanuts for crunch and extra flair. -
Chill to set (20-30 minutes):
Refrigerate the cups until the chocolate is firm and the base holds together (20-30 minutes). If you’re in a rush, pop them in the freezer for 10-15 minutes, but don’t forget about them!
Warning: Don’t try to peel off the liners until the cups are fully set or they’ll fall apart. -
Enjoy!
Once set, remove from the muffin tin and peel away the liners. Store in an airtight container in the fridge or freezer.
Personal tip: If you want super clean layers, wait until the peanut butter base is chilled before adding chocolate. But honestly, I rarely have the patience and they’re still amazing!
Cooking Tips & Techniques
- Don’t rush the melting: When melting the chocolate and peanut butter, always use short bursts and stir in between. Overheating is the number one culprit of grainy chocolate or separated peanut butter. I learned this the hard way—no one likes burnt chocolate!
- Even layering matters: Press the peanut butter-cereal layer firmly and evenly into the muffin cups. If it’s too loose, your cups will crumble when unwrapped. I use the bottom of a small glass, but the back of a spoon works too.
- Chill thoroughly: Patience pays off. If the cups are even a little warm, the chocolate will smudge, and the layers might not hold together. I’ve tried to cut corners, and let’s just say, sticky fingers everywhere.
- Multitask smartly: While the peanut butter layer is chilling, get your chocolate ready. This way, you’re not standing around waiting, and everything comes together faster.
- Consistency counts: Use a cookie scoop or measuring spoon to portion the base and topping evenly. It makes for prettier, uniform cups.
Personal lesson: I used to think “close enough” was good for measuring, but with candy-style treats, a little precision really does make a difference in how things set and taste. And if you want to get fancy, swirl a bit of melted peanut butter into the chocolate for a marbled effect—it looks gorgeous and always impresses guests.
Variations & Adaptations
- Nut-Free: Use sunflower seed butter or soy nut butter instead of peanut butter. I’ve made this swap for school parties where peanuts aren’t allowed, and the flavor is still fantastic.
- Vegan/Dairy-Free: Use vegan butter and dairy-free chocolate chips. Earth Balance and Enjoy Life chips are my favorites for keeping the texture and flavor spot-on.
- Chocolate Overload: Add a thin layer of melted white chocolate on top of the semi-sweet, or swirl both together for a pretty marbled look. Perfect for special occasions or when you want to impress.
- Holiday Twist: Stir in festive sprinkles to the chocolate layer, or press colored candies into the top before chilling. Great for birthdays or holiday dessert tables.
- Flavor Boost: Add a teaspoon of vanilla extract to the peanut butter layer, or a pinch of cinnamon for a subtle warmth. I love doing this in the fall for a cozier vibe.
Personally, my favorite variation is to add a little sea salt and chopped roasted peanuts on top for extra crunch and a salty-sweet hit. It takes these Chocolate Peanut Butter Rice Krispie Cups to the next level of crave-worthy!
Serving & Storage Suggestions
These Chocolate Peanut Butter Rice Krispie Cups are best served chilled or at cool room temperature. If you’re serving them for a party, arrange them on a pretty platter and watch them disappear. I love pairing them with a tall glass of milk, a cup of coffee, or even a scoop of vanilla ice cream for an over-the-top treat.
To store, keep them in an airtight container in the fridge for up to a week. They’ll stay fresh and the chocolate stays nice and snappy. For longer storage, freeze them for up to 2 months—just thaw in the fridge before serving. I sometimes sneak one straight from the freezer for a super-cold, extra-firm bite (highly recommend for summer!).
Flavors meld and deepen after a day in the fridge, so if you make them ahead, they’re even better the next day. If you’re making these for a gift, stack them in parchment-lined tins or boxes—they travel well and look adorable.
Nutritional Information & Benefits
Each Chocolate Peanut Butter Rice Krispie Cup (based on 12 servings) has about 200-220 calories, 12g fat, 22g carbs, and 4g protein. They’re naturally gluten-free (just check your cereal brand), and can easily be made dairy-free and vegan with a couple of swaps.
The peanut butter offers healthy fats and a little protein, while the Rice Krispies keep things light and crunchy. If you use dark chocolate, you’ll get a boost of antioxidants too. Just keep in mind these are a treat—sweet, satisfying, and way better for you than most packaged candies.
Potential allergens include peanuts, dairy (if not using substitutes), and possibly gluten if your cereal isn’t certified. From a wellness perspective, I like that these have fewer additives than store-bought candy bars, and I can control the sweetness and quality of every ingredient.
Conclusion
These Chocolate Peanut Butter Rice Krispie Cups are one of those recipes you’ll come back to again and again. They’re quick, easy, and deliver a classic flavor combo that never gets old. Whether you’re customizing them for allergies, dressing them up for a party, or just enjoying a batch straight from the fridge, you’re in for a real treat.
I love how adaptable they are—make them your own with different chocolates, nut butters, or toppings. Honestly, they’re the kind of dessert that makes people think you spent way more time than you did. If you try them (or put your own twist on the recipe), let me know in the comments! Share your creations or tag me if you post them online. Happy snacking, and may your kitchen always smell like chocolate and peanut butter bliss!
Frequently Asked Questions
How do you keep Chocolate Peanut Butter Rice Krispie Cups from sticking to the pan?
Use paper or silicone cupcake liners—they make removal super easy. If you don’t have liners, grease the muffin tin really well, but be gentle when popping out the cups.
Can I use natural peanut butter instead of regular?
Yes, but the cups will be a bit softer since natural peanut butter is runnier. Just chill them longer, and maybe add a tablespoon more powdered sugar to help firm things up.
How long do these treats last?
Stored in an airtight container in the fridge, they’ll last up to a week. In the freezer, you can keep them for up to 2 months. They’re delicious right out of the fridge or thawed from frozen.
Can I make these dairy-free or vegan?
Absolutely! Use vegan butter and dairy-free chocolate chips. The results are just as tasty—I’ve served them to vegan friends, and they couldn’t tell the difference.
What can I do if my chocolate seizes or becomes grainy?
Make sure to melt chocolate in short bursts and stir often. If it does seize, try mixing in a teaspoon of coconut oil or butter to smooth it out. If all else fails, start over with new chocolate (it happens to the best of us!).
Pin This Recipe!
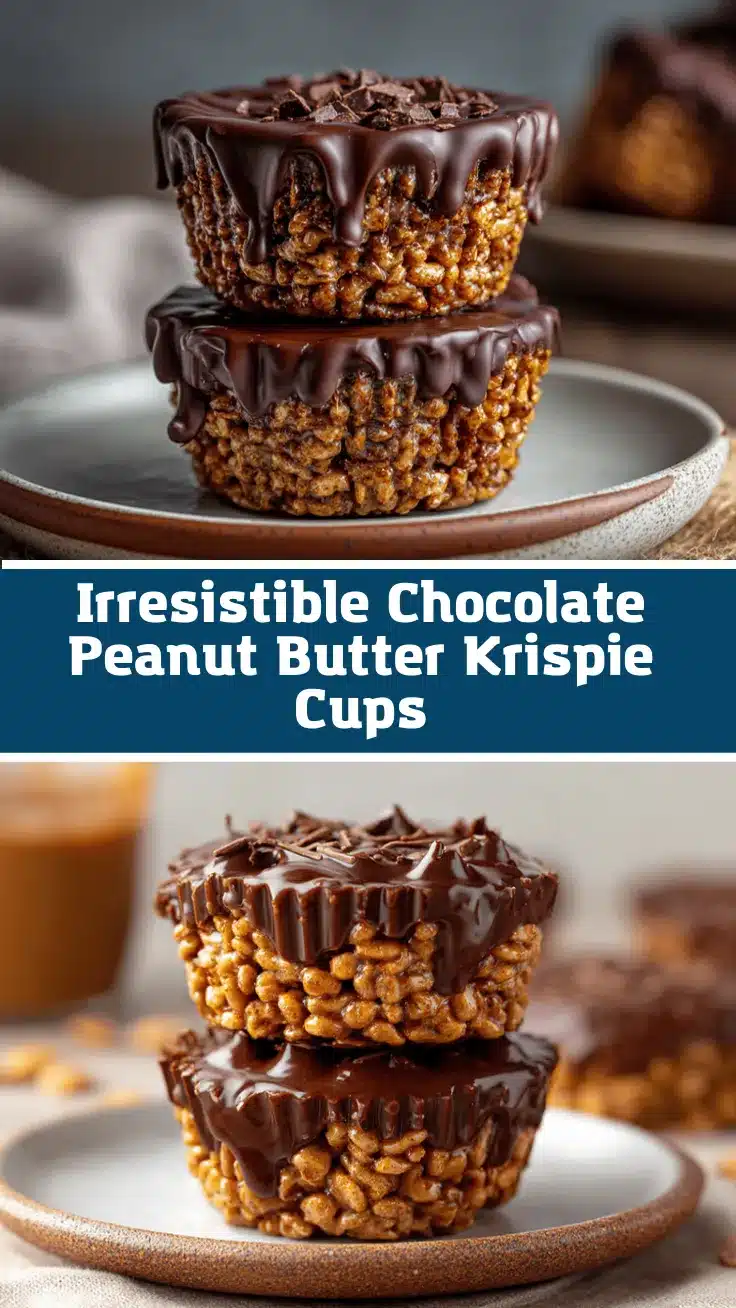
Chocolate Peanut Butter Rice Krispie Cups

These easy, no-bake Chocolate Peanut Butter Rice Krispie Cups combine creamy peanut butter, crunchy puffed rice cereal, and a glossy chocolate topping for a nostalgic treat with a grown-up twist. With just six pantry ingredients and minimal prep, they’re perfect for parties, gifts, or anytime you need a sweet pick-me-up.
- Prep Time: 15 minutes
- Cook Time: 0 minutes
- Total Time: 35-45 minutes (including chilling)
- Yield: 12 cups 1x
- Category: Dessert
- Cuisine: American
Ingredients
- 2 cups Rice Krispies cereal (or any puffed rice cereal, about 60g)
- 1 cup creamy peanut butter (240g, preferably no-stir)
- 1/4 cup unsalted butter, melted (56g)
- 3/4 cup powdered sugar (90g), sifted if lumpy
- 1 cup semi-sweet chocolate chips (170g)
- Pinch fine sea salt (plus more for sprinkling, optional)
Instructions
- Line a 12-cup standard muffin tin with paper or silicone cupcake liners.
- In a medium microwave-safe bowl, combine peanut butter and melted butter. Microwave in 30-second bursts, stirring after each, until melted and smooth (about 1 minute total).
- Stir in powdered sugar and a pinch of salt until fully combined and glossy.
- Gently fold in Rice Krispies cereal until evenly coated. The mixture should be sticky but hold together when pressed.
- Divide the peanut butter-cereal mixture evenly among the 12 muffin cups (about 2 tablespoons per cup). Press down firmly to create a compact base, making a slight indentation in the center.
- In another microwave-safe bowl, melt chocolate chips in 20-30 second bursts, stirring each time until smooth (about 1-1.5 minutes total).
- Spoon melted chocolate over each peanut butter-cereal base (about 1 tablespoon per cup). Smooth the tops with a small offset spatula or the back of a spoon.
- Optional: Sprinkle with flaky sea salt or chopped peanuts.
- Refrigerate the cups until the chocolate is firm and the base holds together (20-30 minutes). For faster setting, freeze for 10-15 minutes.
- Once set, remove from the muffin tin and peel away the liners. Store in an airtight container in the fridge for up to 1 week or freeze for up to 2 months.
Notes
For a vegan version, use vegan butter and dairy-free chocolate chips. If using natural peanut butter, chill the base longer before adding chocolate. Add a teaspoon of vanilla extract or a pinch of cinnamon for extra flavor. For nut-free, substitute sunflower seed butter. Store in the fridge for best texture; they can also be frozen for up to 2 months.
Nutrition
- Serving Size: 1 cup
- Calories: 210
- Sugar: 13
- Sodium: 90
- Fat: 12
- Saturated Fat: 5
- Carbohydrates: 22
- Fiber: 1
- Protein: 4
Keywords: chocolate peanut butter cups, rice krispie treats, no bake dessert, gluten free, easy candy, party treat, peanut butter chocolate, homemade candy, kid friendly, quick dessert


