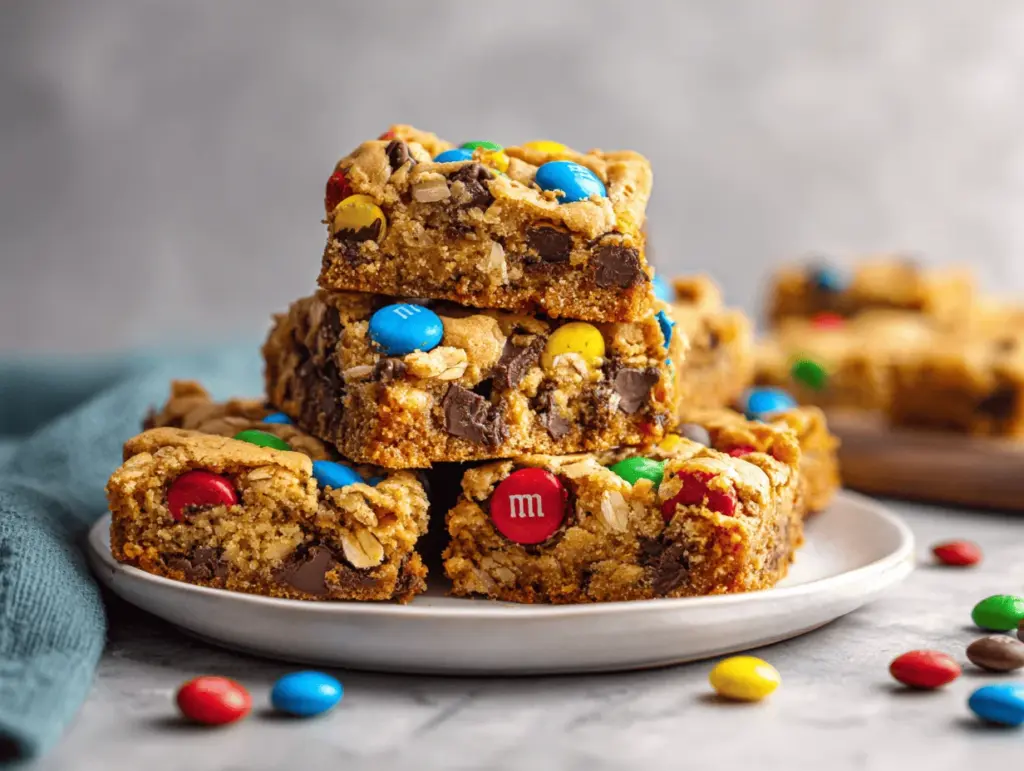
The first time I pulled a pan of monster cookie bars out of the oven, the smell was so good that my kids practically bounced down the hallway. There’s something magical about the combination of gooey peanut butter, colorful M&Ms, and melty chocolate chips that makes this treat vanish in minutes. I’ll admit, I’ve been guilty of sneaking a warm corner square before they’re fully cooled—sometimes patience just isn’t my strong suit when it comes to dessert!
These monster cookie bars have quickly become a family favorite in our house. They’re the kind of treat that turns an ordinary afternoon into a little celebration, no matter what’s going on outside. If you’re a fan of classic monster cookies but want something that’s even easier to whip up (no scooping dough or worrying about spreading!), this recipe is for you.
What I love about this monster cookie bars recipe is how it brings everyone together—messy fingers, chocolatey smiles, and all. I’ve tested and tweaked this recipe more times than I care to admit (seriously, my freezer always has a stash). Whether it’s for bake sales, birthday parties, or just a weekend movie night, these bars hit that perfect sweet spot between chewy and soft, with enough crunch from the candy to keep things interesting. Trust me, you’ll want to keep this monster cookie bars recipe on standby for when you need a quick, crowd-pleasing treat!
Why You’ll Love This Monster Cookie Bars Recipe
- Quick & Easy: No need to chill dough or scoop individual cookies—just press, bake, and slice! You can have these bars ready in under an hour, start to finish. Perfect for last-minute bake sales or unexpected playdates.
- Simple Ingredients: You won’t have to run to three different stores. Most of the ingredients are pantry staples—think oats, peanut butter, and brown sugar. M&Ms and chocolate chips are the only “extras,” and you can easily swap for what you have on hand.
- Perfect for Any Occasion: Monster cookie bars are a hit for just about anything—birthday parties, school lunches, potlucks, or cozy nights at home. They’re colorful enough for a celebration but comforting enough for a rainy day treat.
- Crowd-Pleaser: I’ve never seen anyone turn down a monster cookie bar. The chewy texture, sweet and salty balance, and those pops of M&M color grab attention—and taste buds—every time. Even picky eaters can’t resist!
- Unbelievably Delicious: The combo of creamy peanut butter, buttery oats, melty chocolate chips, and crunchy M&Ms is downright addictive. Every bite is packed with flavor and nostalgia (honestly, it’s hard not to sneak a second… or third).
What really sets my monster cookie bars recipe apart? I blend the oats just a bit—not into flour, but enough to keep the bars soft and chewy without falling apart. And I always, always use creamy peanut butter for that classic, stick-to-your-mouth richness. If you’re feeling adventurous, swirling in a handful of chopped pretzels or using a mix of dark and milk chocolate chips adds an extra layer of fun. This recipe isn’t just another bar cookie—it’s my gold standard for peanut butter dessert bars, tested on family and friends with rave reviews every time.
Honestly, these bars bring out the kid in everyone. They’re the kind of treat that makes you close your eyes and savor the moment. Whether you’re making memories in the kitchen with little helpers or just looking for an easy way to brighten someone’s day, monster cookie bars are pure, joyful comfort food. Go ahead—make a batch and watch them disappear!
What Ingredients You Will Need
This monster cookie bars recipe keeps things simple, using easy-to-find ingredients that come together for a chewy, colorful, and totally crave-worthy treat. Here’s what you’ll need (plus a few substitutions and pro tips from my kitchen):
- Old-Fashioned Rolled Oats (2 cups / 200g) – They give the bars that hearty, chewy bite. Quick oats work in a pinch, but I love the texture from rolled oats. I usually give them a quick pulse in the food processor for a softer bar.
- All-Purpose Flour (1 cup / 125g) – Classic and reliable. For gluten-free, swap with Bob’s Red Mill 1-to-1 Baking Flour.
- Baking Soda (1 tsp) – Helps the bars rise just enough to stay thick and soft.
- Salt (1/2 tsp) – Don’t skip it! It balances all the sweetness and makes the flavors pop.
- Unsalted Butter (1/2 cup / 115g, softened) – For richness and that melt-in-your-mouth feel. If you only have salted butter, just cut the added salt in half.
- Creamy Peanut Butter (1 cup / 250g) – The star of the show! I always use regular creamy peanut butter (like Jif or Skippy) for best results. Natural peanut butter can work, but the bars may be more crumbly.
- Brown Sugar (1 cup / 200g, packed) – Adds moisture and a deep, caramel flavor. Light or dark brown sugar both work.
- Granulated Sugar (1/2 cup / 100g) – For that classic cookie sweetness and a bit of chew.
- Eggs (2 large, room temperature) – Bind everything together and help with that soft, cakey texture.
- Vanilla Extract (2 tsp) – Use real vanilla if you can! It’s worth it.
- Semi-Sweet Chocolate Chips (1 cup / 175g) – I love Ghirardelli or Trader Joe’s for a rich, chocolatey punch.
- M&M Candies (1 cup / 175g, plus extra for topping) – The star of the “monster” look. Mini M&Ms are especially cute, but regular size works too. Pick seasonal colors for holidays!
Optional Add-Ins:
- Chopped Pretzels (1/2 cup) – For a salty crunch (my kids’ favorite variation!)
- Mini Peanut Butter Cups (1/2 cup, chopped) – For extra peanut butter power
- Chopped Nuts (1/2 cup) – Pecans or walnuts add a grown-up twist (skip for nut allergies)
Ingredient Tips: If you want to make these dairy-free, use a plant-based butter and dairy-free chocolate chips. For a nut-free version, swap sunflower seed butter for peanut butter and use nut-safe candy. Honestly, don’t stress if you’re missing something—monster cookie bars are super forgiving and still turn out delicious with little tweaks.
Equipment Needed
- 9×13-inch Baking Pan – Standard size for thick, chewy bars. Glass or metal both work. I’ve even used disposable foil pans for parties.
- Parchment Paper or Nonstick Spray – Trust me, you’ll thank yourself come cleanup time. I always line my pan with parchment with a little overhang for easy lifting.
- Mixing Bowls – At least two: one for dry ingredients, one for wet. I like to use a big bowl for the final mix to avoid spills.
- Electric Mixer or Sturdy Whisk – An electric mixer makes creaming the butter and sugar a breeze, but you can totally use a good old wooden spoon and some elbow grease.
- Measuring Cups & Spoons – Accurate measurements = perfect bars every time. I prefer metal for dry ingredients and glass for liquids.
- Rubber Spatula – For scraping every last bit of dough from the bowl (no one wants to waste cookie dough!).
- Wire Cooling Rack – Helps the bars cool evenly, which means cleaner slices.
- Sharp Knife – For slicing clean edges after the bars have cooled. A bench scraper works too if you’re going for perfect squares.
Personal Tip: If you don’t have a 9×13-inch pan, you can use two 8×8-inch pans or even a rimmed baking sheet for thinner bars—just keep an eye on the bake time. And if your electric mixer is on the fritz (been there!), just really cream the butter and sugar by hand for a minute or two.
How to Make Monster Cookie Bars
-
Prep Your Pan (5 minutes):
Line a 9×13-inch (23×33 cm) baking pan with parchment paper, leaving a bit of overhang on the long sides. This makes lifting the bars out so much easier. Spritz the edges with nonstick spray if you want extra insurance. -
Mix the Dry Ingredients (2 minutes):
In a medium bowl, whisk together 2 cups (200g) rolled oats, 1 cup (125g) flour, 1 tsp baking soda, and 1/2 tsp salt. If you like a softer bar, pulse the oats in a food processor a few times—don’t turn them to dust, just break them up a bit. -
Cream Butter, Peanut Butter & Sugars (3-4 minutes):
In a large mixing bowl, beat 1/2 cup (115g) softened unsalted butter, 1 cup (250g) creamy peanut butter, 1 cup (200g) brown sugar, and 1/2 cup (100g) granulated sugar until light and fluffy—about 2-3 minutes with a mixer on medium speed. The mixture should look pale and creamy. If mixing by hand, beat vigorously until well combined. -
Add Eggs & Vanilla (1 minute):
Beat in 2 large eggs, one at a time, mixing well after each. Scrape down the sides, then add 2 tsp vanilla extract. Mix until smooth. -
Combine Wet & Dry (2 minutes):
Add the dry ingredients to the wet mixture. Use a spatula to fold it all together until no streaks of flour remain. The dough will be thick—don’t worry, that’s what you want! -
Add the Mix-Ins (1 minute):
Stir in 1 cup (175g) chocolate chips and 1 cup (175g) M&Ms. Save a handful of M&Ms for pressing on top later. If you’re adding pretzels, nuts, or peanut butter cups, fold those in now too. -
Press & Top (3 minutes):
Dollop the dough into the prepared pan and press it evenly with a spatula or clean hands. Sprinkle the reserved M&Ms over the top and gently press them in. -
Bake (22-26 minutes):
Bake at 350°F (175°C) for 22-26 minutes, or until the edges are golden brown and the center looks just set. Don’t overbake—monster cookie bars are best a little underdone in the middle. (They firm up as they cool!) If your oven runs hot, start checking at 20 minutes. -
Cool Completely (30-40 minutes):
Let the bars cool in the pan for at least 30 minutes. I know it’s hard to wait, but it helps with clean slices and a fudgy texture. For quicker cooling, lift the bars out using the parchment and set them on a wire rack. -
Slice & Serve (2 minutes):
Once fully cooled, slice into bars or squares. Wipe your knife between cuts for neat edges. Enjoy with a cold glass of milk or your favorite hot drink!
Troubleshooting: If your bars are crumbly, they may be slightly overbaked or you used natural peanut butter. Next time, bake a couple minutes less or stick with classic creamy peanut butter. If the dough seems too dry when mixing, add a splash of milk (1–2 tbsp).
Cooking Tips & Techniques for Perfect Monster Cookie Bars
- Don’t Overbake: The bars will look a bit soft in the center when you take them out, but they’ll set up as they cool. Overbaking leads to dry, crumbly bars—trust me, I’ve made that mistake more than once when I got distracted!
- Measure Flour Carefully: Too much flour makes the bars cakey. Spoon and level your flour instead of scooping straight from the bag (learned that the hard way, after a few dense batches).
- Room Temperature Ingredients: Using room temp eggs and butter helps everything blend smoothly. If you forget, just set your eggs in a bowl of warm water for a few minutes.
- Even Spreading: Press the dough evenly into the pan so your bars bake consistently. I use the back of a lightly greased spatula or just my hands (bonus: you get to lick your fingers after!).
- Customize the Toppings: If you want those picture-perfect bars for Pinterest, press extra M&Ms and chocolate chips on top right before baking. It makes them pop with color after baking.
- Chill for Clean Slices: If you want super neat edges, pop the cooled bars in the fridge for 20 minutes before slicing. I do this when I’m making them for a bake sale or want to impress guests.
- Batch Size: For thicker bars, use an 8×12-inch pan and bake a few minutes longer. For thinner, chewier bars, spread the dough into a rimmed baking sheet and check for doneness at 18 minutes.
Honestly, the biggest lesson I’ve learned: don’t be afraid to experiment! Monster cookie bars are super forgiving, so you can play with add-ins and bake times until you find your perfect sweet spot.
Variations & Adaptations
- Gluten-Free Monster Cookie Bars: Swap the all-purpose flour for a gluten-free 1-to-1 baking blend and use certified gluten-free oats. I’ve made them this way for my sister-in-law and no one could tell the difference!
- Nut-Free Version: Use sunflower seed butter instead of peanut butter and nut-safe chocolate candies. The flavor is slightly different, but still delicious and safe for allergy-friendly classrooms.
- Seasonal Flavors: For fall, add a teaspoon of pumpkin pie spice to the dough and use autumn-colored M&Ms. Around Christmas, peppermint chips are a fun swap for some of the chocolate chips, and red/green candies make them extra festive.
- Double Chocolate Monster Bars: Use 1/2 cup cocoa powder in place of 1/2 cup flour and mix in white chocolate chips for a brownie-like twist. My husband’s personal favorite!
- Vegan Adaptation: Use plant-based butter, flax eggs (2 tbsp flaxseed meal + 5 tbsp water), and vegan chocolate chips/candies. The bars are a little softer, but still hold together and taste fantastic.
One of my favorite personal spins? Swapping in butterscotch chips for half the chocolate chips—super nostalgic and a little extra gooey. Don’t be afraid to use what’s in your pantry or tailor the bars to your family’s tastes!
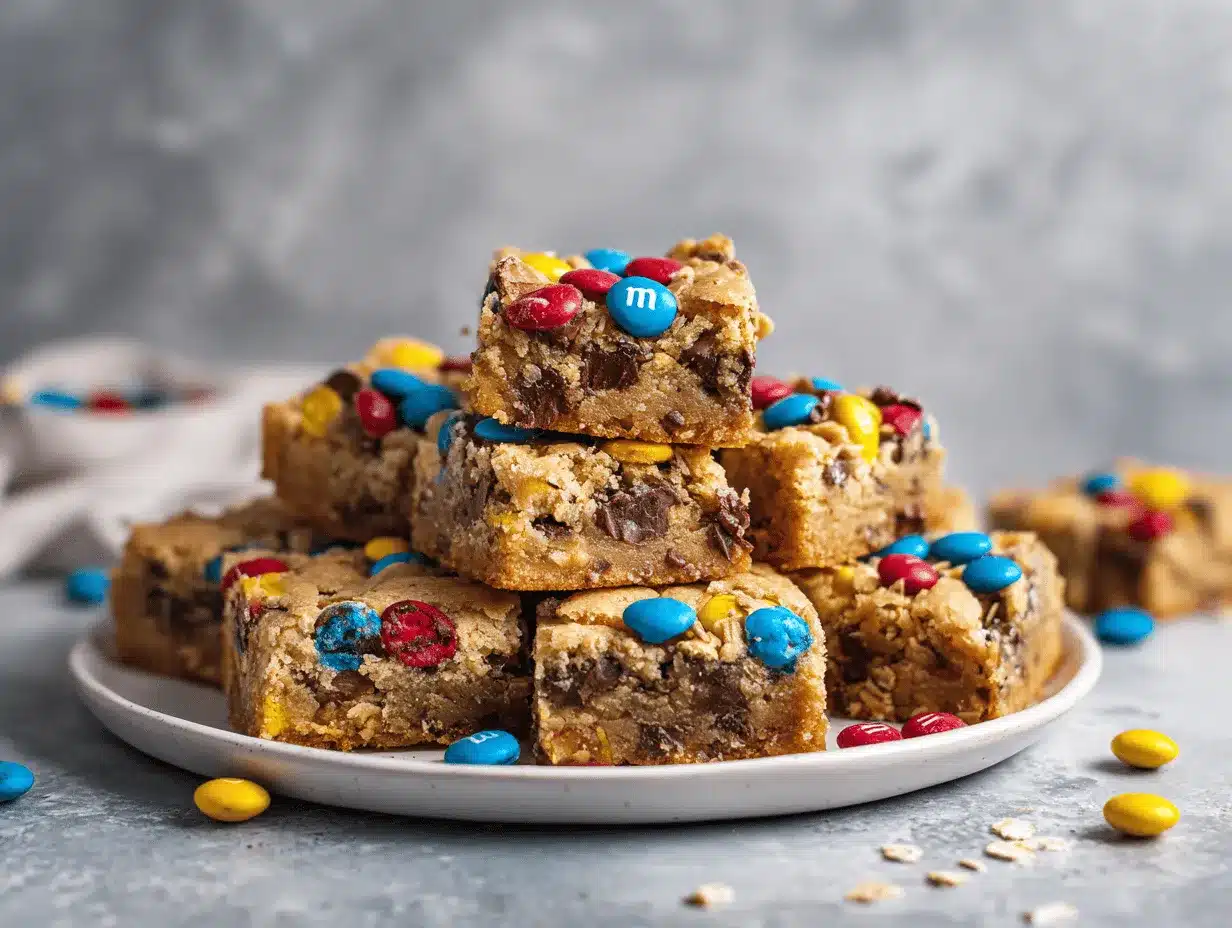
Serving & Storage Suggestions
Monster cookie bars are best served at room temperature, where the chocolate is just a little soft and the peanut butter flavor really shines. For a party platter look, slice into small squares and pile them high—they’re super eye-catching thanks to all those colorful M&Ms.
- Pair With: A cold glass of milk, hot cocoa, or even a scoop of vanilla ice cream if you’re feeling extra indulgent. They also make a great lunchbox treat or after-school snack.
- Storage: Store bars in an airtight container at room temperature for up to 5 days. Put a piece of parchment between layers to prevent sticking. For longer storage, freeze in a freezer-safe container for up to 3 months. Just thaw on the counter for an hour before serving.
- Reheating: If you love that fresh-from-the-oven gooeyness, zap a bar in the microwave for 10-15 seconds. The chocolate gets melty and the bar softens up (dangerously good with ice cream!).
Pro Tip: The flavors actually get even better after a day, as the bars become chewier and the candies stay crunchy. Perfect for making ahead for parties or gifting to friends!
Nutritional Information & Benefits
Each monster cookie bar (assuming 24 bars per pan) is approximately:
- Calories: 220
- Protein: 4g
- Carbohydrates: 27g
- Fat: 11g
- Sugar: 16g
The oats and peanut butter offer a little fiber and protein, making these bars more filling than your average cookie. Oats are also a great source of whole grains, and using natural peanut butter can add healthy fats (though I admit, I prefer the classic stuff for texture!).
These bars do contain peanuts, eggs, dairy, and wheat, so they’re not suitable for all allergies—but the recipe is flexible for adaptations. I love that you can sneak in some extra nutrition with chopped nuts or seeds. As always, treats should be enjoyed in moderation, but a homemade monster cookie bar is a fun way to satisfy a sweet tooth with a bit of staying power.
Conclusion
If you’re searching for a dessert that’s colorful, chewy, and bursting with peanut butter flavor, this monster cookie bars recipe is the answer. It’s the kind of treat that’s as fun to make as it is to eat—easy enough for baking with kids, but impressive enough for sharing with a crowd.
I love how customizable these bars are, whether you’re going for classic M&Ms and chocolate chips or adding your own twist with seasonal candies and mix-ins. They never last long in my house, and I bet they’ll become a staple in yours too.
Give these easy monster cookie bars a try, then let me know how you made them your own! Drop a comment, share your favorite add-in, or tag me with your colorful creations. Here’s to happy baking, sticky fingers, and lots of sweet memories!
Frequently Asked Questions
Can I make monster cookie bars without peanut butter?
Yes, you can use sunflower seed butter or almond butter as a substitute. The flavor will change a bit, but the bars will still be chewy and delicious.
Do I need to chill the dough before baking?
Nope! That’s one of the best parts—just mix, press into the pan, and bake right away. No chilling required.
Can I freeze monster cookie bars?
Absolutely. Once cooled and sliced, place bars in a freezer-safe container. They’ll keep for up to 3 months. Thaw at room temp or microwave for a warm treat.
How do I keep the bars from getting dry?
Don’t overbake! Take them out when the center looks just set. Also, be sure your flour measurements aren’t too heavy—spoon and level for accuracy.
What’s the best way to cut clean squares?
Let the bars cool completely, then use a sharp knife (wiped clean between cuts). For perfectly neat edges, chill the bars in the fridge for 20 minutes before slicing.
PrintMonster Cookie Bars

These easy monster cookie bars combine gooey peanut butter, colorful M&Ms, and melty chocolate chips for a chewy, crowd-pleasing treat. Perfect for bake sales, parties, or a fun family dessert, they come together quickly with pantry staples and no dough chilling required.
- Prep Time: 15 minutes
- Cook Time: 25 minutes
- Total Time: 55 minutes
- Yield: 24 bars 1x
- Category: Dessert
- Cuisine: American
Ingredients
- 2 cups old-fashioned rolled oats (200g)
- 1 cup all-purpose flour (125g)
- 1 teaspoon baking soda
- 1/2 teaspoon salt
- 1/2 cup unsalted butter, softened (115g)
- 1 cup creamy peanut butter (250g)
- 1 cup brown sugar, packed (200g)
- 1/2 cup granulated sugar (100g)
- 2 large eggs, room temperature
- 2 teaspoons vanilla extract
- 1 cup semi-sweet chocolate chips (175g)
- 1 cup M&M candies (175g), plus extra for topping
- Optional: 1/2 cup chopped pretzels
- Optional: 1/2 cup mini peanut butter cups, chopped
- Optional: 1/2 cup chopped nuts (pecans or walnuts)
Instructions
- Preheat oven to 350°F (175°C). Line a 9×13-inch baking pan with parchment paper, leaving overhang on the long sides. Lightly spray edges with nonstick spray if desired.
- In a medium bowl, whisk together oats, flour, baking soda, and salt. For softer bars, pulse oats a few times in a food processor.
- In a large mixing bowl, beat softened butter, peanut butter, brown sugar, and granulated sugar until light and fluffy (2-3 minutes with a mixer or by hand).
- Add eggs one at a time, mixing well after each. Add vanilla extract and mix until smooth.
- Fold dry ingredients into wet mixture with a spatula until just combined. Dough will be thick.
- Stir in chocolate chips and M&Ms, reserving a handful of M&Ms for topping. Fold in any optional add-ins (pretzels, peanut butter cups, nuts) if using.
- Press dough evenly into prepared pan. Sprinkle reserved M&Ms on top and gently press in.
- Bake for 22-26 minutes, until edges are golden and center looks just set. Do not overbake.
- Cool in pan for at least 30 minutes. For quicker cooling, lift bars out using parchment and place on a wire rack.
- Once fully cooled, slice into bars or squares. Wipe knife between cuts for clean edges. Serve and enjoy!
Notes
For gluten-free bars, use a 1-to-1 gluten-free flour blend and certified gluten-free oats. For nut-free, substitute sunflower seed butter and nut-safe candies. Do not overbake for best chewy texture. Chill bars before slicing for clean edges. Store in an airtight container at room temperature for up to 5 days or freeze for up to 3 months.
Nutrition
- Serving Size: 1 bar (1/24 of pan)
- Calories: 220
- Sugar: 16
- Sodium: 120
- Fat: 11
- Saturated Fat: 4
- Carbohydrates: 27
- Fiber: 2
- Protein: 4
Keywords: monster cookie bars, peanut butter bars, M&M cookie bars, easy dessert, bake sale, chewy cookie bars, chocolate chip bars, family treat, party dessert, kid-friendly


