The first time I tasted real sweet and sour sauce at a bustling Chinatown eatery, the zingy tang and glossy red shimmer totally floored me. It’s that unmistakable balance—the gentle sweetness, that sharp, lip-smacking tartness, the way it clings to crispy chicken or dances over stir-fried veggies. It’s magic, honestly. And yet, for years, I relied on the bottled stuff (you know the one—neon, oddly thick, just not quite right). It wasn’t until a cozy Saturday at home, craving Chinese takeout but determined to cook from scratch, that I finally tried making my own sweet and sour sauce recipe. Friends, game changer!
Let’s face it: good sweet and sour sauce can make or break a dish. And making it at home? So much simpler than I ever expected. You control the flavors, the thickness, and there’s something so rewarding about whisking up this restaurant classic in your own kitchen. My kids swoon for it over chicken nuggets, and my partner will dip just about anything in it (fries, tofu, egg rolls—you name it). This recipe is packed with real-deal flavor but uses ingredients you probably already have. No mystery syrups, no weird aftertaste, just pure, uplifting comfort that brings a little sparkle to any meal.
After testing this sweet and sour sauce recipe more times than I can count—tweaking the sugar, playing with pineapple juice, and even testing which vinegar gives the best zing—I can say with confidence: this is the only one you’ll ever need. Whether you’re craving that classic takeout taste or just want to jazz up your weeknight dinner, this sauce is about to become your go-to. Ready to skip the takeout line and make a little kitchen magic?
Why You’ll Love This Sweet and Sour Sauce Recipe
- Quick & Easy: You can whip this sauce up in under 10 minutes, start to finish. No more waiting for delivery or running to the store for a last-minute bottle.
- Simple Ingredients: Everything you need is probably already in your pantry or fridge—no specialty shopping trips, no hard-to-pronounce additives.
- Perfect for Any Occasion: Whether it’s a lazy Sunday lunch, a lively family dinner, or finger-foods for a party, this sauce shines. I’ve even drizzled it over grilled pineapple for a quirky brunch!
- Crowd-Pleaser: Kids love it. Adults ask for the recipe. Even my pickiest eater gave it two sticky thumbs up. It’s the ultimate dipper, pourer, and drizzler.
- Unbelievably Delicious: The flavor is punchy but not overpowering, sweet but balanced, and it coats everything in a gorgeous, glossy sheen. It’s the kind of sauce that makes you want to lick the spoon (go ahead, I won’t judge).
What sets this sweet and sour sauce recipe apart is the flexibility and freshness. Most recipes rely on ketchup as a base, but here, I blend pineapple juice and vinegar for a more authentic, layered flavor. The cornstarch slurry gives it just the right thickness—silky but pourable, never gloopy. And you can tweak the sugar or vinegar to match your mood.
There’s pure comfort in every spoonful. It’s the nostalgic taste of takeout, but you get to tailor it to your family’s tastes and dietary needs. Plus, you’ll save money, skip the preservatives, and impress everyone at the table. Trust me, once you try this, bottled sauce just won’t cut it anymore. If you’re after that perfect balance of sweet and tang, this is the recipe you’ve been searching for.
What Ingredients You Will Need
This sweet and sour sauce recipe keeps things simple but bold. Each ingredient plays a role in creating that classic flavor and shiny, craveable texture. You’ll probably find most of these in your kitchen already—and if not, they’re all easy to track down.
- Pineapple Juice (1/2 cup / 120 ml) – Delivers the distinct fruity sweetness and tang. Use canned 100% juice for consistency (Dole is my standby), or squeeze your own if you have fresh pineapple on hand.
- Rice Vinegar (1/4 cup / 60 ml) – Gives that signature sharpness. You can swap with apple cider vinegar or white vinegar in a pinch, but rice vinegar is classic for its mild, mellow bite.
- Brown Sugar (1/3 cup / 67 g, packed) – Adds caramel notes and depth. Light brown sugar works best, but dark is okay for a richer taste. You can use coconut sugar for a less refined option.
- Ketchup (1/4 cup / 60 g) – Brings color, subtle tomato tang, and a touch of umami. Any brand you love will do, but I’ve found Heinz gives a good balance (skip the artisan ketchup if you want the classic flavor).
- Soy Sauce (1 tablespoon / 15 ml) – Just enough to add savory depth and balance the sweetness. Low-sodium is fine. For gluten-free, use tamari or coconut aminos.
- Cornstarch (2 tablespoons / 16 g) – Essential for thickening the sauce to that perfect, glossy consistency. Tapioca starch or potato starch also work.
- Cold Water (2 tablespoons / 30 ml, for slurry) – Don’t skip this step; it dissolves the cornstarch and prevents lumps.
- Salt (1/4 teaspoon / 1.5 g) – Just a pinch to round everything out.
- Optional Extras:
- Red Chili Flakes (for a spicy kick—my husband’s favorite twist)
- Garlic Powder (1/4 teaspoon / 0.5 g, for a mellow garlicky note)
- Fresh Ginger (1/2 teaspoon grated / 2 g, if you want a fresh zing)
Ingredient tips: If you want a truly vibrant red sauce, a tiny drop of natural food coloring will do it—though I usually skip it for home cooking. For a less sweet version, reduce the brown sugar to 1/4 cup. And for a vegan option, double-check that your sugar and ketchup are animal product-free.
Most importantly, don’t stress about brands—use what you have, and adjust to your taste. I’ve made this sauce with apple cider vinegar instead of rice vinegar in a pinch, and it was still a hit. The beauty of this recipe is that it’s forgiving, flexible, and always delicious.
Equipment Needed
- Small Saucepan: Any medium-sized saucepan will do. Stainless steel is my favorite for easy cleanup, but non-stick works too. If you have a heavy-bottomed pan, even better—it helps prevent scorching.
- Whisk: A balloon whisk is ideal for blending the sauce and dissolving the cornstarch slurry smoothly. A fork works in a pinch.
- Measuring Cups & Spoons: For accuracy, especially when balancing sweet and sour. If you’re a “pinch and pour” kind of cook, just try to keep the ratios close.
- Heatproof Spatula or Spoon: For stirring and scraping the sides so nothing burns. Silicone spatulas are my go-to.
- Small Bowl: To mix the cornstarch slurry. Even a coffee mug works if you’re short on bowls.
- Jar or Container: For storing leftovers (if there are any!). I like glass jars because the sauce looks so pretty, but any airtight container will do.
If you don’t have a dedicated whisk, stirring with a fork as the sauce thickens works just fine—just keep stirring to avoid lumps. For cleanup, soak your pan right after cooking; the sugar can get sticky if left too long. And if you’re shopping for tools, you don’t need anything fancy—most dollar-store saucepans and spatulas have lasted me years.
Preparation Method
-
Prepare the cornstarch slurry:
In a small bowl, whisk together 2 tablespoons (16 g) cornstarch and 2 tablespoons (30 ml) cold water until smooth and lump-free. Set aside. This step is key—adding cornstarch directly to hot liquid will make it clump. -
Combine the base ingredients:
Place 1/2 cup (120 ml) pineapple juice, 1/4 cup (60 ml) rice vinegar, 1/3 cup (67 g) packed brown sugar, 1/4 cup (60 g) ketchup, 1 tablespoon (15 ml) soy sauce, and 1/4 teaspoon (1.5 g) salt into your saucepan. If you’re adding chili flakes, garlic powder, or ginger, now’s the time! Whisk well to combine. -
Heat the mixture:
Turn the stove to medium heat. Bring the mixture to a gentle simmer, whisking occasionally. This usually takes 2–3 minutes. You’ll notice a sweet, tangy aroma wafting up—so good! -
Add the cornstarch slurry:
Once the sauce is bubbling gently, give your slurry a quick stir (cornstarch settles if it sits too long). Pour the slurry in slowly, whisking constantly as you go. This helps the sauce thicken evenly and prevents lumps. -
Simmer and thicken:
Let the sauce cook for another 2–3 minutes, whisking the whole time. The sauce will turn glossy and coat the back of a spoon. If it looks too thin, keep simmering for another minute; if it’s too thick, splash in a bit more pineapple juice or water until you hit that perfect texture. -
Taste and adjust:
Give the sauce a taste (careful—it’s hot!). Want it tangier? Add a splash more vinegar. Sweeter? Sprinkle in a teaspoon of sugar. Need more salt or spice? Adjust to your liking. -
Cool and serve:
Remove the pan from heat. Let the sweet and sour sauce cool for 2–3 minutes before using. This helps it thicken up even more and lets the flavors mellow. Pour into a serving bowl, jar, or drizzle directly over your favorite dish. -
Troubleshooting:
If your sauce develops lumps, don’t panic—just whisk vigorously off the heat, or strain through a fine-mesh sieve. Sauce too runny? Simmer for a minute longer. Too thick? Add a splash of water, whisk, and you’re back on track.
Pro tip: Always keep an eye on the sauce as it thickens—sugar can scorch if left unattended. Stirring constantly is the name of the game for silky-smooth results. And don’t be afraid to tweak the flavors to fit your mood; this sweet and sour sauce recipe is as flexible as your cravings!
Cooking Tips & Techniques
- Whisk, Don’t Stir: Using a whisk, especially when adding the cornstarch slurry, is key for a smooth, glossy finish. I learned the hard way—my first attempt came out lumpy because I reached for a spoon instead of a whisk!
- Simmer, Don’t Boil: Keep the heat at a gentle bubble. High heat can make the sauce separate or get oddly sticky. Medium is just right for coaxing out the best flavor and texture.
- Balance the Flavors: Taste as you go. If you overshoot the sugar or vinegar, a splash of water can mellow things out. Too sharp? A tiny pinch of extra sugar helps.
- Consistency Control: The sauce thickens as it cools. If you want a pourable glaze, stop cooking when it just coats a spoon. For thicker dipping sauce, simmer another 30 seconds—don’t overdo it, or it’ll get too jelly-like.
- Multitasking: While the sauce simmers, prep your main dish. Chop veggies or fry chicken so everything comes together at once. If you’re making a double batch (trust me, people will ask), use a larger saucepan and whisk longer to keep things smooth.
- Color Cues: The sauce should turn a deep, shiny orange-red as it thickens. If it looks pale, double-check your ketchup and sugar amounts or simmer another minute.
And here’s a lesson learned: don’t walk away from the stove, even for a minute. The sugar can caramelize quickly and change the flavor. Cleanup tip: soak your saucepan right away, and any sticky residue will wash right off. Last but not least, don’t be afraid to make this your own—some of my best batches happened when I adjusted on the fly!
Variations & Adaptations
- Spicy Sweet and Sour Sauce: Stir in 1/4–1/2 teaspoon red chili flakes or a squirt of sriracha for a fiery kick. My partner raves about the spicy version over crispy tofu or shrimp.
- Gluten-Free Version: Swap regular soy sauce for gluten-free tamari or coconut aminos. Double-check your ketchup and cornstarch labels to be sure—most are gluten-free, but it’s worth a peek.
- Low-Sugar Option: Cut the brown sugar by half or swap for stevia or monkfruit sweetener (start with 2 tablespoons and add to taste). It’ll be tangier but still delicious—great for anyone watching their sugar intake.
- Fruit-Twist: Add small pineapple chunks or a splash of orange juice with the pineapple juice for a tropical spin. Chopped bell peppers work too for a sweet crunch (just simmer an extra minute).
- Cooking Methods: This sweet and sour sauce recipe is stovetop-friendly, but you can also microwave it: combine all ingredients (except cornstarch slurry) in a microwave-safe bowl, heat for 2 minutes, whisk in the slurry, then microwave in 30-second bursts until thick.
- Allergen Substitutions: For soy allergies, coconut aminos or even a dash of Worcestershire (vegan version) can work. If you’re avoiding corn, try tapioca or potato starch.
Personal favorite? I once added grated fresh ginger and a splash of orange juice when I was out of pineapple juice—turned out zesty, bright, and perfect over grilled chicken. Don’t be afraid to riff and make it yours!
Serving & Storage Suggestions
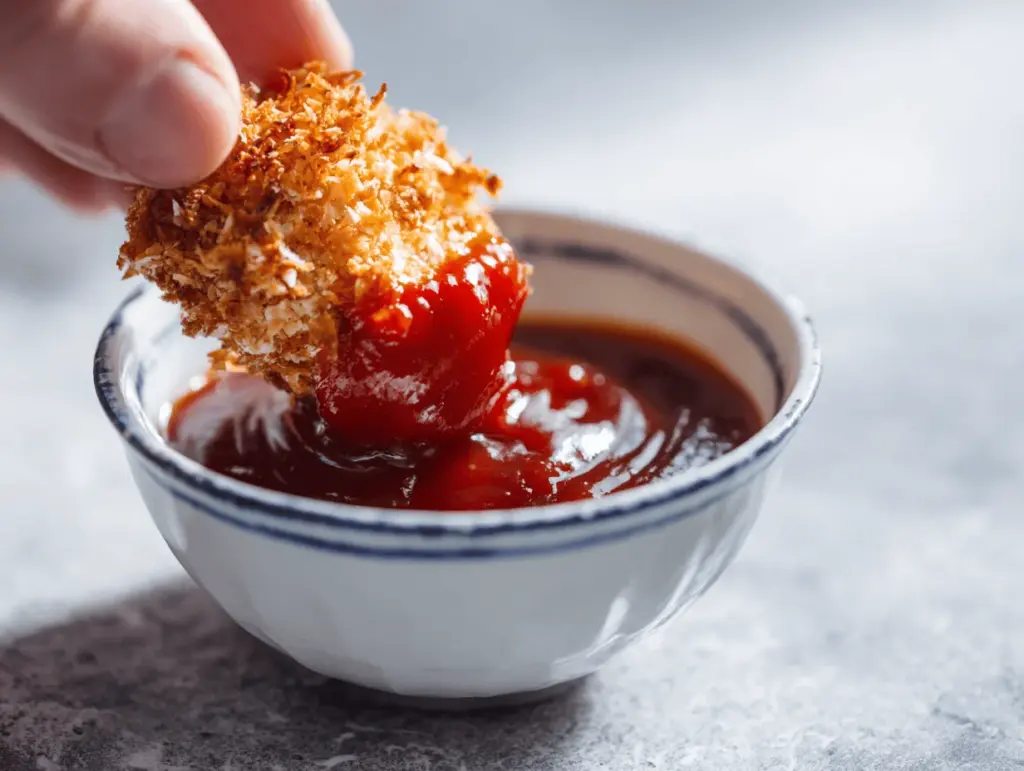
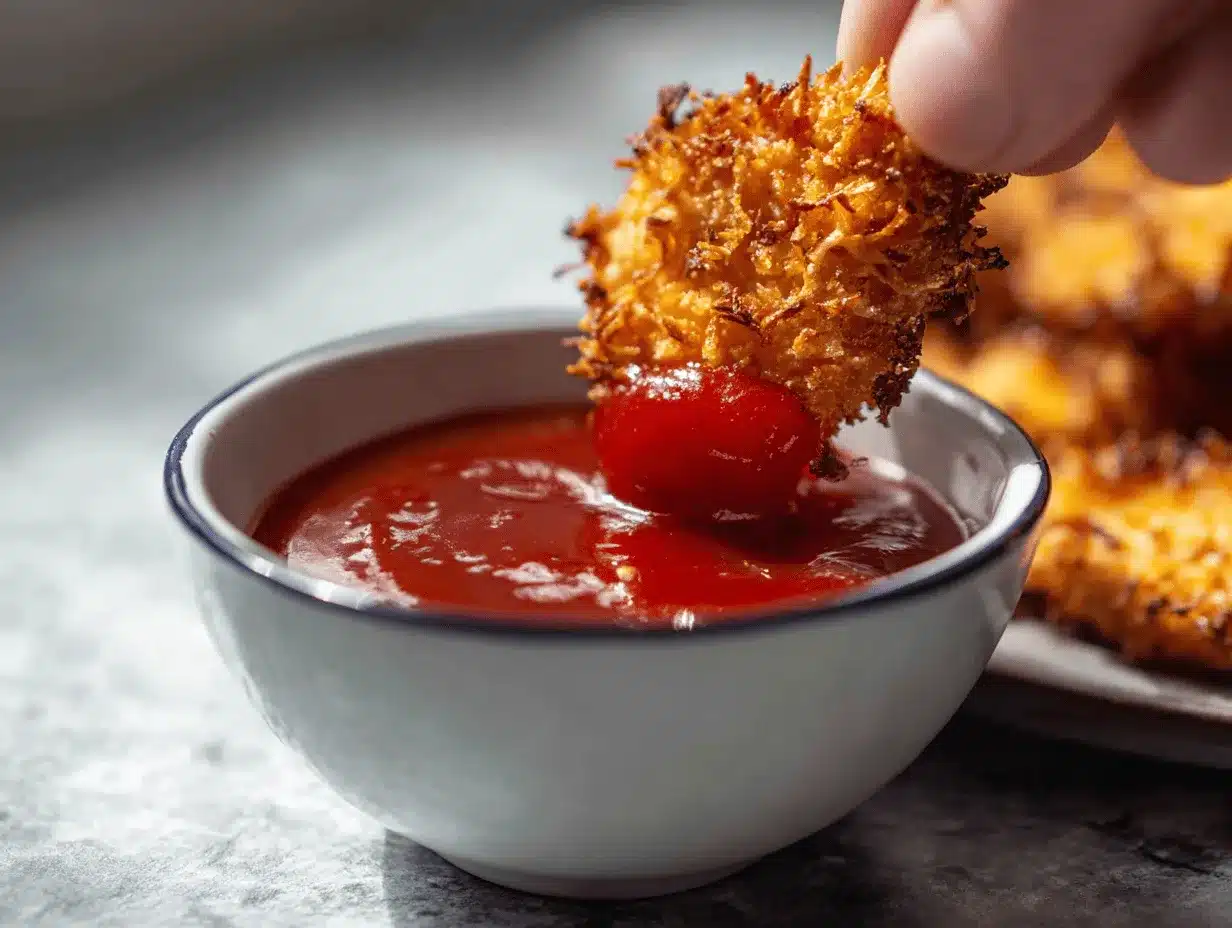
This sweet and sour sauce recipe shines at room temperature or gently warmed. For a glossy finish, pour it over hot dishes just before serving—think crispy chicken, battered shrimp, or veggie stir-fry. It’s also perfect as a dip for egg rolls, spring rolls, or even fries (seriously, try it!).
For a picture-perfect platter, sprinkle with sesame seeds or chopped green onions before serving. Pair with steamed jasmine rice, fried rice, or a chilled cucumber salad for balance. I love it alongside sparkling water with lime or a light white wine for a refreshing contrast.
To store, let the sauce cool to room temp, then transfer to a glass jar or airtight container. Stash it in the fridge for up to a week—it’ll thicken a bit, but just stir or reheat gently to loosen. For longer storage, freeze in small portions (ice cube trays work wonders) for up to 3 months. When reheating, use gentle heat on the stove or microwave in 20-second bursts, whisking until smooth.
Bonus: the flavors deepen after a day or two. I actually prefer it the next day, when everything’s melded together. If you notice any separation, just give it a good stir or shake before using.
Nutritional Information & Benefits
This sweet and sour sauce recipe is lighter than many store-bought versions. Each two-tablespoon (30 ml) serving has approximately:
- Calories: 60
- Sugar: 12g
- Fat: 0g
- Carbs: 14g
- Sodium: 200mg
Pineapple juice brings vitamin C and a dash of potassium, while homemade means no high-fructose corn syrup or preservatives. For gluten-free or vegan diets, simple swaps make this recipe accessible to everyone. Allergens? Just watch the soy sauce and cornstarch (see substitutions above). My own wellness rule: I’d rather make a sweet treat from scratch than guess what’s in a bottle. You know exactly what you’re eating, and you can tweak it to fit your goals.
Conclusion
So there you have it—my go-to sweet and sour sauce recipe that’s easy, homemade, and honestly better than takeout. It’s fast, foolproof, and fits every occasion, from weeknight dinners to party platters. The flavors are bold but balanced, and you’re in control of every ingredient.
Give this recipe a try the next time you’re craving that classic Chinese restaurant taste. Play around with variations, make it as sweet or tangy as you like, and don’t forget to share your favorite tweaks in the comments below. I’d love to hear how you make it your own!
Trust me, once you taste homemade sweet and sour sauce, you’ll never look at the bottled stuff the same way again. Happy cooking, and may your next meal be extra saucy!
FAQs About Sweet and Sour Sauce Recipe
Can I make sweet and sour sauce ahead of time?
Absolutely! In fact, the flavors improve after a day in the fridge. Store in a sealed jar and give it a good stir before serving.
What can I use instead of pineapple juice?
Orange juice or apple juice work in a pinch. For extra tang, add a squeeze of lemon. The flavor will change slightly but still be delicious.
Is this sweet and sour sauce recipe gluten-free?
It can be! Just use tamari or coconut aminos instead of regular soy sauce, and double-check your other ingredients.
How do I fix lumpy sweet and sour sauce?
If lumps form, whisk the sauce off the heat or strain it through a fine sieve. Next time, make sure to dissolve the cornstarch in cold water first and whisk constantly as you add it.
Can I freeze homemade sweet and sour sauce?
Yes, it freezes well. Pour into ice cube trays or small containers, freeze, and thaw in the fridge before reheating. Stir or whisk to restore its smooth texture.
PrintSweet and Sour Sauce Recipe Easy Homemade Chinese Takeout
This easy homemade sweet and sour sauce delivers the perfect balance of tangy and sweet, just like your favorite Chinese takeout. Made with pantry staples and ready in under 10 minutes, it’s perfect for dipping, drizzling, or pouring over your favorite dishes.
- Prep Time: 5 minutes
- Cook Time: 5 minutes
- Total Time: 10 minutes
- Yield: About 1 cup (8 servings, 2 tablespoons each) 1x
- Category: Sauce
- Cuisine: Chinese
Ingredients
- 1/2 cup pineapple juice
- 1/4 cup rice vinegar
- 1/3 cup packed brown sugar
- 1/4 cup ketchup
- 1 tablespoon soy sauce (or tamari/coconut aminos for gluten-free)
- 2 tablespoons cornstarch
- 2 tablespoons cold water
- 1/4 teaspoon salt
- Optional: 1/4–1/2 teaspoon red chili flakes
- Optional: 1/4 teaspoon garlic powder
- Optional: 1/2 teaspoon grated fresh ginger
Instructions
- In a small bowl, whisk together cornstarch and cold water until smooth and lump-free. Set aside.
- In a small saucepan, combine pineapple juice, rice vinegar, brown sugar, ketchup, soy sauce, and salt. Add optional chili flakes, garlic powder, or ginger if desired. Whisk well.
- Place saucepan over medium heat and bring mixture to a gentle simmer, whisking occasionally (about 2–3 minutes).
- Stir the cornstarch slurry again, then slowly pour it into the simmering sauce while whisking constantly.
- Continue to simmer and whisk for another 2–3 minutes, until the sauce thickens and turns glossy. If too thin, simmer another minute; if too thick, add a splash of pineapple juice or water.
- Taste and adjust: add more vinegar for tang, sugar for sweetness, or salt/spice as desired.
- Remove from heat and let cool for 2–3 minutes before serving. The sauce will thicken further as it cools.
- If lumps form, whisk vigorously off heat or strain through a fine-mesh sieve. Store leftovers in a sealed jar in the fridge for up to a week.
Notes
For a spicier sauce, add chili flakes or sriracha. Use tamari or coconut aminos for gluten-free. The sauce thickens as it cools; thin with water or pineapple juice if needed. Store in the fridge for up to a week or freeze for up to 3 months. Taste and adjust sugar or vinegar to your preference.
Nutrition
- Serving Size: 2 tablespoons
- Calories: 60
- Sugar: 12
- Sodium: 200
- Carbohydrates: 14
Keywords: sweet and sour sauce, homemade, Chinese takeout, easy, dipping sauce, gluten-free, vegan, pineapple, quick, stir fry, Asian sauce


