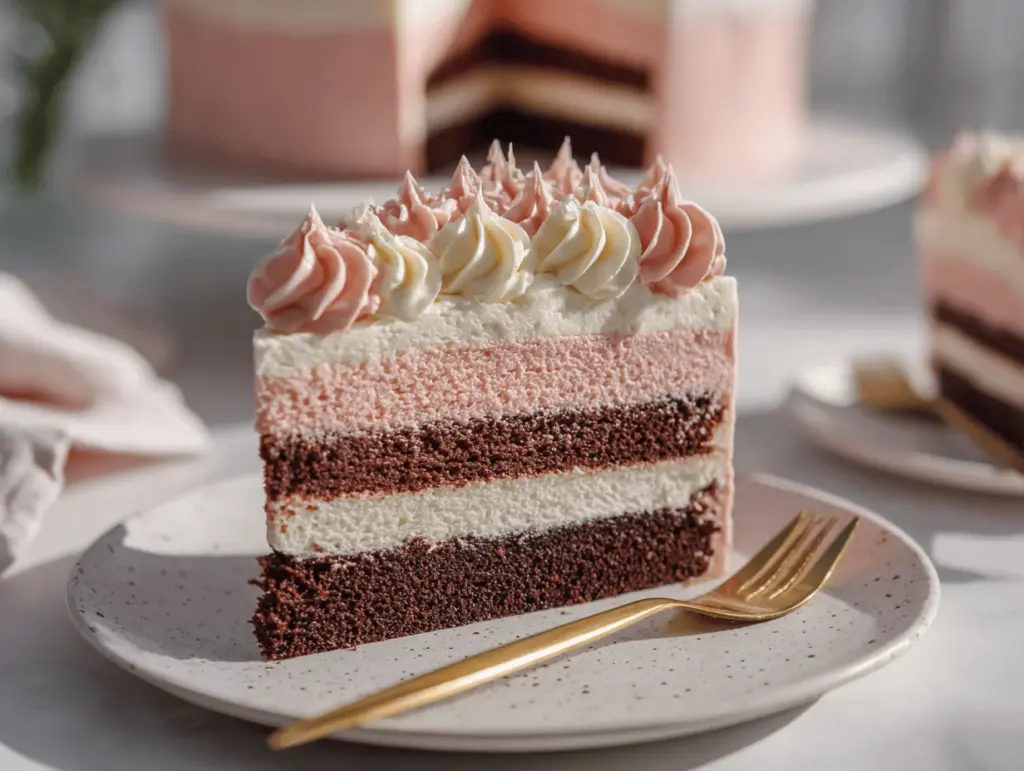
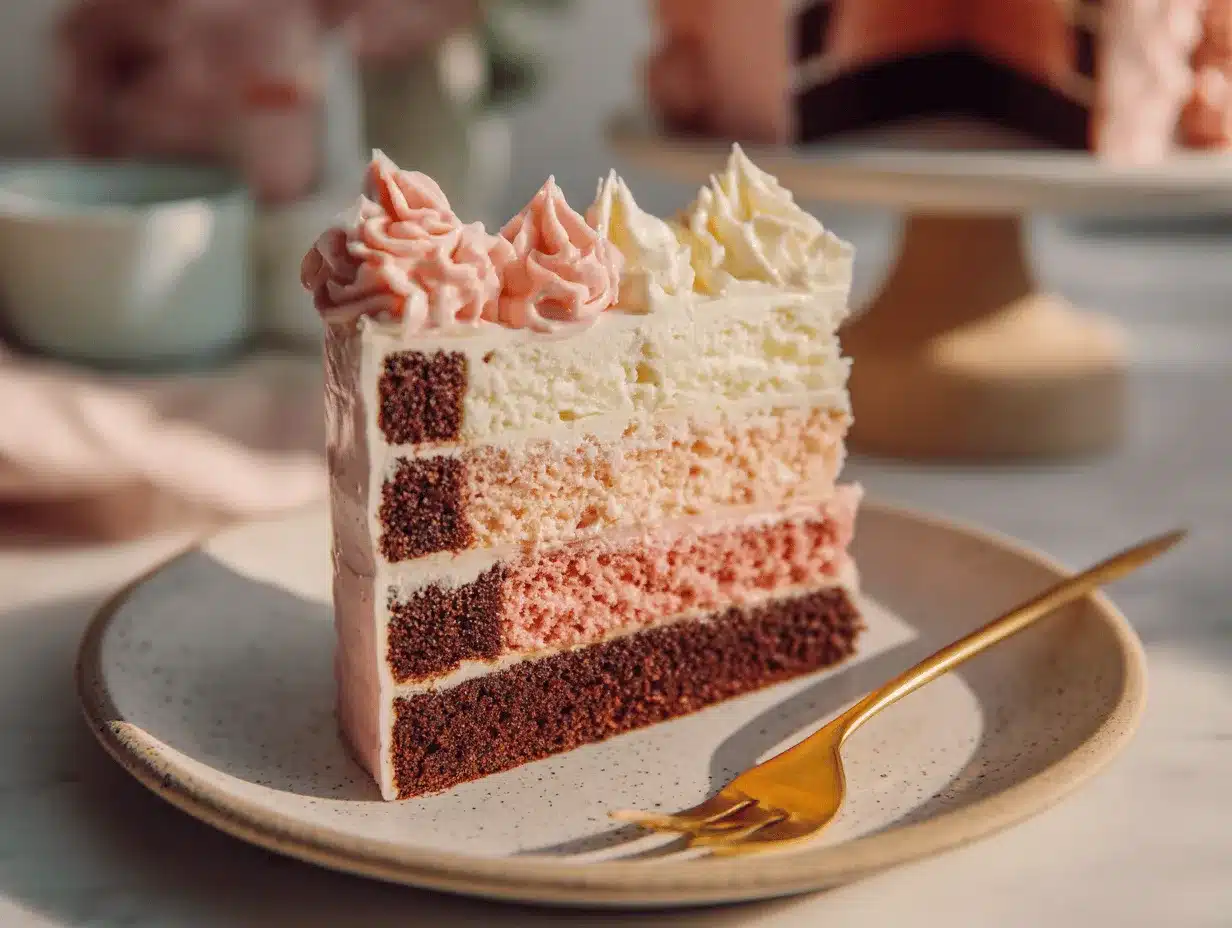
The very first time I sliced into a homemade Neapolitan cake, it was like a celebration on a plate—three bold layers, each its own flavor, stacked up like a pastel dream. The soft aroma of vanilla and chocolate mingled with the sweet hint of strawberry, and honestly, I was hooked from that moment. If you’ve ever admired those gorgeous tri-color cakes and thought they were way out of reach for a home baker, I’m here to change your mind. This Neapolitan cake recipe is surprisingly simple, beautifully elegant, and it’s perfect for any fancy occasion—or, let’s be real, just because you’re craving something a little extra special.
I started making Neapolitan cakes for my family birthdays, and they quickly became “the cake” everyone requested. There’s just something so joyful about those three layers—chocolate, vanilla, and strawberry—nestled together under a cloud of creamy frosting. You know, I’ve tested this recipe a dozen times (maybe more), tweaking it for the right tenderness and flavor balance. The result? A cake that’s soft, moist, and never dry, even after a day or two in the fridge.
This Neapolitan cake recipe isn’t just about looks—though it’s definitely a showstopper for Pinterest and party tables. It’s a mash-up of classic flavors that’s easy enough for beginner bakers but fancy enough to impress a crowd. Whether you’re baking for a special birthday, a holiday gathering, or just because you want to treat yourself, you’ll love how this cake brings the nostalgia of childhood ice cream in a grown-up, party-ready package.
Why You’ll Love This Neapolitan Cake Recipe
- Stunning Presentation: The chocolate, vanilla, and strawberry layers look absolutely gorgeous when you slice in—definitely a Pinterest-worthy centerpiece.
- Easy to Make: Don’t let the layers fool you! With my step-by-step directions, you’ll have everything under control—even if you’ve never stacked a cake before.
- Classic Flavors, Perfectly Balanced: Each layer is distinct but not overpowering. The chocolate is rich, the vanilla is light, and the strawberry is sweet but natural.
- Ideal for Celebrations: Birthdays, anniversaries, bridal showers, or even a fancy brunch—this cake elevates any event (and everyone asks for seconds).
- Family-Approved: My picky eaters and cake-obsessed friends have all given this their stamp of approval. It’s a crowd-pleaser every single time.
- Customizable: Want a gluten-free version? Need to skip the eggs? No problem—there are plenty of ways to adapt this cake to your needs (check out the variations below!).
- Moist and Tender Every Time: Thanks to a few pro tips (and a little patience), your cake will be soft, never dry or crumbly. No more disappointing layer cakes!
What really sets this Neapolitan cake recipe apart is the method: instead of baking three separate cakes from scratch, you whip up one base batter, then divide and flavor it. No more endless bowls or messy counters! I also blend real strawberries into the strawberry layer for that authentic, fruity pink color without fake dyes. And let’s face it—there’s something magical about serving a cake that looks like it came straight from a fancy bakery, even though you made it in your own kitchen.
For me, this recipe is about more than dessert. It’s about sharing something beautiful, delicious, and a little nostalgic. The moment you set this cake down at a party, you’ll see what I mean—watch as everyone’s eyes light up! It’s the kind of cake that turns any day into a celebration.
What Ingredients You Will Need
This Neapolitan cake recipe is made with simple ingredients you probably already have, plus a few special touches to bring out that signature flavor in every layer. Here’s what you’ll need for the cake and the frosting:
For the Cake Layers
- All-purpose flour (240g / 2 cups) – the backbone of your cake layers, giving structure and softness.
- Baking powder (2 teaspoons) – helps the cake rise and stay fluffy.
- Baking soda (1/2 teaspoon) – adds a little extra lift and tenderness.
- Salt (1/2 teaspoon) – just enough to balance the sweetness.
- Unsalted butter, softened (170g / 3/4 cup) – brings rich flavor and a moist crumb. (I like Kerrygold for extra creaminess.)
- Granulated sugar (300g / 1 1/2 cups) – just the right amount for a cake that’s sweet but not cloying.
- Large eggs, room temperature (3) – eggs bind everything together and create that classic cake texture.
- Whole milk, room temperature (240ml / 1 cup) – keeps the cake moist and tender.
- Vanilla extract (2 teaspoons) – use real vanilla for the best flavor (I’m partial to Nielsen-Massey).
- Unsweetened cocoa powder (20g / 1/4 cup) – for the chocolate layer; Dutch-processed gives a deeper color and flavor.
- Fresh strawberries, pureed (80g / about 1/2 cup) – for the strawberry layer; frozen works if fresh isn’t in season (thaw and drain first).
- Red or pink food coloring (optional) – a drop or two to amp up the strawberry layer’s color, but it’s not required if you like a natural look.
For the Frosting
- Unsalted butter, softened (170g / 3/4 cup) – the base for a creamy, dreamy frosting.
- Powdered sugar (360g / 3 cups) – sifted, for a smooth finish.
- Heavy cream (45-60ml / 3-4 tablespoons) – to make your frosting extra fluffy and spreadable.
- Vanilla extract (1 teaspoon) – for flavor.
- Pinch of salt – balances out the sweetness.
Ingredient Tips: Use room temperature eggs, milk, and butter for the best cake texture—they mix more evenly, so you get a perfectly tender crumb. For the strawberry layer, I blend strawberries in a mini food processor, then strain out excess juice for a thick puree. If you want a gluten-free cake, swap in a 1:1 gluten-free flour blend (I like King Arthur’s). If dairy-free, use margarine and a plant-based milk. You can even sub in raspberry puree for a twist!
Equipment Needed
- Three 8-inch (20cm) round cake pans – essential for those even, distinct layers. I’ve used 9-inch pans in a pinch, but your layers will be a bit thinner.
- Electric mixer or stand mixer – makes creaming the butter and sugar so much easier. You can do it by hand, but your arm might get a workout!
- Mixing bowls – at least two, for dividing and flavoring the batter.
- Measuring cups and spoons – accuracy is key for baking.
- Rubber spatula – helps you scrape every last bit of batter from the bowl.
- Parchment paper – lining your pans makes removing the cakes a breeze.
- Wire cooling rack – for cooling the cakes evenly.
- Offset spatula or butter knife – spreads frosting smoothly for that bakery look.
- Food processor or blender – handy for making strawberry puree (optional, but saves time).
If you don’t have three pans, you can bake the layers one at a time—just wash, dry, and re-grease between uses. I’ve done this plenty of times when my kitchen was short on gear. For easy cleanup, line pans with parchment rounds. And if you’re a frequent baker, investing in good-quality nonstick pans is totally worth it—they last ages with a little care (just don’t put them in the dishwasher and avoid using metal utensils).
Preparation Method
- Prep your pans and preheat: Preheat your oven to 350°F (175°C). Grease three 8-inch (20cm) round cake pans with butter or nonstick spray. Line the bottoms with parchment paper for easy release.
- Mix the dry ingredients: In a medium bowl, whisk together 2 cups (240g) flour, 2 teaspoons baking powder, 1/2 teaspoon baking soda, and 1/2 teaspoon salt. Set aside.
- Cream the butter and sugar: In a large bowl, beat 3/4 cup (170g) unsalted butter and 1 1/2 cups (300g) sugar together on medium-high speed for about 3 minutes (until light and fluffy). This step is crucial for a tender crumb, so don’t rush it!
- Add eggs and vanilla: Beat in 3 large eggs, one at a time, scraping down the bowl between each addition. Mix in 2 teaspoons vanilla extract.
- Alternate dry ingredients and milk: With the mixer on low, add the dry ingredients in three parts, alternating with 1 cup (240ml) whole milk, starting and ending with dry. Mix until just combined—don’t over-mix or your cake could turn dense.
-
Divide and flavor the batter: Evenly divide the batter into three bowls (about 400g / 1 1/3 cups each).
- For the vanilla layer: Leave as-is.
- For the chocolate layer: Stir in 1/4 cup (20g) cocoa powder and 2 tablespoons (30ml) milk.
- For the strawberry layer: Fold in 1/2 cup (80g) strawberry puree (strained if watery) and a drop of red/pink food coloring if desired.
- Bake the layers: Pour each batter into a prepared pan, smoothing tops with a spatula. Bake for 20-25 minutes, rotating pans halfway through. The cakes are done when a toothpick inserted in the center comes out clean and the top springs back lightly when touched.
- Cool completely: Let cakes cool in the pans for 10 minutes, then run a knife around the edge and turn out onto a wire rack. Peel off parchment and allow to cool completely—frosting warm cakes is a recipe for a melty mess!
- Make the frosting: Beat 3/4 cup (170g) unsalted butter until creamy (about 2 minutes). Gradually add 3 cups (360g) powdered sugar, 1 teaspoon vanilla, pinch of salt, and 3-4 tablespoons (45-60ml) heavy cream. Beat for 2-3 minutes until fluffy. If it’s too thick, add a splash more cream; if too thin, beat in more powdered sugar.
- Assemble the cake: Place the chocolate layer on a serving plate. Spread a layer of frosting on top, then add the strawberry layer, more frosting, then the vanilla layer on top. Frost the top and sides with the remaining frosting.
- Decorate: Use an offset spatula for smooth sides, or swirl the frosting with a spoon for a rustic look. Top with sprinkles, sliced strawberries, or chocolate shavings if you’re feeling extra fancy.
- Chill and serve: For clean slices, chill the cake for at least 30 minutes before cutting. Use a sharp, warm knife (run under hot water and dry) for picture-perfect layers.
Notes: If your strawberry batter looks too thin, add a tablespoon of flour. If your cakes dome, trim the tops with a serrated knife. Don’t stress about perfection—this cake is all about fun and flavor!
Cooking Tips & Techniques
- Room Temp Ingredients: Bringing your butter, eggs, and milk to room temperature helps everything mix evenly and creates a finer crumb. Cold ingredients can lead to dense, uneven cakes—trust me, I’ve made that mistake before.
- Don’t Over-Mix: Overbeating the batter can make your cake tough. Mix just until the flour is incorporated, and always use gentle folding for the strawberry layer.
- Even Layers: Weigh your batter with a kitchen scale for perfect, uniform layers. If you don’t have one, eyeball it as best you can and use a measuring cup.
- Cooling Is Key: Letting your cakes cool completely before frosting avoids meltdowns (literally). I’ve tried to rush it before—big mistake!
- Frost Like a Pro: Use a thin ‘crumb coat’ first—spread a thin layer of frosting over the whole cake to catch crumbs, chill for 15 minutes, then finish with the final layer of frosting.
- Clean Slices: For those beautiful slices you see on Pinterest, chill the cake before cutting, and use a hot, clean knife for each slice.
- Test for Doneness: Every oven is a little different, so start checking your cakes at 20 minutes. They should spring back in the center and pull slightly from the edges of the pan.
One time, I forgot to line my pans and spent ages prying the layers out with a spatula—never again! Parchment is your best friend. And if you’re short on time, you can bake the layers a day ahead and wrap them tightly until ready to frost.
Variations & Adaptations
- Gluten-Free: Swap all-purpose flour for a 1:1 gluten-free baking blend. I’ve used King Arthur’s with great results—nobody could tell the difference!
- Dairy-Free: Use vegan butter and a plant-based milk (like oat or almond). The cake stays just as moist and flavorful.
- Flavor Twists: Try raspberry puree instead of strawberry for a tangy spin, or use matcha powder in the vanilla layer for a green tea twist (so pretty for spring!).
- Different Cooking Methods: You can bake these layers in a sheet pan and cut them into rectangles for a “Neapolitan cake bar” look—great for parties or potlucks.
- Allergen Substitutions: Egg-free? Use a flax egg (1 tablespoon ground flax + 2.5 tablespoons water per egg) or your favorite egg replacer.
- Personal Favorite: I’ve made this cake with a whipped cream cheese frosting instead of buttercream—just blend in 8oz (225g) cream cheese for tangy, fluffy results. My family loves it!
Don’t be afraid to play with the flavors to make this cake your own. You can even add a layer of jam between the cakes for extra punch. If you want to go all-in on chocolate, swap the vanilla layer for another chocolate one—no judgment here!
Serving & Storage Suggestions
I always recommend serving Neapolitan cake slightly chilled. The slices hold their shape, and the frosting is just firm enough for those sharp, bakery-style edges. Let it sit at room temp for about 20 minutes before slicing if you want it extra soft and creamy.
This cake shines as a dessert centerpiece for birthdays, anniversaries, or any day you want to feel a little fancy. Pair it with fresh berries, a scoop of vanilla ice cream, or a glass of cold milk for the ultimate treat. For brunch, a cup of strong coffee is perfect.
To store, cover the cake tightly and refrigerate for up to 4 days. It freezes beautifully—just wrap individual slices in plastic wrap and freeze for up to 2 months. Thaw overnight in the fridge and let come to room temperature before serving. If the frosting feels a little stiff after chilling, a quick 10-second zap in the microwave (just the slice, not the whole cake!) brings it back to life. The flavors actually deepen after a day, so sometimes the leftovers taste even better.
Nutritional Information & Benefits
This Neapolitan cake recipe yields about 12 slices. Each slice has roughly 420 calories, 21g fat, 55g carbs, and 5g protein. It’s definitely an indulgence, but you’re getting real fruit in the strawberry layer and a good boost of calcium from the milk and butter. If you swap in gluten-free or dairy-free options, the numbers will change a bit, but the cake stays just as delicious.
Key ingredients like strawberries add vitamin C and antioxidants, while using whole milk and real butter means no weird additives. The cake is nut-free as written, but always check your ingredients for hidden allergens if you’re baking for a crowd. For me, baking from scratch always feels better than buying a store cake full of preservatives—it’s a treat you can feel good about sharing.
Conclusion
Let’s be honest—sometimes you just need a cake that makes people say “Wow!” when you bring it to the table. This Neapolitan cake recipe does exactly that, with its elegant layers and irresistible flavors. Whether you’re baking for a big celebration or just to brighten up a weekend, you’ll love how easy it is to pull off something so beautiful and delicious.
If you’ve never tried baking a layer cake before, this is the perfect place to start. Tweak the flavors, swap the frosting, or add your own creative touch—there’s no wrong way to make this cake your own. Personally, every time I bake it, I’m reminded of family birthdays and the joy of sharing something homemade.
If you make this Neapolitan cake recipe, I’d love to hear how it turned out! Leave a comment, share your photos, or let me know your favorite twist on the classic. Here’s to more celebrations, more cake, and more moments worth remembering!
FAQs About Neapolitan Cake Recipe
How do I keep my cake layers even and flat?
Level your batter before baking and tap the pans gently on the counter to remove bubbles. If the cakes dome, just trim the tops with a serrated knife for perfect stacking.
Can I use cake flour instead of all-purpose flour?
Yes, cake flour will make your layers even softer and lighter. Substitute the same amount by weight for best results.
Can I make the cake layers ahead of time?
Definitely! Bake the layers a day in advance, cool completely, and wrap tightly in plastic. They’ll be ready to frost when you need them.
What’s the best way to get a vibrant pink strawberry layer?
Use fresh, ripe strawberries for puree, and add a drop or two of red or pink food coloring if you want a brighter hue. Natural works too—it’s all about personal preference!
How do I store leftovers?
Cover the cake and refrigerate for up to 4 days. For longer storage, wrap slices and freeze up to 2 months. Thaw in the fridge and enjoy as fresh as day one!
Pin This Recipe!

Neapolitan Cake Recipe: Easy Elegant Layers for Fancy Celebrations

This Neapolitan cake features three stunning layers—chocolate, vanilla, and strawberry—stacked together for a showstopping dessert that’s surprisingly easy to make. Perfect for birthdays, holidays, or any celebration, this cake brings classic ice cream flavors to your party table.
- Prep Time: 30 minutes
- Cook Time: 25 minutes
- Total Time: 1 hour
- Yield: 12 servings 1x
- Category: Dessert
- Cuisine: American
Ingredients
- 2 cups (240g) all-purpose flour
- 2 teaspoons baking powder
- 1/2 teaspoon baking soda
- 1/2 teaspoon salt
- 3/4 cup (170g) unsalted butter, softened
- 1 1/2 cups (300g) granulated sugar
- 3 large eggs, room temperature
- 1 cup (240ml) whole milk, room temperature
- 2 teaspoons vanilla extract
- 1/4 cup (20g) unsweetened cocoa powder (Dutch-processed preferred)
- 2 tablespoons (30ml) milk (for chocolate layer)
- 1/2 cup (80g) fresh strawberries, pureed (or thawed, drained frozen strawberries)
- Red or pink food coloring (optional, for strawberry layer)
- For the frosting:
- 3/4 cup (170g) unsalted butter, softened
- 3 cups (360g) powdered sugar, sifted
- 3–4 tablespoons (45-60ml) heavy cream
- 1 teaspoon vanilla extract
- Pinch of salt
Instructions
- Preheat your oven to 350°F (175°C). Grease three 8-inch round cake pans and line the bottoms with parchment paper.
- In a medium bowl, whisk together flour, baking powder, baking soda, and salt. Set aside.
- In a large bowl, beat butter and sugar together on medium-high speed for about 3 minutes until light and fluffy.
- Beat in eggs one at a time, scraping down the bowl between each addition. Mix in vanilla extract.
- With the mixer on low, add the dry ingredients in three parts, alternating with the milk, starting and ending with dry ingredients. Mix until just combined.
- Divide the batter evenly into three bowls (about 1 1/3 cups each).
- For the vanilla layer: Leave as is.
- For the chocolate layer: Stir in cocoa powder and 2 tablespoons milk.
- For the strawberry layer: Fold in strawberry puree and a drop of food coloring if desired.
- Pour each batter into a prepared pan, smoothing the tops. Bake for 20-25 minutes, rotating pans halfway through, until a toothpick comes out clean.
- Let cakes cool in pans for 10 minutes, then turn out onto a wire rack and cool completely.
- For the frosting: Beat butter until creamy (about 2 minutes). Gradually add powdered sugar, vanilla, salt, and heavy cream. Beat for 2-3 minutes until fluffy, adjusting cream or sugar for consistency.
- To assemble: Place the chocolate layer on a serving plate and spread a layer of frosting on top. Add the strawberry layer, more frosting, then the vanilla layer. Frost the top and sides with remaining frosting.
- Decorate as desired with sprinkles, sliced strawberries, or chocolate shavings.
- Chill the cake for at least 30 minutes before slicing for clean layers. Use a sharp, warm knife for best results.
Notes
Use room temperature ingredients for best texture. If the strawberry batter is too thin, add a tablespoon of flour. Trim domed cakes for even stacking. For clean slices, chill the cake and use a hot, clean knife. The cake can be made gluten-free or dairy-free with appropriate substitutions. Layers can be baked ahead and wrapped tightly until ready to frost.
Nutrition
- Serving Size: 1 slice (1/12 of cake)
- Calories: 420
- Sugar: 38
- Sodium: 210
- Fat: 21
- Saturated Fat: 13
- Carbohydrates: 55
- Fiber: 1
- Protein: 5
Keywords: Neapolitan cake, layer cake, chocolate vanilla strawberry cake, birthday cake, celebration dessert, homemade cake, easy layer cake, party cake, classic cake, strawberry chocolate vanilla


