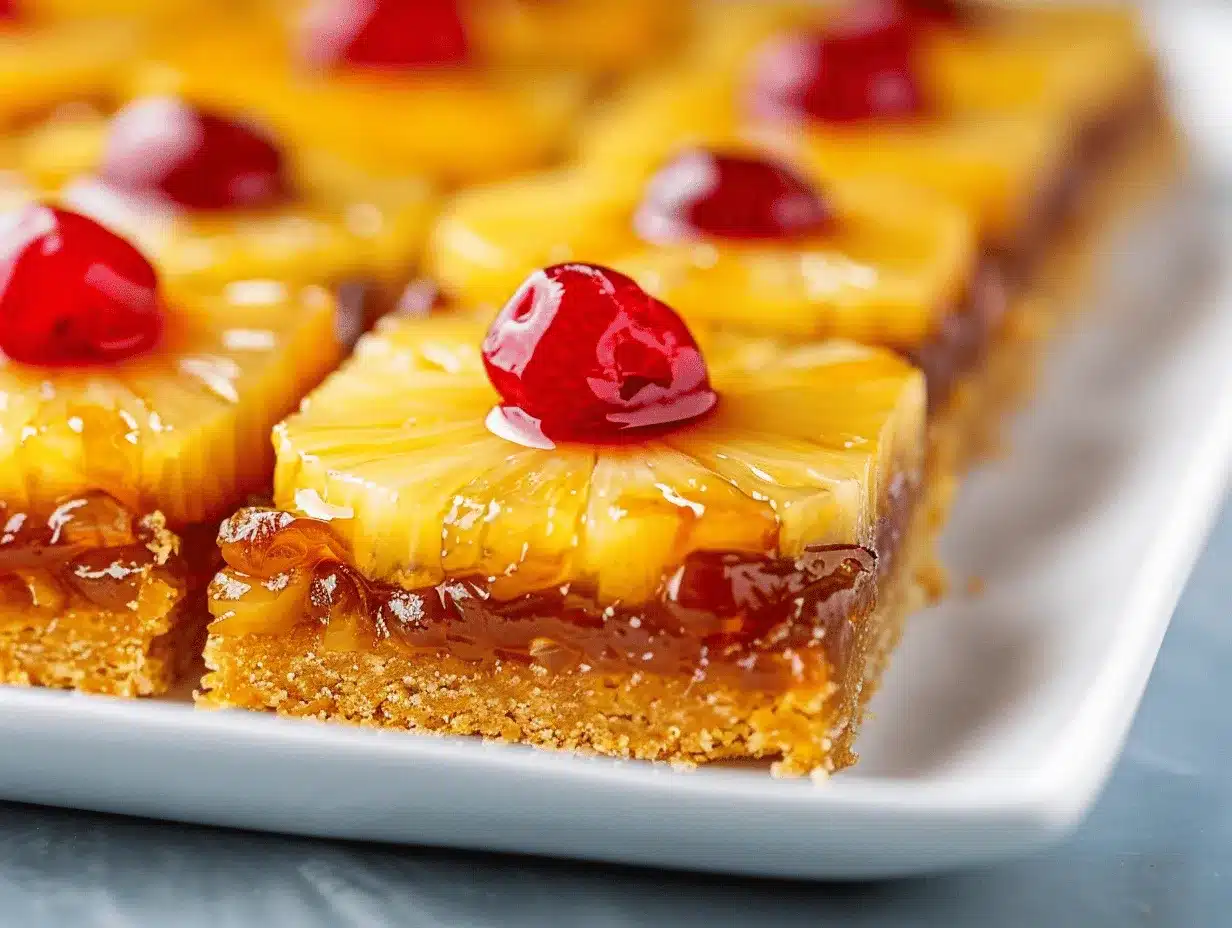
The first time the aroma of caramelized pineapple and cherries filled my kitchen, I knew I’d stumbled onto something magical. Imagine the classic pineapple upside-down cake, but transformed into chewy, golden cookie bars—plus a glossy cherry glaze that practically begs you to grab another square. I’ll be honest: these Pineapple Upside-Down Cookie Bars with Cherry Glaze are my go-to for potlucks, birthday parties, or any time I want to wow a crowd (with minimal fuss). The recipe has become a family favorite around here, and I’ve tested it so many times, I could probably whip it up in my sleep!
This dessert is pure sunshine in a pan—sweet pineapple, gooey brown sugar, buttery cookie base, all crowned with a tangy cherry glaze. You know how some recipes are just fun to make? This one has all the joy of layering, drizzling, and sneaking bites of caramelized fruit. It’s perfect for busy parents, weekend bakers, or anyone who wants to put a creative spin on a retro classic. Whether you’re craving something familiar or looking for a show-stopping treat, these cookie bars deliver. Plus, “pineapple upside-down cookie bars” are a breeze to cut, serve, and pack for lunchboxes. Trust me, you’ll want to keep this recipe handy for every sweet occasion.
As someone who’s baked everything from sugar cookies to five-layer cakes, I love how this recipe brings those nostalgic pineapple upside-down cake flavors into a modern, portable format. The cherry glaze? That was a happy accident during a rainy afternoon baking session, and now I can’t imagine these bars without it. If you’re ready to turn simple ingredients into something irresistibly fun, comforting, and Pinterest-worthy, stick with me—let’s make these Pineapple Upside-Down Cookie Bars with Cherry Glaze together!
Why You’ll Love This Recipe
Let’s get real—there’s a reason these Pineapple Upside-Down Cookie Bars with Cherry Glaze keep popping up on my dessert table. After baking dozens of batches, tweaking the glaze, and testing different bases, I’ve landed on a recipe that never fails to impress. Here’s why I think you’ll love it as much as I do:
- Quick & Easy: Ready in under 45 minutes, with no fancy techniques or endless waiting. Perfect for last-minute gatherings or spontaneous cravings.
- Simple Ingredients: Most of what you need is probably already in your pantry or fridge. No need to hunt down specialty items—just grab your basics and go.
- Perfect for Any Occasion: These bars shine at birthday parties, family brunches, backyard BBQs, and even as a sweet after-school snack.
- Crowd-Pleaser: Kids love the bright colors and sweet flavor. Adults love the nostalgia. I’ve never had leftovers after bringing these anywhere!
- Unbelievably Delicious: The contrast of buttery cookie, caramelized fruit, and tart cherry glaze is something you just have to taste to believe.
What sets these Pineapple Upside-Down Cookie Bars apart? Well, the base is soft and chewy, never dry (thanks to a touch of brown sugar and real butter). The pineapple layer is baked until it’s sticky-sweet, while the cherry glaze adds a pop of color and zing. I blend the cherries to get that ultra-smooth, ruby-red finish—so much better than just plopping maraschinos on top. And you know what? The layered effect makes them look way fancier than the effort required. These bars aren’t just a treat—they’re the kind that get recipe requests from friends and family, every single time.
Honestly, baking these bars feels like a little celebration. They’re nostalgic comfort food with a playful twist, and they come together faster than you’d expect. I love sharing them—especially with people who think homemade desserts are too complicated. Give them a try, and I bet you’ll have your own list of reasons to love them in no time!
What Ingredients You Will Need
This recipe uses simple, wholesome ingredients that combine to create bold flavor and satisfying texture—no complicated shopping trips required. I’ve grouped the ingredients by layer, so you can see how each part comes together. Feel free to check your pantry before heading to the store!
For the Pineapple Upside-Down Layer:
- 1/4 cup (55g) unsalted butter (melted; for richness)
- 1/2 cup (100g) packed light brown sugar (creates caramelized flavor)
- 1 can (20 oz/565g) pineapple slices in juice, drained (save some juice for the glaze)
- 10-12 maraschino cherries (whole, for topping the pineapple)
For the Cookie Bar Base:
- 1/2 cup (115g) unsalted butter, softened (for chewy texture)
- 3/4 cup (150g) granulated sugar
- 1/4 cup (55g) packed light brown sugar (boosts flavor)
- 2 large eggs, room temperature
- 2 tsp vanilla extract (adds warmth)
- 1 3/4 cups (220g) all-purpose flour (or use gluten-free blend for dietary needs)
- 1/2 tsp baking powder
- 1/4 tsp baking soda
- 1/4 tsp salt
For the Cherry Glaze:
- 1/2 cup (120ml) reserved pineapple juice
- 1/3 cup (60g) maraschino cherries, chopped
- 1 cup (120g) powdered sugar
- 1/2 tsp almond extract (optional, but makes the cherry flavor pop)
Ingredient Tips & Substitutions:
- Butter: Use plant-based butter for a dairy-free option.
- Pineapple: Fresh pineapple works, just slice thin and pat dry.
- Flour: Almond flour or gluten-free blends substitute well—some readers say “Bob’s Red Mill” works great.
- Cherries: If you prefer, swap maraschino for fresh or frozen cherries (just cook them down a bit for the glaze).
- Eggs: For egg-free, try flaxseed “eggs” (1 tbsp flaxseed meal + 3 tbsp water per egg, let sit 5 minutes).
- Brown Sugar: Dark brown sugar adds deeper caramel notes, but light is classic.
Don’t stress if you’re missing something—this recipe is forgiving, and substitutions usually work out fine. I’ve used canned pineapple chunks, skipped almond extract, and even swapped in coconut sugar with good results. Just keep the base ratios the same, and you’ll end up with irresistible pineapple upside-down cookie bars!
Equipment Needed
- 9×13 inch (23x33cm) baking pan: Standard size works best—lined with parchment for easy lifting.
- Mixing bowls: One large for the dough, one small for glaze.
- Hand mixer or stand mixer: For creaming butter and sugar—though a sturdy whisk works if you’ve got arm strength (I’ve done it both ways!).
- Spatula: Silicone is my favorite for scraping every bit of batter and spreading layers evenly.
- Measuring cups and spoons: Accurate measurements keep the bars chewy, not dry.
- Small saucepan: For reducing pineapple juice if you want a thicker glaze.
- Wire cooling rack: Optional, but helps bars cool evenly before glazing.
If you don’t have a hand mixer, just cream butter and sugar with a sturdy wooden spoon—the texture will be slightly more rustic, but still delicious. I’ve baked these bars in glass and metal pans, and both work fine (just watch for browning). For easy cleanup, parchment paper is a lifesaver. And if you don’t have a wire rack, let the bars cool in the pan before glazing—no big deal.
Budget tip: I found a great set of nesting mixing bowls at my local discount store, and they’ve lasted years. Maintenance-wise, keep your mixer beaters clean and dry, especially after sticky fruit prep.
Preparation Method
- Prep the Pan (5 minutes): Line a 9×13 inch (23x33cm) baking pan with parchment paper, leaving an overhang for easy lifting. Lightly grease the sides to prevent sticking. (Trust me, this step saves headaches later!)
- Make the Pineapple Layer (5 minutes): Pour melted butter over the parchment, then sprinkle brown sugar evenly on top. Arrange pineapple slices in a single layer, trimming if needed to fill gaps. Place a maraschino cherry in the center of each pineapple ring. The pan should look colorful and smell sweet at this stage.
- Mix Cookie Bar Base (10 minutes): In a large bowl, beat softened butter, granulated sugar, and brown sugar until creamy (about 2 minutes). Add eggs and vanilla extract, mixing until smooth. In a separate bowl, whisk together flour, baking powder, baking soda, and salt. Gradually add dry ingredients to wet, mixing until just combined—don’t overmix, or bars will get tough.
- Layer and Bake (25-30 minutes): Gently dollop cookie dough over the pineapple layer, then spread evenly with a spatula. It’s okay if the pineapple peeks through a bit. Bake at 350°F (175°C) for 25-30 minutes, until the edges are golden and a toothpick inserted in the center comes out mostly clean (a few moist crumbs are fine). The kitchen will smell like vacation—seriously!
- Cool and Flip (10 minutes): Let the pan cool for 10-15 minutes on a wire rack. Carefully lift bars out using parchment overhang. Place a cutting board on top, then invert so pineapple layer faces up. Peel off parchment gently.
- Make Cherry Glaze (5 minutes): In a small bowl, combine reserved pineapple juice, chopped cherries, powdered sugar, and almond extract (if using). Whisk until smooth and glossy. If glaze is too runny, add more powdered sugar; too thick, a splash more juice. You want a pourable consistency.
- Glaze and Cut (5 minutes): Drizzle cherry glaze all over the cooled bars, letting it drip over the pineapple and cookie edges. For extra wow, add a few chopped cherries on top. Slice into squares (about 20 bars). Each bite should have a bit of pineapple, cherry, and chewy cookie!
Troubleshooting Tips: If the cookie base looks too wet, add 2 tbsp (15g) extra flour. If bars brown too quickly, tent with foil for last 10 minutes. Pineapple may release juice—don’t panic, it soaks up as bars cool. If glaze is grainy, sift powdered sugar first. And always let bars cool before glazing, or it’ll melt right off!
Personal Note: I always sneak one end piece with extra glaze—those corners are the best!
Cooking Tips & Techniques
After many batches (some more successful than others), I’ve picked up a few tricks for perfect Pineapple Upside-Down Cookie Bars every time. Let’s face it, baking isn’t always flawless, but here’s how to get the most out of this recipe:
- Room Temperature Ingredients: Softened butter and eggs blend better and help bars stay tender. If you forget, microwave butter in short bursts and submerge eggs in warm water for 5 minutes.
- Don’t Overmix: Once you add flour, stir just until combined. Overmixing creates tough cookie bars—not what we want here!
- Pineapple Placement: Trim slices to fit pan corners. If using chunks, scatter evenly—every bar should get pineapple.
- Glaze Consistency: Test glaze with a spoon before drizzling. If it runs too fast, add more powdered sugar.
- Multitasking: Mix the glaze while bars cool. It’s a time-saver and means you’re not waiting around.
- Avoid Soggy Bars: Drain pineapple well and pat dry. Excess juice can make the base too soft.
- Cutting Clean Squares: Use a sharp knife wiped clean after each cut. For perfect edges, chill bars briefly before slicing.
Personal fail: Once, I forgot parchment and spent 10 minutes scraping bars from the pan—learn from my mistake! If using glass pans, bars may need another 2-3 minutes baking time. For consistent results, weigh your flour (220g for 1 3/4 cups). And if you ever need bars for a crowd, double the recipe and use a sheet pan—just watch baking time.
Variations & Adaptations
One thing I love about these Pineapple Upside-Down Cookie Bars is how adaptable they are. Whether you’re baking for dietary needs or just want a new twist, here are some tried-and-true variations:
- Gluten-Free: Swap all-purpose flour for a 1:1 gluten-free blend. “King Arthur Measure for Measure” works great—texture stays chewy.
- Dairy-Free: Use plant-based butter and dairy-free baking chips if you want to add white chocolate. Coconut oil also works, though flavor will change slightly.
- Seasonal Flavors: In the fall, add 1 tsp ground ginger or cinnamon to the cookie base for a spicy kick. Summer? Try fresh berries instead of cherries for the glaze.
- Nutty Twist: Sprinkle chopped pecans or coconut flakes over the pineapple before adding dough. Adds crunch and a hint of tropical flavor.
- Egg-Free: Replace eggs with flaxseed “eggs” (see ingredient section). Bars will be a touch denser, but still delicious.
- Less Sugar: Reduce granulated sugar in the base by 1/4 cup (50g) if you prefer a less sweet treat—the pineapple and glaze keep things flavorful.
My personal favorite? Swapping almond extract for coconut extract in the glaze—makes it taste like a piña colada! If you need to bake in a smaller pan (like 8×8 inch), just halve the recipe and check for doneness a bit earlier. And if you’re feeling creative, try shaping the dough into circles for “mini upside-down cookie cakes.” The options are endless!
Serving & Storage Suggestions
These Pineapple Upside-Down Cookie Bars really shine when served slightly warm—the glaze glistens and the pineapple is extra fragrant. For parties, arrange bars on a platter and sprinkle with a few extra cherries or mint leaves for color. If you’re bringing them to a picnic or potluck, stack with parchment paper between layers to prevent sticking.
- Best Serving Temperature: Room temp or gently warmed in the microwave for 10 seconds. Chilled bars are firmer, but flavors are a bit muted.
- Perfect Pairings: Serve with vanilla ice cream, whipped cream, or a cold glass of milk. These bars also go great with fruity teas or lemonade.
- Storage: Store in an airtight container at room temperature for up to 3 days. For longer storage, refrigerate up to 1 week—just let bars come to room temp before serving.
- Freezing: Freeze bars (uncut or individually wrapped) for up to 2 months. Thaw overnight in the fridge, then glaze before serving.
- Reheating: Microwave for 10-15 seconds per bar for a warm, gooey treat. Just don’t overdo it—glaze can melt off!
One thing I’ve noticed: The flavor deepens after a day or two, making leftovers (if you have any) even better. Sometimes I sneak a cold bar straight from the fridge—no judgment!
Nutritional Information & Benefits
Here’s a quick look at the nutrition for Pineapple Upside-Down Cookie Bars (per bar, based on 20 servings):
| Calories | About 160 kcal |
|---|---|
| Fat | 7g |
| Carbohydrates | 24g |
| Protein | 2g |
| Sugar | 16g |
| Fiber | 0.5g |
Health Benefits: Pineapple is packed with vitamin C and manganese, plus digestive enzymes. Cherries add antioxidants and a pop of color. You can adjust sugar and use whole-grain flour for a healthier twist if you like.
Dietary Notes: Bars are nut-free as written, but check ingredient labels for cross-contamination. Easy to make gluten-free or dairy-free—see variations above. Contains eggs and wheat unless adapted.
Personally, I love sneaking fruit into my desserts—and these bars are a fun way to enjoy a taste of the tropics with a little less guilt!
Conclusion
If you’re looking for a fun, flavorful dessert that brings people together, these Pineapple Upside-Down Cookie Bars with Cherry Glaze are a must-try. They’re easy enough for weeknight baking but impressive enough for special occasions. The layers of caramelized pineapple, chewy cookie, and sweet-tart glaze make every bite memorable.
Feel free to tweak the recipe to suit your own tastes—add coconut, swap cherries, go gluten-free, or turn down the sweetness. That’s the beauty of homemade desserts!
Honestly, I love these bars because they remind me of family celebrations and cozy afternoons spent experimenting in the kitchen. If you bake them, let me know how they turn out in the comments below—or tag me on Pinterest with your creations. Happy baking, and here’s to sharing sweet moments, one delicious square at a time!
Frequently Asked Questions
Can I use fresh pineapple instead of canned?
Absolutely! Just slice thin and pat dry before layering. Fresh pineapple adds a little extra tang and texture.
How do I make these bars gluten-free?
Swap the all-purpose flour for a 1:1 gluten-free blend. The results are just as chewy and yummy—no one will notice the difference!
Can I make these bars ahead of time?
Yes! Bake, cool, and store unglazed bars for up to two days, then add the cherry glaze right before serving for freshest flavor and appearance.
What’s the best way to cut neat squares?
Chill the bars for 30 minutes after glazing, then use a sharp knife wiped clean between cuts. This makes for perfect edges and less sticking.
Can I freeze Pineapple Upside-Down Cookie Bars?
Definitely. Wrap the bars tightly (before glazing is best), freeze for up to 2 months, and thaw before serving. Add glaze after thawing for best texture.
Pin This Recipe!
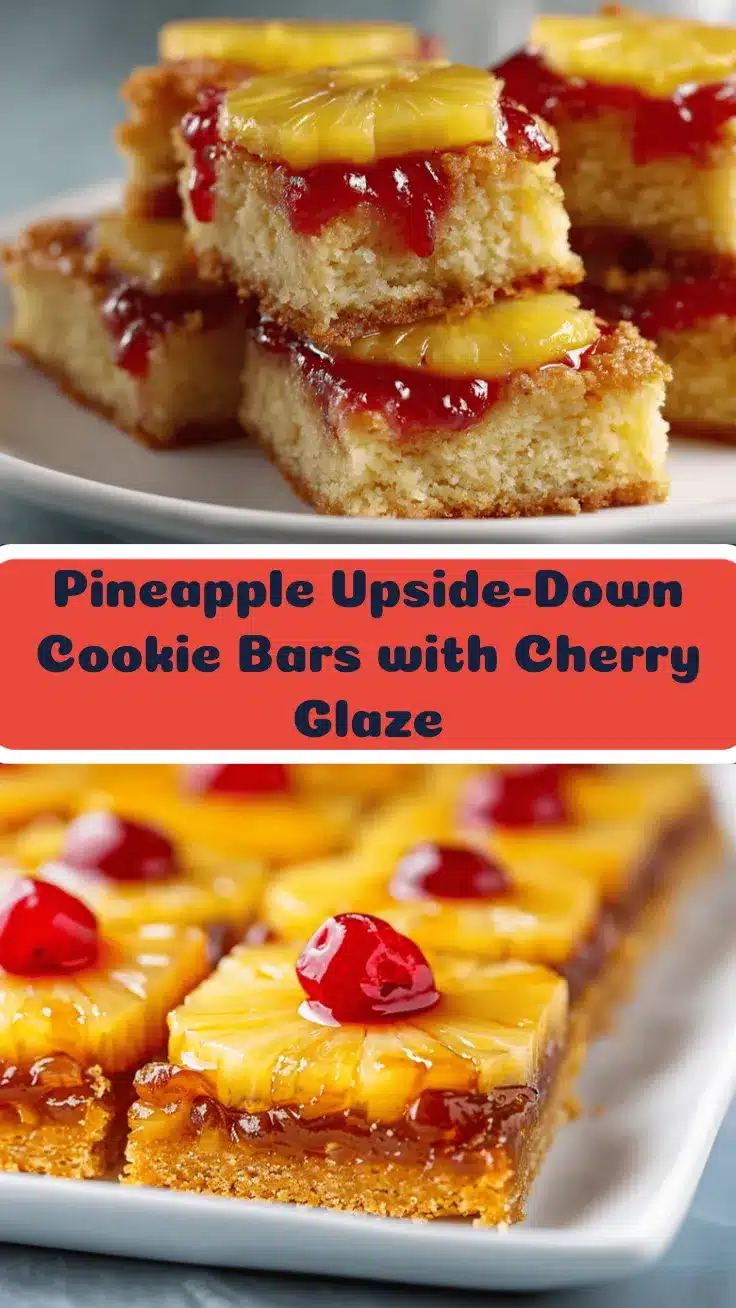
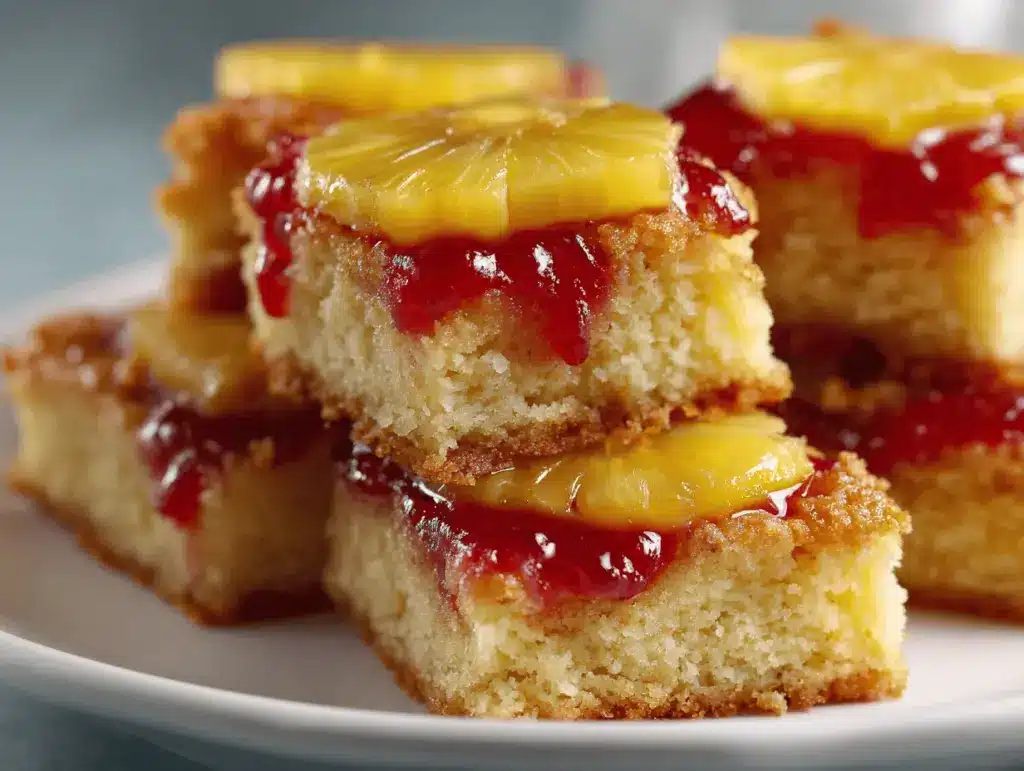
Pineapple Upside-Down Cookie Bars with Cherry Glaze

These Pineapple Upside-Down Cookie Bars transform the classic cake into chewy, golden bars topped with caramelized pineapple and a tangy cherry glaze. Perfect for parties, potlucks, or a fun family dessert, they’re easy to make and always a crowd-pleaser.
- Prep Time: 20 minutes
- Cook Time: 25-30 minutes
- Total Time: 45-50 minutes
- Yield: 20 bars 1x
- Category: Dessert
- Cuisine: American
Ingredients
- 1/4 cup unsalted butter, melted (for pineapple layer)
- 1/2 cup packed light brown sugar (for pineapple layer)
- 1 can (20 oz) pineapple slices in juice, drained (reserve juice for glaze)
- 10–12 maraschino cherries (whole, for topping pineapple)
- 1/2 cup unsalted butter, softened (for cookie base)
- 3/4 cup granulated sugar
- 1/4 cup packed light brown sugar (for cookie base)
- 2 large eggs, room temperature
- 2 tsp vanilla extract
- 1 3/4 cups all-purpose flour (or gluten-free blend)
- 1/2 tsp baking powder
- 1/4 tsp baking soda
- 1/4 tsp salt
- 1/2 cup reserved pineapple juice (for glaze)
- 1/3 cup maraschino cherries, chopped (for glaze)
- 1 cup powdered sugar (for glaze)
- 1/2 tsp almond extract (optional, for glaze)
Instructions
- Line a 9×13 inch baking pan with parchment paper, leaving an overhang for easy lifting. Lightly grease the sides.
- Pour melted butter over the parchment, then sprinkle brown sugar evenly on top. Arrange pineapple slices in a single layer, trimming if needed. Place a maraschino cherry in the center of each pineapple ring.
- In a large bowl, beat softened butter, granulated sugar, and brown sugar until creamy (about 2 minutes). Add eggs and vanilla extract, mixing until smooth.
- In a separate bowl, whisk together flour, baking powder, baking soda, and salt. Gradually add dry ingredients to wet, mixing until just combined.
- Gently dollop cookie dough over the pineapple layer, then spread evenly with a spatula. Bake at 350°F for 25-30 minutes, until edges are golden and a toothpick inserted in the center comes out mostly clean.
- Let the pan cool for 10-15 minutes on a wire rack. Carefully lift bars out using parchment overhang. Place a cutting board on top, then invert so pineapple layer faces up. Peel off parchment gently.
- In a small bowl, combine reserved pineapple juice, chopped cherries, powdered sugar, and almond extract (if using). Whisk until smooth and glossy. Adjust consistency with more powdered sugar or juice as needed.
- Drizzle cherry glaze all over the cooled bars. Optionally, add a few chopped cherries on top. Slice into squares (about 20 bars).
Notes
For gluten-free, use a 1:1 blend. For dairy-free, use plant-based butter. Drain pineapple well to avoid soggy bars. Chill bars before cutting for neat squares. Glaze consistency can be adjusted with more powdered sugar or juice. Bars freeze well before glazing.
Nutrition
- Serving Size: 1 bar (1/20th of recipe)
- Calories: 160
- Sugar: 16
- Sodium: 70
- Fat: 7
- Saturated Fat: 4
- Carbohydrates: 24
- Fiber: 0.5
- Protein: 2
Keywords: pineapple upside-down bars, cookie bars, cherry glaze, easy dessert, potluck, party treat, pineapple dessert, retro dessert, chewy bars, fruit bars