Introduction
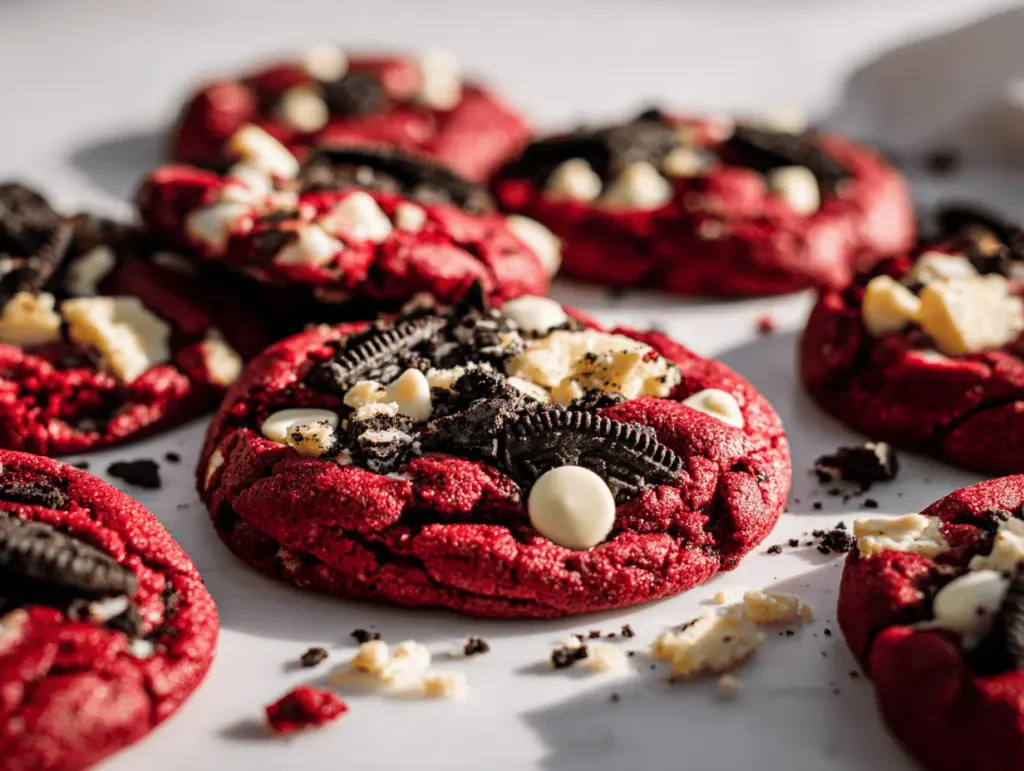
The first time I pulled a batch of Red Velvet Oreo Monster Cookies out of the oven, the kitchen smelled like a chocolate dream collided with a birthday party. Swirls of red velvet, gooey chocolate chips, and chunky Oreo pieces—honestly, it was the kind of cookie that makes you stop and stare. I stumbled onto this combo during a late-night Pinterest scroll, craving something decadent but not just another chocolate chip cookie. You know how it is when you want a showstopper treat for a birthday, a bake sale, or just to impress your own taste buds?
Red velvet has always been my go-to for drama and flavor, but tossing Oreos and a monster cookie twist into the mix? Game-changer. As a self-taught baker (with a soft spot for chewy cookies that practically melt in your mouth), I’ve tested this recipe more times than I can count—tweaking the ratios, swapping out mix-ins, and, yes, sneaking bites before the cookies even cooled! The result is a batch of ultra chewy, loaded cookies that never last more than a day in my house.
This Red Velvet Oreo Monster Cookies recipe isn’t just about bold color—it’s about texture, flavor, and a little nostalgia. It’s perfect for anyone who loves classic cookies but wants something a bit extra. Trust me, if you’ve got a crowd to impress (or just want an excuse for a midnight snack), this one checks all the boxes. Grab your apron, because you’re about to make cookies that are chewy, chocolatey, and absolutely unforgettable!
Why You’ll Love This Recipe
After baking these Red Velvet Oreo Monster Cookies a dozen different ways, I can honestly say they’re the kind that disappear fast—like, “where did the whole batch go?” fast. Here’s why these cookies are always the star of the dessert table:
- Quick & Easy: You’ll have cookies ready in under 40 minutes, including prep and baking, which is perfect for last-minute cravings or busy weeknights.
- Simple Ingredients: No wild grocery trips required—most of these are pantry staples, plus Oreos (because, let’s face it, those are a staple for some of us!).
- Perfect for Parties & Holidays: Their bold red color and stuffed cookie centers make them a hit for Valentine’s Day, birthdays, Christmas cookie swaps, or just because.
- Crowd-Pleaser: Kids lose their minds over the Oreo chunks, and adults love the chewy, rich texture. There’s something for everyone in every bite.
- Unbelievably Delicious: The combo of velvety cocoa flavor, creamy white chips, and crunchy Oreos makes for a cookie that’s soft, chewy, and totally addictive.
What really sets this Red Velvet Oreo Monster Cookies recipe apart is the texture. I blend just enough butter and brown sugar to keep the centers moist, and folding in chopped Oreos means every bite is a surprise. There’s no dry, cakey cookie here—just dense, chewy goodness loaded with mix-ins. Plus, you can toss everything in one bowl (less mess, more cookies).
Baking these cookies always feels a little magical. Sometimes I add extra chocolate chips or swap in golden Oreos for a twist. The real secret? Letting them cool just enough so the edges stay crisp but the center is gooey. Whether you’re baking for your family, work friends, or just to treat yourself, these cookies make any occasion sweeter.
What Ingredients You Will Need
This recipe uses simple, wholesome ingredients to deliver bold flavor and that signature red velvet color. I promise, you won’t be running to five stores to pull these together. Here’s what you’ll need:
- For the cookie dough:
- All-purpose flour (210g / 1 ¾ cups) – gives structure and chew
- Unsweetened cocoa powder (15g / 2 tbsp) – classic red velvet flavor
- Baking soda (½ tsp) – helps the cookies rise just enough
- Salt (¼ tsp) – balances the sweetness
- Unsalted butter (113g / ½ cup, softened) – for richness and moisture
- Brown sugar (150g / ¾ cup, packed) – keeps the cookies extra chewy
- Granulated sugar (50g / ¼ cup) – for crisp edges
- Large egg (1) – binds everything together
- Vanilla extract (1 tsp) – deepens the flavor
- Red food coloring (1-2 tbsp, gel or liquid) – for that classic red velvet look (I use Americolor gel for vibrant color)
- Mix-ins:
- Oreo cookies (8-10, roughly chopped) – adds crunch and surprise in every bite
- Semi-sweet chocolate chips (90g / ½ cup) – for gooey chocolate pockets
- White chocolate chips (90g / ½ cup) – contrasts with the cocoa and Oreos
Ingredient Tips:
Use full-fat, real butter for the best flavor and texture. If you want these cookies to be gluten-free, swap the flour for a 1:1 gluten-free blend (I’ve tried King Arthur’s and had great results). Don’t skimp on the cocoa powder—it’s what gives the cookie its depth. For the Oreos, classic is best, but double-stuffed or fun flavors work if you’re feeling adventurous. If you don’t have white chocolate chips, chopped white baking chocolate works just as well.
Substitutions are easy with this recipe! Try swapping the chocolate chips for butterscotch or peanut butter chips for a twist. If you need dairy-free, use a plant-based butter and dairy-free chips. For a holiday spin, mix in peppermint extract or festive sprinkles. Honestly, these cookies are as flexible as your pantry.
Equipment Needed
You don’t need fancy gadgets for Red Velvet Oreo Monster Cookies, which is part of the charm. Here’s what I use every time:
- Mixing bowls – One large and one medium (glass or metal, either works)
- Electric mixer or sturdy whisk – I prefer a hand mixer for speed, but a wooden spoon works if you’ve got some muscle
- Rubber spatula – For folding in the Oreos and chips without crushing them
- Baking sheet – Heavy-duty ones give the best even bake
- Parchment paper or silicone baking mat – Keeps cookies from sticking and makes cleanup easy
- Cookie scoop or tablespoon – For even, thick cookies (I use a medium scoop for those signature monster cookie rounds)
- Wire cooling rack – For crisp edges and gooey centers
If you’re just starting out, don’t worry—no stand mixer needed, and even an old baking sheet will do the trick (just add parchment paper). Pro tip: wash your silicone mat right after baking so the red food coloring doesn’t stain. If you’re on a budget, thrift store bowls and spatulas work perfectly—I’ve got a mismatched set that’s seen dozens of cookie batches.
Preparation Method
-
Prep your ingredients and oven:
Preheat oven to 350°F (175°C). Line two baking sheets with parchment paper or silicone mats. Gather all ingredients and let butter come to room temperature for 15-20 minutes. -
Mix dry ingredients:
In a medium bowl, whisk together all-purpose flour (210g), cocoa powder (15g), baking soda (½ tsp), and salt (¼ tsp). Set aside. -
Cream butter and sugars:
In a large mixing bowl, beat softened unsalted butter (113g) with brown sugar (150g) and granulated sugar (50g) until fluffy—about 2-3 minutes with a hand mixer. The mixture should look light and creamy (don’t rush this for chewy cookies!). -
Add egg, vanilla, and food coloring:
Beat in the egg and vanilla extract (1 tsp) until incorporated. Then, add red food coloring (start with 1 tbsp gel, add more for deeper color). The dough should be vibrant red—if it’s too pale, add a bit more coloring. -
Combine wet and dry ingredients:
Gradually add the dry mix to the wet ingredients, mixing on low speed or by hand. Scrape down the bowl as needed. The dough will be thick and sticky—don’t worry, that’s perfect. -
Fold in mix-ins:
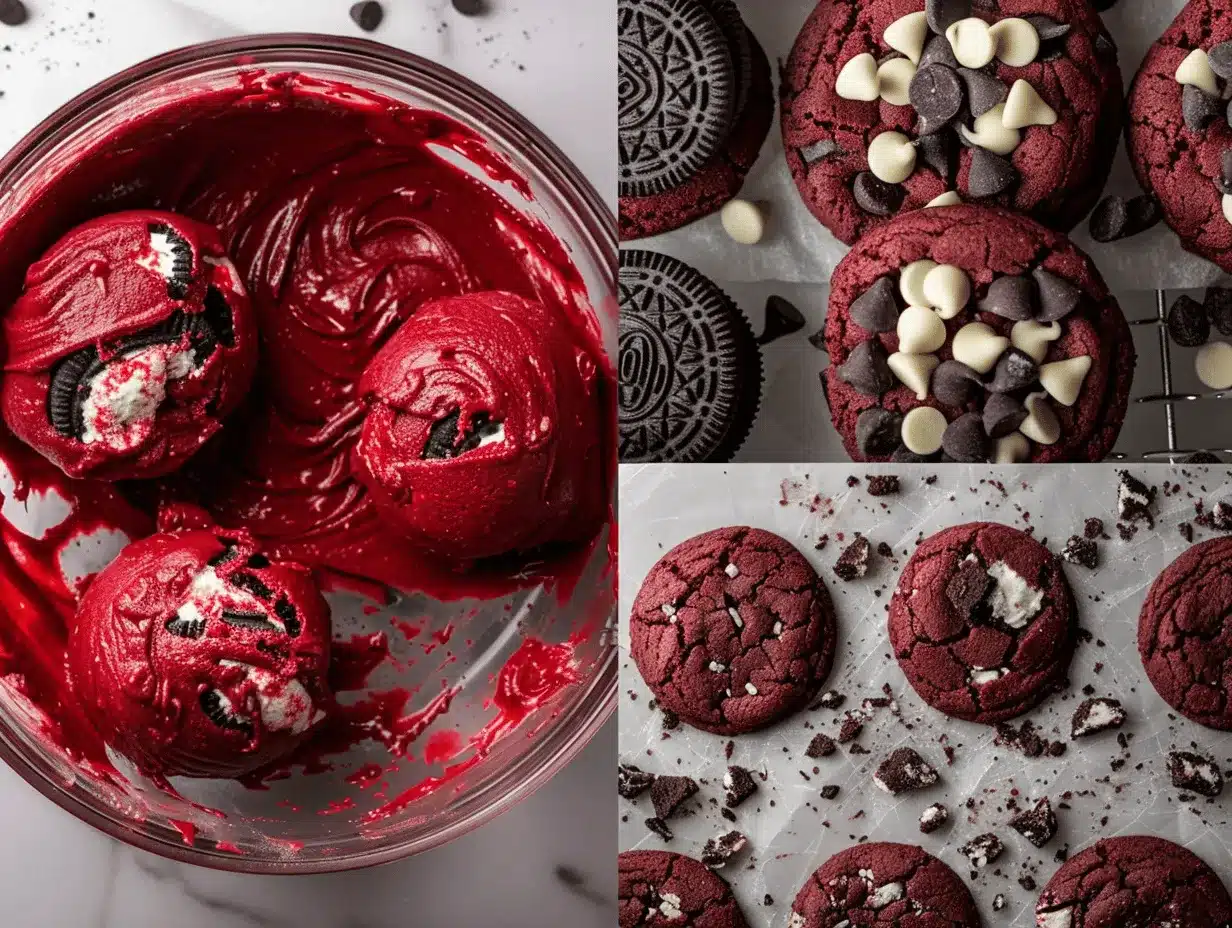
With a rubber spatula, gently fold in chopped Oreos (8-10 cookies), semi-sweet chocolate chips (90g), and white chocolate chips (90g). Try not to crush the Oreo chunks too much—big pieces are best. -
Scoop the dough:
Using a medium cookie scoop or heaping tablespoon, portion the dough into balls (about 2 tbsp each, or 35g). Place them 2 inches apart on prepared baking sheets. -
Bake:
Bake for 10-12 minutes. The edges should be set but centers still soft—cookies will finish setting as they cool. If baking two trays, rotate halfway for even baking. -
Cool:
Let cookies cool on the baking sheet for 5 minutes, then transfer to a wire rack. They’ll firm up but stay delightfully chewy inside. Resist the urge to overbake!
Preparation notes: If your dough seems too dry, add 1-2 tsp milk. If it’s too wet, chill for 15 minutes before baking. Watch for color—some food colorings fade in the oven, so a deeper red before baking helps. I always sneak a warm cookie for “quality control”—that gooey Oreo center is everything.
Cooking Tips & Techniques
Baking cookies isn’t just about following the recipe—little tricks can make all the difference. After dozens of batches of Red Velvet Oreo Monster Cookies, here’s what I’ve learned:
- Room temperature ingredients matter: Softened butter blends easier, creating that chewy texture. Cold eggs can make the dough stiff—give them a quick warm-up in a bowl of warm water.
- Don’t overmix: Once you add the dry ingredients, mix just until combined. Overmixing toughens cookies (learned that the hard way with a hockey puck batch!).
- Big Oreo chunks are best: Chop Oreos roughly—smaller pieces get lost, while big chunks stay soft and gooey inside the cookie.
- Cookie scoop for consistency: Using a scoop gives you even cookies that bake at the same rate. If you don’t have a scoop, eyeball it, but keep sizes similar.
- Bake until just set: The centers should look a little underdone when you pull them out. Let them sit on the tray for 5 minutes—that’s when the magic happens.
- Rotate trays for even baking: If you’re baking two sheets, swap and rotate them halfway through. Most ovens have hot spots (mine definitely does!).
- Chill the dough if needed: On hot days, chilling for 15 minutes keeps cookies from spreading too much.
One batch, I used cold butter by accident—resulted in flat, crispier cookies (not bad, but not what you want here). Also, don’t use double-stuffed Oreos unless you want extra goo (I tried it once; delicious, but a little messy). If you want extra chew, use more brown sugar and less granulated sugar. Trust me, these little tweaks really add up.
Variations & Adaptations
Red Velvet Oreo Monster Cookies are endlessly customizable, which is half the fun. Here are some ways to switch things up:
- Gluten-Free: Use a 1:1 gluten-free flour blend. I’ve baked with King Arthur’s and Bob’s Red Mill—both work well.
- Seasonal twist: Swap in peppermint Oreos and add ½ tsp peppermint extract for a festive flavor (I do this every December).
- Nutty addition: Stir in ½ cup chopped pecans or walnuts for crunch. Or, swap chocolate chips for peanut butter chips for a nutty, salty-sweet vibe.
- Dairy-free: Use plant-based butter and dairy-free chocolate chips. Oreos are typically dairy-free, but check the packaging to be sure.
- Flavor swap: Try golden Oreos and butterscotch chips for a lighter twist, or add a swirl of marshmallow fluff to the dough for gooey centers.
My personal favorite? Mixing half regular Oreos and half birthday cake Oreos for a funfetti effect—kids go nuts for it. If you’re baking for someone with allergies, always double-check your mix-ins. And don’t be afraid to play with flavors—these cookies hold up to almost anything you toss in!
Serving & Storage Suggestions
Red Velvet Oreo Monster Cookies are best served warm or at room temperature. I love stacking them on a cake stand or in a big jar for a Pinterest-worthy dessert table. Pair them with cold milk, hot cocoa, or even a scoop of vanilla ice cream for an indulgent treat.
Storage: Store cookies in an airtight container at room temperature for up to 5 days. They stay chewy, but if you want maximum gooeyness, microwave for 10 seconds before eating. For longer keeping, freeze baked cookies in a single layer, then transfer to a freezer bag. Thaw at room temp or reheat in the oven at 300°F (150°C) for 5 minutes.
The flavors actually deepen after a day—Oreos soften, the cocoa gets richer, and the chewiness stays perfect. If you’re prepping for a party, bake a day ahead and store tightly wrapped. (Let’s be real, hiding a few for yourself is never a bad idea!)
Nutritional Information & Benefits
Each Red Velvet Oreo Monster Cookie (about 35g) is estimated to contain:
- Calories: ~180
- Fat: 8g
- Carbohydrates: 25g
- Protein: 2g
- Sugar: 15g
Health benefits: Cocoa powder offers antioxidants, and using real butter means fewer processed fats. The recipe can be adapted for gluten-free or dairy-free diets with simple swaps. Oreos do contain wheat and soy, so check labels if you’re baking for allergies.
From a wellness perspective, these cookies are a treat—a little indulgence that brings joy. Enjoy in moderation and pair with fresh fruit or milk for balance. In my house, we treat cookies as a special moment, not a daily snack, and that makes them even sweeter.
Conclusion
Red Velvet Oreo Monster Cookies are more than just a dessert—they’re a celebration in every bite. The chewy texture, bold color, and loaded mix-ins make them a favorite for gatherings, gifts, and just plain old comfort. If you love cookies that stand out and taste as good as they look, this recipe delivers every time.
Don’t be afraid to put your own spin on these cookies—whether it’s a different Oreo flavor, a new mix-in, or a fun way to serve them. I keep coming back to this recipe because it’s reliable, crowd-pleasing, and totally delicious.
If you try these Red Velvet Oreo Monster Cookies, leave a comment below, share your own variations, or tag me on social—there’s nothing better than seeing your creations! Bake a batch and treat yourself (and your favorite people) to the best ultra chewy cookies ever.
FAQs
Can I make Red Velvet Oreo Monster Cookies without food coloring?
Yes! The cookies will taste the same but won’t have the vibrant red color. You can add a touch more cocoa for deeper flavor or use natural beet powder for color.
Can I freeze the dough for later?
Absolutely. Scoop dough balls onto a tray, freeze until solid, then store in a freezer bag. Bake straight from frozen, adding 1-2 extra minutes to the baking time.
Can I use different Oreo flavors?
Definitely! Golden Oreos, birthday cake, or seasonal flavors all work. Just chop them roughly and swap in equal amounts.
Why did my cookies turn out flat?
Flat cookies usually mean the butter was too warm or the dough wasn’t chilled enough. Try chilling the dough for 15-30 minutes before baking next time.
Are these cookies safe for nut allergies?
Yes, the base recipe contains no nuts. But check your chocolate chips and Oreos for cross-contamination warnings if you’re baking for someone with allergies.
Pin This Recipe!
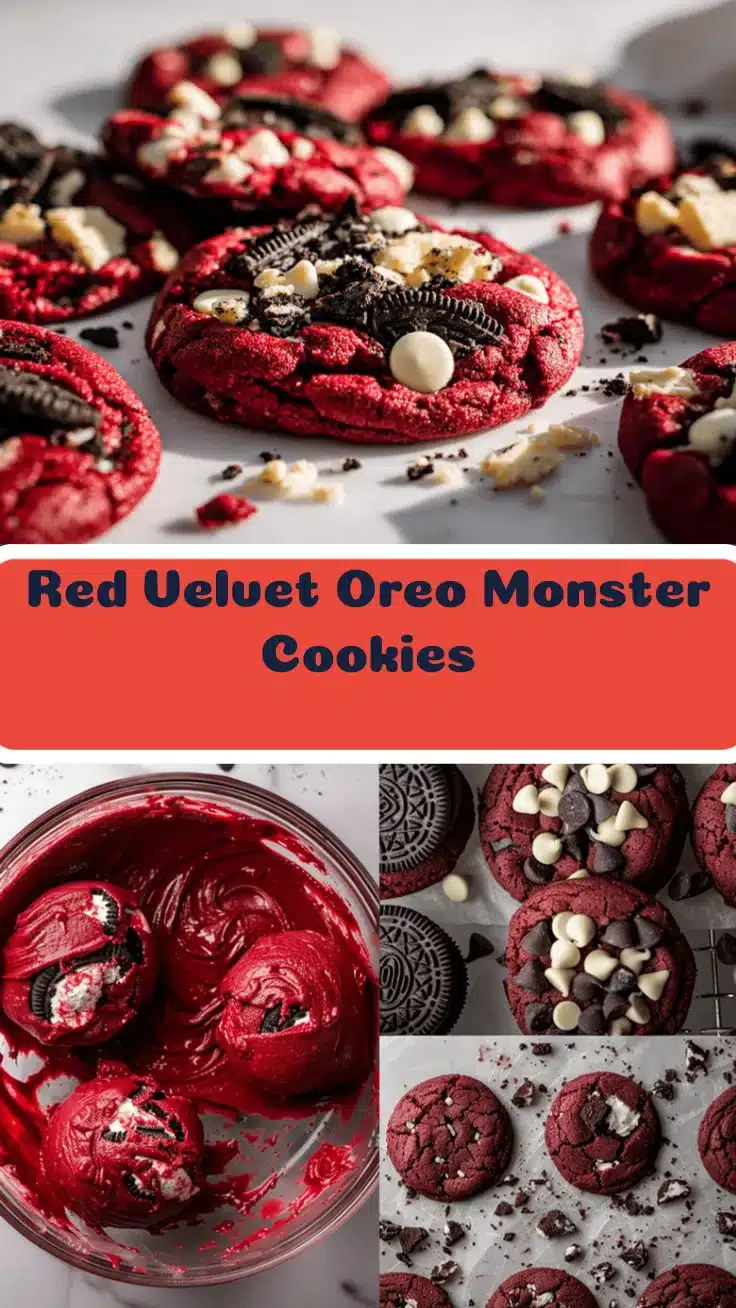
Red Velvet Oreo Monster Cookies

These ultra chewy Red Velvet Oreo Monster Cookies are loaded with gooey chocolate chips, creamy white chips, and chunky Oreo pieces for a showstopping treat. Perfect for parties, bake sales, or whenever you crave a decadent, crowd-pleasing cookie.
- Prep Time: 15 minutes
- Cook Time: 12 minutes
- Total Time: 27 minutes
- Yield: 18 cookies 1x
- Category: Dessert
- Cuisine: American
Ingredients
- 1 3/4 cups (210g) all-purpose flour
- 2 tablespoons (15g) unsweetened cocoa powder
- 1/2 teaspoon baking soda
- 1/4 teaspoon salt
- 1/2 cup (113g) unsalted butter, softened
- 3/4 cup (150g) brown sugar, packed
- 1/4 cup (50g) granulated sugar
- 1 large egg
- 1 teaspoon vanilla extract
- 1–2 tablespoons red food coloring (gel or liquid, preferably gel for vibrant color)
- 8–10 Oreo cookies, roughly chopped
- 1/2 cup (90g) semi-sweet chocolate chips
- 1/2 cup (90g) white chocolate chips
Instructions
- Preheat oven to 350°F (175°C). Line two baking sheets with parchment paper or silicone mats. Let butter come to room temperature for 15-20 minutes.
- In a medium bowl, whisk together flour, cocoa powder, baking soda, and salt. Set aside.
- In a large mixing bowl, beat softened butter with brown sugar and granulated sugar until light and fluffy, about 2-3 minutes.
- Beat in the egg and vanilla extract until incorporated. Add red food coloring (start with 1 tablespoon, add more for deeper color) and mix until vibrant.
- Gradually add the dry ingredients to the wet mixture, mixing on low speed or by hand until just combined. Scrape down the bowl as needed. The dough will be thick and sticky.
- Gently fold in chopped Oreos, semi-sweet chocolate chips, and white chocolate chips with a rubber spatula, being careful not to crush the Oreo chunks.
- Using a medium cookie scoop or heaping tablespoon (about 2 tablespoons or 35g per cookie), portion dough balls and place them 2 inches apart on prepared baking sheets.
- Bake for 10-12 minutes, until edges are set but centers are still soft. Rotate trays halfway through if baking two sheets.
- Let cookies cool on the baking sheet for 5 minutes, then transfer to a wire rack to cool completely. Enjoy warm or at room temperature.
Notes
For best results, use room temperature butter and egg. Don’t overmix the dough after adding dry ingredients to keep cookies chewy. Roughly chop Oreos for big, gooey chunks. If dough is too dry, add 1-2 teaspoons milk; if too wet, chill for 15 minutes. Cookies are best slightly underbaked and cooled on the tray for 5 minutes. Store in an airtight container for up to 5 days or freeze for longer storage.
Nutrition
- Serving Size: 1 cookie (about 35g)
- Calories: 180
- Sugar: 15
- Sodium: 90
- Fat: 8
- Saturated Fat: 5
- Carbohydrates: 25
- Fiber: 1
- Protein: 2
Keywords: red velvet, oreo cookies, monster cookies, chewy cookies, chocolate chip, party dessert, bake sale, easy cookies, holiday cookies