“Hey, you’ve got to try these nachos I whipped up,” my friend texted me one late Friday evening. I wasn’t exactly in a cooking mood after a long day, but curiosity got the better of me. I figured, why not? Little did I expect that these crispy personal pan nachos supreme—loaded with every topping imaginable—would become my go-to snack for the next few weeks straight.
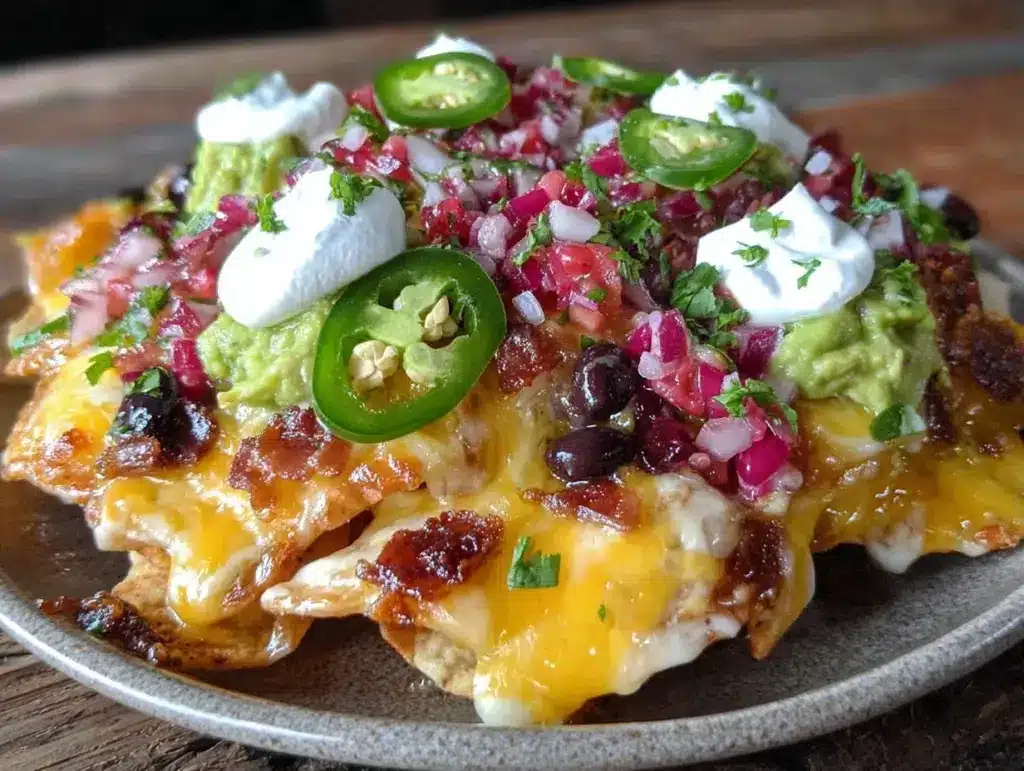
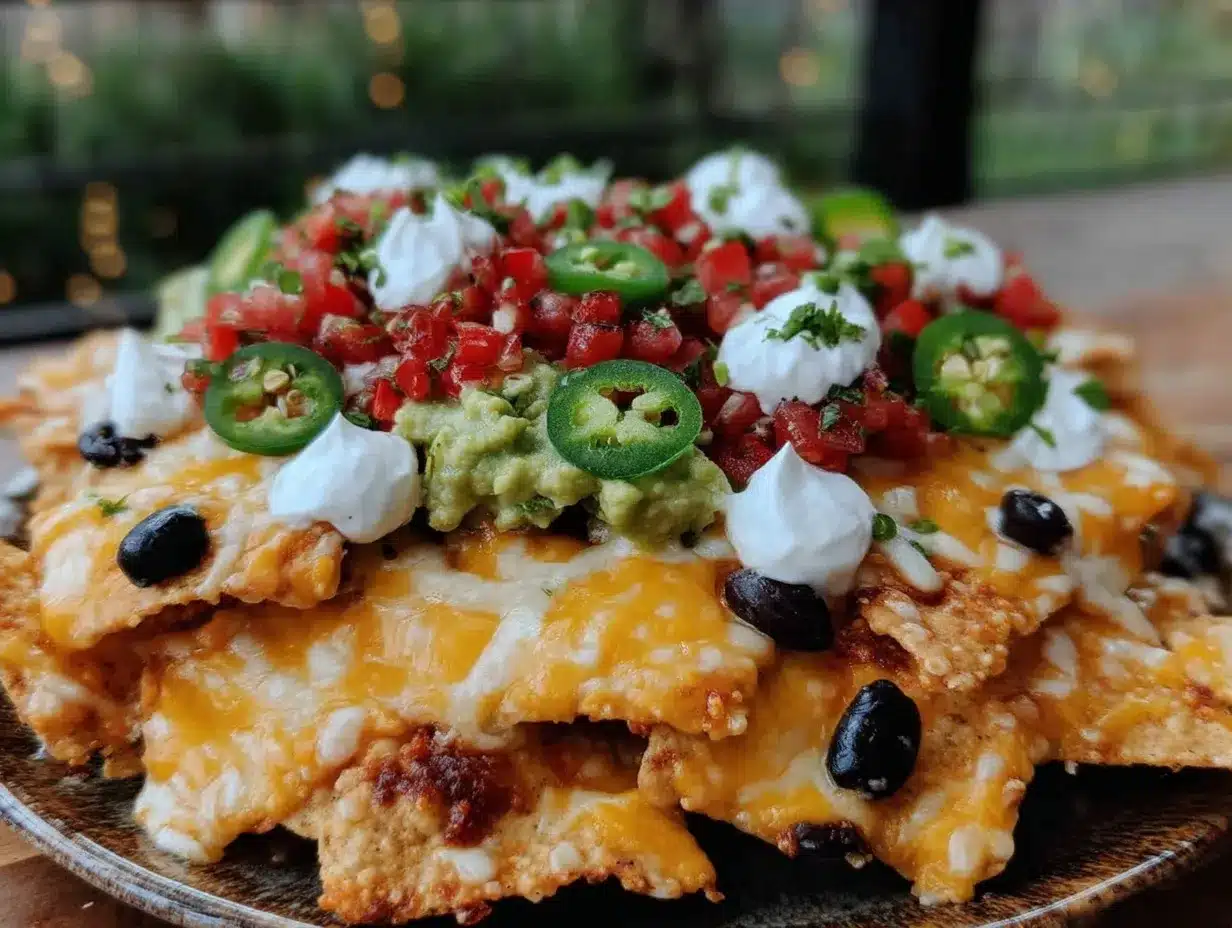
The crunch of perfectly toasted chips layered under a blanket of melted cheese was just the beginning. Then there was the tangy salsa, the creamy dollop of sour cream, and the unexpected burst of fresh jalapeños that made the whole thing sing. Honestly, I was skeptical at first. Nachos are simple, right? But this personal-sized pan packed a punch and felt like a cozy little fiesta for one.
I found myself craving them not just for the flavor but for that instant comfort they brought after hectic days or when friends dropped by unexpectedly. They’re easy to make, don’t demand a pile of dirty dishes, and best of all, you customize every bite. It’s the kind of recipe that stays with you quietly, making you realize that sometimes, the best food is the one that fits your mood and your schedule without fuss.
What’s stuck with me is that this recipe isn’t just about nachos. It’s about creating a little moment to yourself, packed with bold flavors, crispy textures, and all the toppings you love. So if you’re ready to treat yourself with something that’s equal parts snack and celebration, this personal pan nachos supreme might just become your new favorite too.
Why You’ll Love This Crispy Personal Pan Nachos Supreme Recipe
After testing this recipe multiple times (yes, I couldn’t stop making them!), here’s why these nachos stand out:
- Quick & Easy: Ready in under 20 minutes, perfect for those busy weeknights or spontaneous cravings.
- Simple Ingredients: No need for exotic groceries; most of these toppings are pantry staples or easy to grab on your next store run.
- Perfect for Solo or Small Serving: Made in a personal pan, so you’re not stuck with a huge platter or leftovers you don’t want.
- Crowd-Pleaser: Kids and adults rave about the crispy texture combined with the creamy, spicy, and fresh toppings.
- Unbelievably Delicious: The melty cheese melds beautifully with the crispy chips, while the toppings add layers of flavor and texture.
What really sets this recipe apart is the layering technique and the thoughtful toppings combo: a mix of fresh, creamy, spicy, and savory elements that hit every craving note. Plus, I’ve found that baking the chips in a personal pan keeps them crispy under the toppings, unlike some soggy nacho dishes I’ve had before.
Honestly, it’s comfort food that feels indulgent but is easy to pull off, making it great for when you want to impress without stress. If you’ve ever loved smoked mac and cheese with crispy topping, this recipe shares that same satisfying crunch but with a Tex-Mex twist that’s just as soul-soothing.
What Ingredients You Will Need for These Loaded Personal Pan Nachos
This recipe keeps things straightforward but flavorful, using ingredients that work together to deliver that perfect crunch and supreme topping experience.
- For the Base:
- Thick-cut tortilla chips (about 4 cups / 120g; I like the sturdy ones from Mission for their crunch)
- Cheese Layer:
- Sharp cheddar cheese, shredded (1 cup / 100g; packs a tangy punch)
- Monterey Jack cheese, shredded (1 cup / 100g; melts beautifully)
- Protein & Veggies:
- Ground beef or turkey (6 oz / 170g; cooked and seasoned with taco spices)
- Black beans, drained and rinsed (½ cup / 120ml; adds creaminess and fiber)
- Diced tomatoes (½ cup / 120ml; fresh or canned)
- Jalapeño slices (fresh or pickled; add to taste)
- Diced red onion (2 tbsp; adds zing)
- Toppings:
- Sour cream or Greek yogurt (2 tbsp; creamy balance)
- Sliced black olives (2 tbsp; for that salty bite)
- Chopped green onions (1 tbsp; fresh and mild)
- Fresh cilantro, chopped (1 tbsp; optional but adds brightness)
- Guacamole or sliced avocado (¼ cup / 60ml; creamy and cooling)
- Seasonings & Extras:
- Taco seasoning (1 tbsp; homemade or store-bought—I like McCormick’s)
- Lime wedges (optional, for squeezing over the top)
If you want to swap out the ground meat, shredded rotisserie chicken or even cooked chorizo work beautifully here. For a vegetarian twist, double the black beans and toss in some corn kernels. And if you’re avoiding dairy, use a dairy-free cheese blend and skip the sour cream or substitute with cashew cream.
Equipment Needed to Make Crispy Personal Pan Nachos Supreme
Luckily, this recipe doesn’t demand any fancy gadgets. Here’s what you’ll want on hand:
- Personal-sized baking pan or oven-safe skillet (about 8 inches / 20 cm diameter) — if you don’t have a personal pan, a small cast iron skillet works great and helps crisp the chips evenly.
- Mixing bowl for combining ingredients
- Skillet or frying pan to cook the ground meat
- Cheese grater (unless you buy pre-shredded cheese)
- Measuring cups and spoons
Pro tip: I’ve tried baking these nachos on a baking sheet, but the chips spread thin and don’t hold the toppings as well. The personal pan or small skillet traps heat nicely and crisps the bottom layer without sogginess.
For cleanup, a non-stick pan helps, but lining your pan with parchment paper can keep things easier. And if you want a budget-friendly option, thrift stores often have great small pans perfect for this recipe.
Preparation Method: Step-by-Step Guide to Perfect Personal Pan Nachos
- Preheat your oven to 400°F (200°C). This temperature crisps the chips and melts the cheese without drying out the toppings.
- Cook the protein: In a skillet over medium heat, brown 6 oz (170g) of ground beef or turkey with 1 tablespoon of taco seasoning. Stir occasionally. It should take about 7 minutes. Drain excess fat if needed.
- Prepare the base: Spread about 4 cups (120g) of thick-cut tortilla chips evenly in your personal pan or skillet.
- Layer cheese: Sprinkle half of your shredded cheddar (½ cup / 50g) and Monterey Jack (½ cup / 50g) evenly over the chips.
- Add protein and beans: Evenly distribute the cooked meat and ½ cup (120ml) of rinsed black beans over the cheese layer.
- Add veggies: Scatter ½ cup (120ml) diced tomatoes, 2 tablespoons diced red onion, and jalapeño slices to taste.
- Top with remaining cheese: Sprinkle the last half of your shredded cheese over everything to create that glorious melty topping.
- Bake: Place the pan on the middle rack in the oven and bake for 8-10 minutes, until cheese is bubbly and golden in spots. Watch closely after 7 minutes to avoid burning.
- Finish with fresh toppings: Remove from oven and dollop 2 tablespoons of sour cream or Greek yogurt, sprinkle sliced black olives, chopped green onions, and fresh cilantro over the top.
- Optional avocado: Add sliced avocado or a scoop of guacamole for that extra creamy touch.
- Serve with lime wedges for squeezing right before digging in.
Tip: To prevent chips from getting soggy, don’t add fresh toppings until after baking. The contrast between hot melty cheese and cool toppings is part of the magic.
Cooking Tips & Techniques for Crispy Nachos Every Time
From my many attempts (and a few soggy failures), these tips keep your nachos crispy and flavorful:
- Layering matters: Place chips first, then cheese, then toppings, then cheese again. Cheese acts like glue, keeping everything tasty and crispy.
- Don’t overload: Too many toppings can weigh down the chips and make them soggy. Keep a balance for that perfect crunch.
- Use thick tortilla chips: Thin chips tend to break or get soggy quickly. Look for sturdy, restaurant-style chips or make your own from corn tortillas.
- Pre-cook meats and beans: Adding raw ingredients will release moisture and mess with crispness.
- Watch your oven: Every oven is different. Start checking at 7 minutes to avoid overbaking.
- Multitask: While the nachos bake, chop your fresh toppings and prep dollops of sour cream or guac so everything’s ready to go.
- Try a broiler finish: For a golden bubbly top, switch to broil for the last 30 seconds, but watch like a hawk to prevent burning.
Variations & Adaptations for Your Personal Pan Nachos Supreme
This recipe is a great starting point, but here are some ways to make it your own:
- Vegetarian option: Skip the meat and add extra black beans, corn, and diced bell peppers. Add a sprinkle of smoked paprika for a savory depth.
- Spicy twist: Toss cooked meat with chipotle powder and add sliced fresh serranos or hot sauce to the toppings.
- Different cheeses: Swap Monterey Jack for pepper jack for a little kick, or use queso fresco for a milder, crumbly texture.
- Cooking method swap: If you don’t want to use the oven, assemble the nachos in a skillet and cover with a lid on medium-low heat to melt cheese, but keep an eye on crispness.
- Gluten-free: Use certified gluten-free tortilla chips and check your taco seasoning label.
Personally, I once tried adding grilled shrimp instead of beef, inspired by grilled shrimp skewers I love. It gave the nachos a fresh, summery vibe that was surprisingly fantastic!
Serving & Storage Suggestions for Your Personal Pan Nachos
Serve your nachos hot out of the oven for the crispiest experience. They’re perfect on their own or alongside a fresh salad or even a simple guacamole dip bowl.
If you’re planning a relaxed game night or casual dinner, these pair wonderfully with a light beer or a sparkling water with lime. And for a more indulgent touch, try them with a side of creamy passion fruit mousse to balance the savory heat with something sweet.
To store leftovers, cover the pan tightly and refrigerate within two hours of cooking. Nachos are best eaten within 24 hours, but you can reheat them in a 350°F (175°C) oven for 5-7 minutes to bring back some of that crisp. Avoid microwaving if possible, as it tends to make chips soggy.
Flavors meld beautifully if you add fresh toppings after reheating, so keep sour cream, avocado, and fresh herbs separate until serving again.
Nutritional Information & Benefits
This personal pan nachos recipe is a satisfying balance of carbs, protein, and fats:
- Calories per serving: approximately 550-600 (depending on toppings and meat choice)
- Protein: 25-30 grams (from beef and beans)
- Fiber: 8 grams (from beans, tomatoes, and chips)
- Vitamins & minerals: good source of Vitamin C (tomatoes, jalapeños), calcium (cheese), and iron (beans, beef)
Using black beans boosts fiber and plant protein, making this a bit more filling and balanced than traditional nachos. Choosing lean ground turkey reduces saturated fat, while toppings like avocado add healthy fats and creamy texture.
If you prefer a lower-carb version, try swapping chips for baked vegetable chips or crisped cabbage leaves. And if dairy is a concern, dairy-free cheese and yogurt options work well without sacrificing flavor.
Conclusion: Why Crispy Personal Pan Nachos Supreme Should Be Your Next Snack
This recipe isn’t just a quick fix; it’s a little celebration that fits in your evening, your mood, your kitchen. It’s flexible, fun, and packed with all the toppings you love—without the overwhelm of a big platter or complicated prep.
Whether you’re looking for a solo snack or a small bite to share, this personal pan nachos supreme recipe delivers every time with that crunchy, melty, spicy, creamy combo that keeps you coming back for more.
I hope you enjoy making it as much as I have (which, honestly, has been quite a few times in the past month). Feel free to experiment with your favorite toppings and share your twists—I’d love to hear how you make this recipe your own!
And if you’re in the mood for a fresh and elegant bite afterward, you might enjoy the smoked salmon cucumber tea sandwiches I recently made for guests. Perfect for balancing out the boldness of nachos with something light and refreshing.
FAQs About Crispy Personal Pan Nachos Supreme
Can I make these nachos ahead of time?
You can prep the ingredients in advance, but I recommend assembling and baking the nachos just before serving to keep the chips crispy.
What if I don’t have a personal pan?
A small cast iron skillet or an 8-inch round baking dish works perfectly as a substitute.
How do I keep the chips from getting soggy?
Layer cheese under and over the toppings, and add fresh or wet toppings like sour cream and guacamole after baking to maintain crispness.
Can I use shredded rotisserie chicken instead of ground beef?
Absolutely! It’s a great swap that keeps the protein flavorful and tender.
Are these nachos gluten-free?
They can be if you use certified gluten-free tortilla chips and check all seasoning labels carefully.
Pin This Recipe!
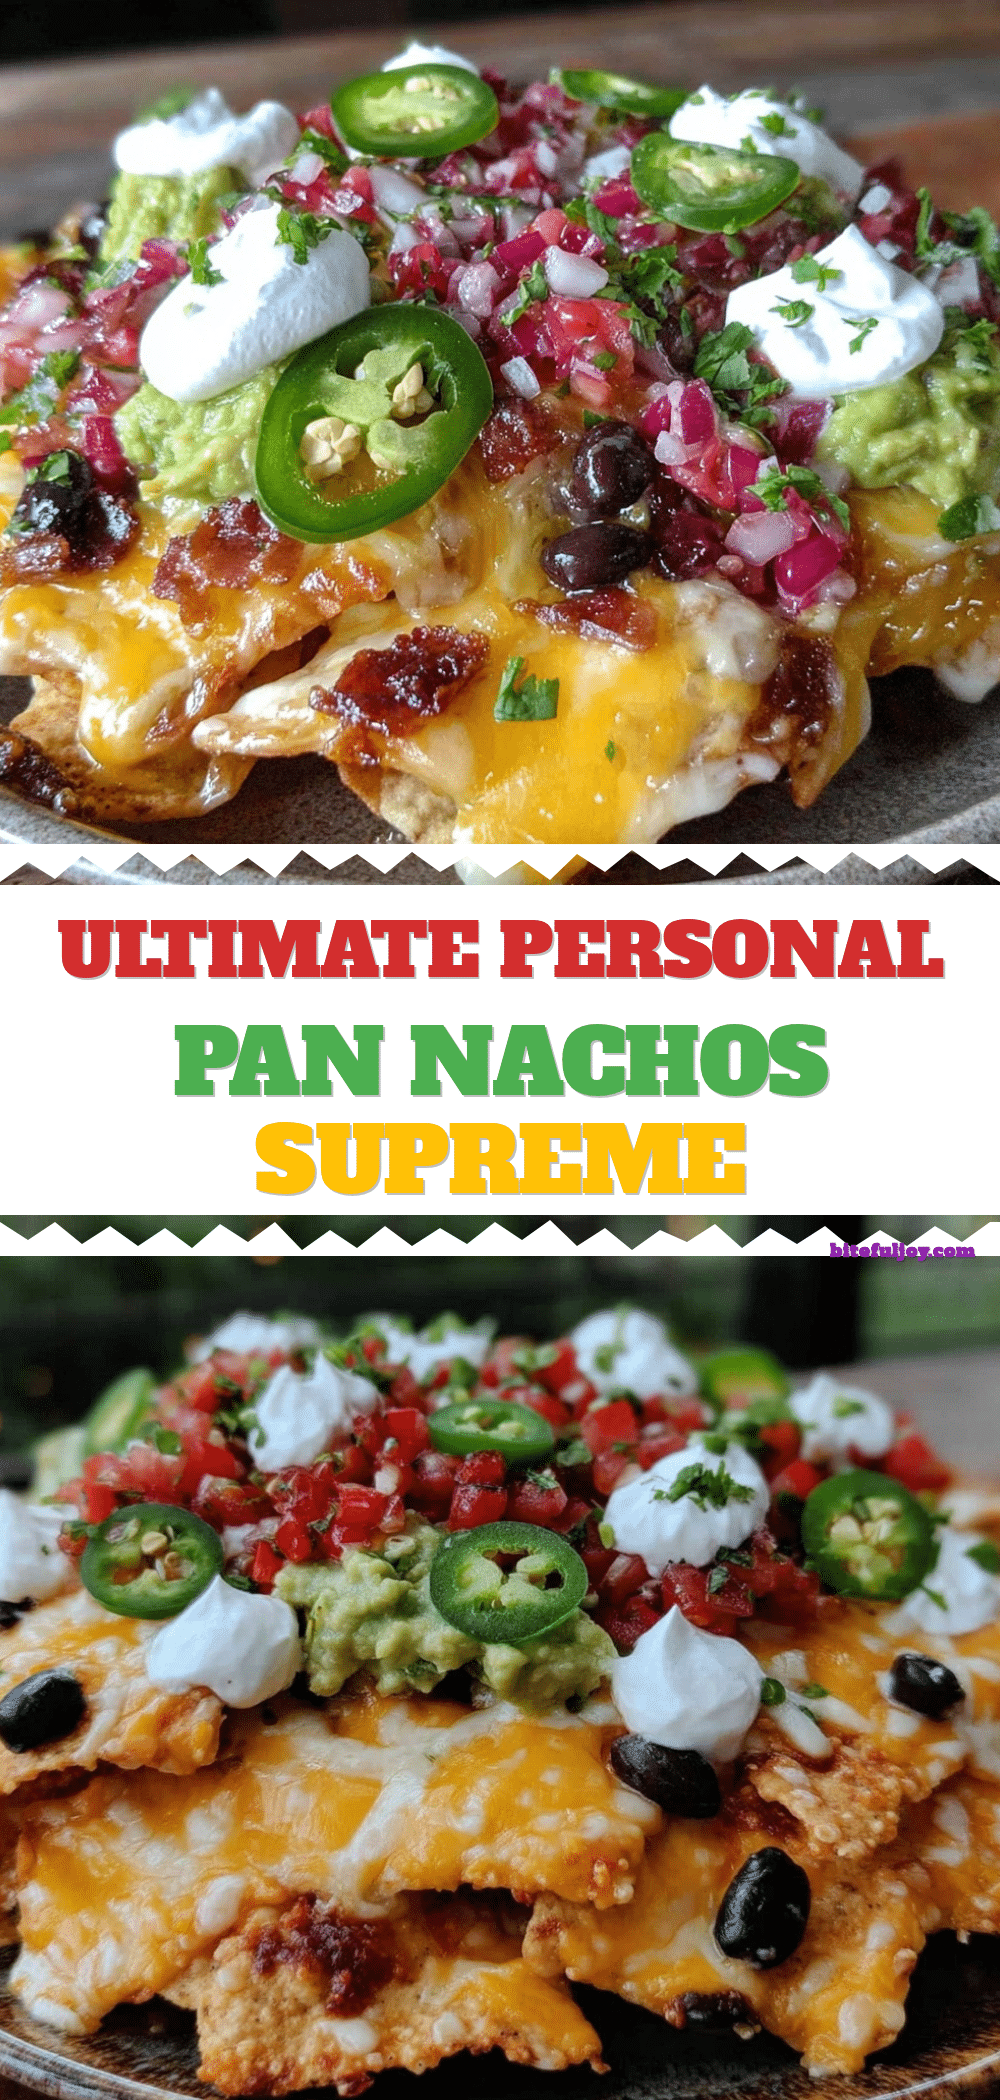
Crispy Personal Pan Nachos Supreme Recipe Easy Loaded Toppings

A quick and easy personal-sized nachos recipe loaded with crispy chips, melted cheese, seasoned meat, beans, fresh veggies, and creamy toppings. Perfect for a solo snack or small serving with bold Tex-Mex flavors.
- Prep Time: 10 minutes
- Cook Time: 15 minutes
- Total Time: 25 minutes
- Yield: 1 serving 1x
- Category: Snack
- Cuisine: Tex-Mex
Ingredients
- 4 cups (120g) thick-cut tortilla chips
- 1 cup (100g) sharp cheddar cheese, shredded
- 1 cup (100g) Monterey Jack cheese, shredded
- 6 oz (170g) ground beef or turkey, cooked and seasoned with taco spices
- ½ cup (120ml) black beans, drained and rinsed
- ½ cup (120ml) diced tomatoes, fresh or canned
- Jalapeño slices, fresh or pickled, to taste
- 2 tbsp diced red onion
- 2 tbsp sour cream or Greek yogurt
- 2 tbsp sliced black olives
- 1 tbsp chopped green onions
- 1 tbsp fresh cilantro, chopped (optional)
- ¼ cup (60ml) guacamole or sliced avocado
- 1 tbsp taco seasoning (homemade or store-bought)
- Lime wedges (optional, for serving)
Instructions
- Preheat your oven to 400°F (200°C).
- In a skillet over medium heat, brown 6 oz (170g) of ground beef or turkey with 1 tablespoon of taco seasoning, stirring occasionally for about 7 minutes. Drain excess fat if needed.
- Spread about 4 cups (120g) of thick-cut tortilla chips evenly in your personal pan or skillet.
- Sprinkle half of the shredded cheddar (½ cup / 50g) and Monterey Jack (½ cup / 50g) cheese evenly over the chips.
- Evenly distribute the cooked meat and ½ cup (120ml) of rinsed black beans over the cheese layer.
- Scatter ½ cup (120ml) diced tomatoes, 2 tablespoons diced red onion, and jalapeño slices to taste over the meat and beans.
- Sprinkle the remaining shredded cheese over everything to create a melty topping.
- Place the pan on the middle rack in the oven and bake for 8-10 minutes, until cheese is bubbly and golden in spots. Start checking at 7 minutes to avoid burning.
- Remove from oven and dollop 2 tablespoons of sour cream or Greek yogurt, sprinkle sliced black olives, chopped green onions, and fresh cilantro over the top.
- Add sliced avocado or a scoop of guacamole if desired.
- Serve with lime wedges for squeezing before eating.
Notes
To keep chips crispy, layer cheese under and over toppings and add fresh toppings like sour cream and guacamole after baking. Use thick-cut tortilla chips for best crunch. Watch oven closely after 7 minutes to avoid burning. For a golden bubbly top, broil for last 30 seconds but watch carefully. Leftovers can be reheated in a 350°F oven for 5-7 minutes; avoid microwaving to prevent sogginess.
Nutrition
- Serving Size: One personal pan ser
- Calories: 575
- Sugar: 5
- Sodium: 700
- Fat: 30
- Saturated Fat: 12
- Carbohydrates: 45
- Fiber: 8
- Protein: 28
Keywords: personal pan nachos, crispy nachos, loaded nachos, easy nachos recipe, Tex-Mex snack, quick snack, solo serving nachos


